Showing posts with label Chicken. Show all posts

Friday, May 31, 2013

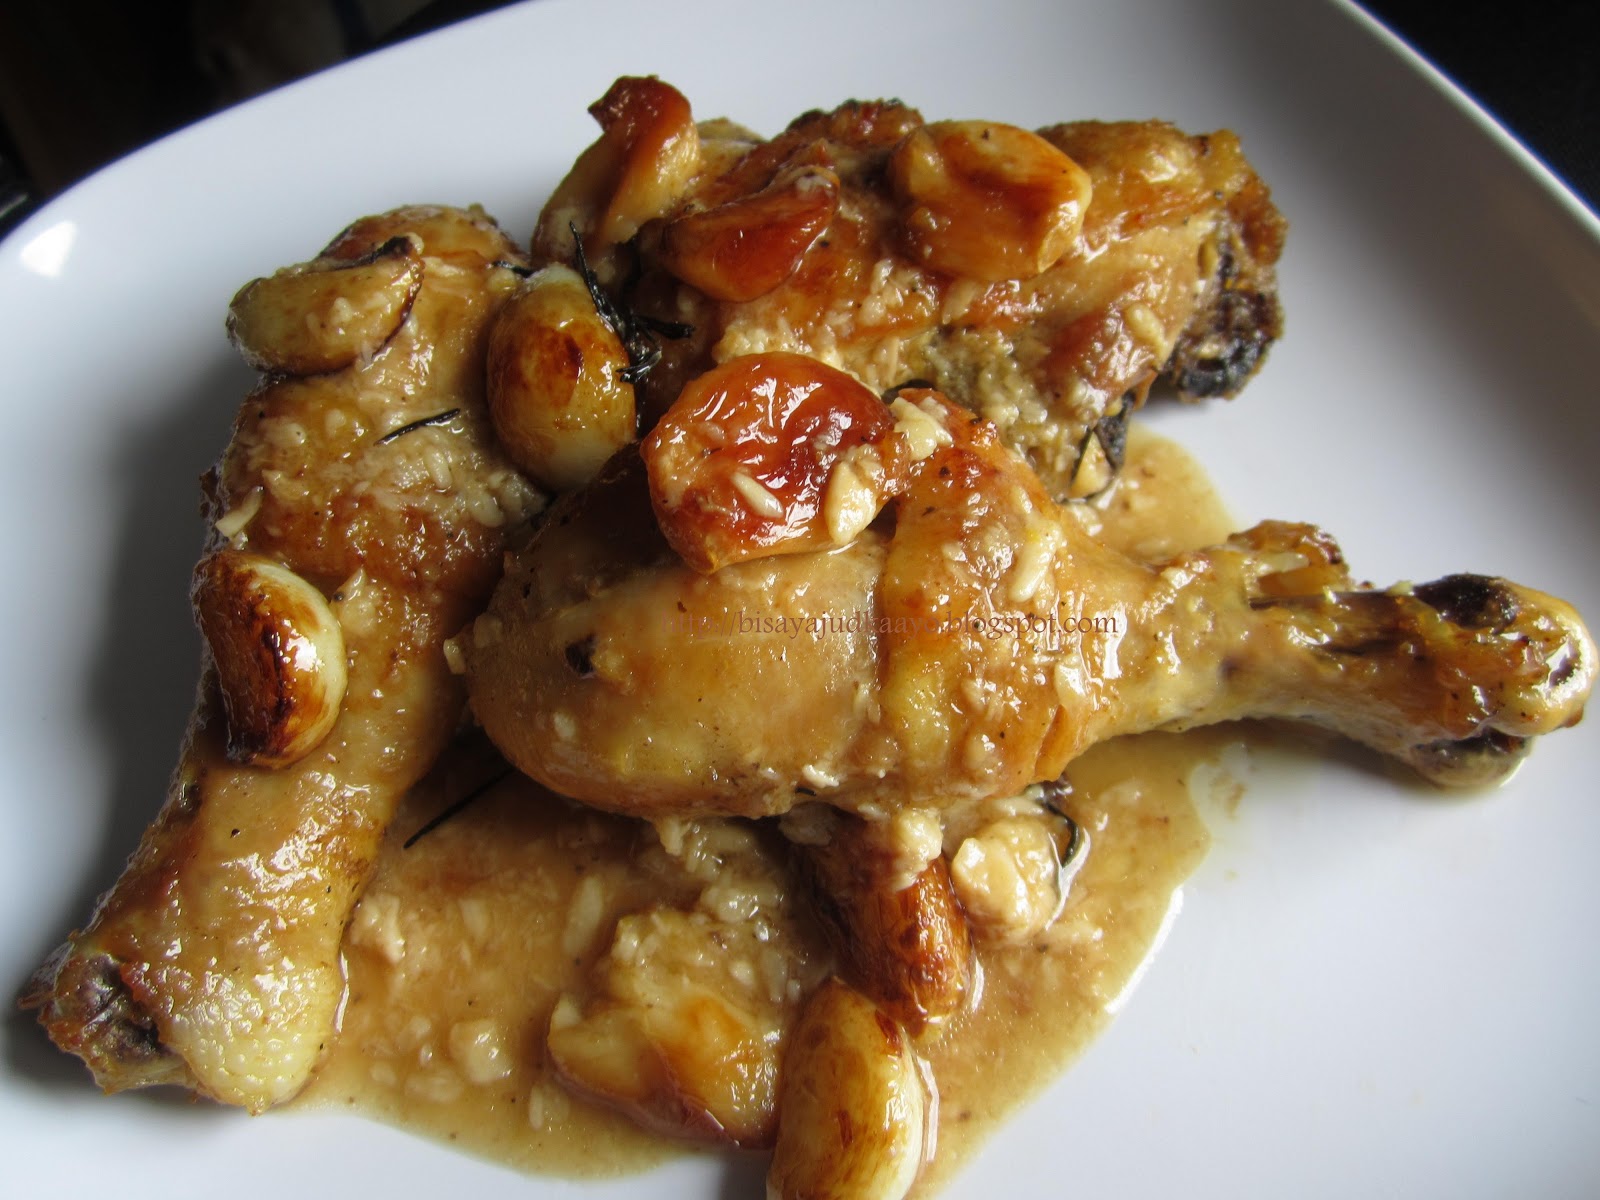
CHICKEN WITH FORTY CLOVES OF GARLIC


Don't worry or be intimidated by the copious amount of garlic. Once roasted, garlic imparted a nutty, buttery flavor. I promise you that!!! ;)
Chicken was juicy, moist and tender.
Definitely a keeper, this will easily be one of my comfort food.
Served with rice (because i'm Filipino...hahaha) but i know slices of baguette will be perfect to absorb those sauce or spread those roasted garlic like butter.

Recipe adapted from Williams-Sonoma.  Check out the recipe CHICKEN WITH 40 GARLIC CLOVES

"Don't be alarmed by the number of garlic cloves called for in this recipe. The garlic mellows as it roasts, imbuing the finished sauce with a subtle flavor."

Ingredients:

  • 2 chickens, each 4 lb., cut into 8 serving pieces (used 5 lbs. of leg quarters)
  • Salt and freshly ground pepper, to taste (season liberally)
  • 3 Tbs. extra-virgin olive oil
  • 40 garlic cloves, peeled
  • 1 Tbs. minced fresh rosemary
  • 1 Tbs. minced fresh thyme
  • Zest of 2 lemons
  • 1/4 cup white wine (used pinot grigio)
  • 3/4 cup chicken stock
  • 3 Tbs. unsalted butter, at room
    temperature, cut into pieces

Directions:

Preheat an oven to 400°F.

Season the chicken with salt and pepper. In a wide Dutch oven over medium-high heat, warm the olive oil. Working in batches, brown the chicken, 2 to 3 minutes per side. Transfer to a plate.

Add the garlic to the pan and cook, stirring, for 1 minute. Remove the pan from the heat. Add the chicken, rosemary, thyme and lemon zest and stir to combine. Cover the pan, transfer to the oven and roast for 20 minutes. Baste the chicken with the accumulated juices. Continue roasting, uncovered, until the chicken is cooked through and the juices run clear when the meat is pierced with a knife, about 30 minutes more.

Transfer the chicken to a platter; leave the garlic in the pan. Cover the chicken loosely with aluminum foil.

Set the pan over medium heat and mash the garlic with the back of a spoon. Add the wine and cook for 3 minutes. Add the stock and cook, stirring occasionally, until slightly thickened, about 5 minutes. Whisk in the butter a few pieces at a time. Season with salt and pepper. Transfer the sauce to a sauce boat. Serve the chicken immediately and pass the sauce alongside. Serves 8.

Williams-Sonoma Kitchen.


 To save time peeling 40 cloves, i bought already peeled garlic.
I buy those small bottles of wine for cooking purposes
.


Remove chicken, continue cooking the garlic (took out some for garnish) add the wine, water or chicken stock (add more if needed). Taste and adjust seasonings. Whisk in butter until sauce thickens.


Served sans the sauce, it was good too. 


Roasted garlic imparted a nutty, buttery flavor.
Chicken was juicy and tender.
Definitely a keeper.


Tuesday, September 11, 2012

TACOS DE POLLO EN SALSA VERDE

 My daughter shared this recipe years ago but never got the chance to blog it. This is one of my family's favorite Latin dish. My BIL had rice with this, not surprised about that, we Filipinos love our rice ;) I like mine with fried corn tortilla chips, no not the store bought. I fry my own corn tortillas.

Tortilla is recommended but when i made this as shown below, i used fried pita bread which is as good as the tortilla.

 Ingredients:

Salsa:
8 oz Tomatillos, husked and rinsed
2 Serrano chiles, stemmed ( You can also use jalapeno)
1 1/2 T olive oil or canola oil
1 medium Spanish onion, coarsely chopped (any sweet onions will do)
2 cloves garlic, coarsely chopped
1 C Chicken stock or broth****
1/4 C cilantro, coarsely chopped
Salt to taste

2 C firmly packed spinach, shredded or 1 bag of spinach
2 C cooked chicken breast ****
1/2 - 3/4 C Queso Fresco, crumbled (I've tried feta and it was equally as good or omit the cheese)

Corn Tortillas - cut in bite sizes and fried.

***I boiled the chicken with water, carrots, onions, celery to get my chicken stock.

Roast tomatillos, chiles , garlic and onions under a broiler until blackened and soft on both sides.

Transfer, along with any rendered juices to a blender.

Puree to medium coarse consistency.

Heat saute pan, add oil and puree. Saute, stirring, until puree gets slightly darker and thicker.

Stir in stock and simmer about 10 minutes. Add cilantro and season with salt.

Just before serving, bring salsa to a boil , add spinach and allow to wilt.

Adjust seasoning as needed.

Add chicken to the salsa or served separately.

Serve with tortillas topped with queso fresco,


I used pita bread. Cut the bread into bite sizes and fry them.


Pita bread is as good as the tortillas.


Cut them into bite sizes and fry.. You could use flour tortilla but i prefer corn tortilla


Yum!!


Tuesday, May 8, 2012

FRIED FROG LEGS/ FISH FILLET WRAPPED IN CHICKEN SKIN

I've fried chicken skin which is called chicken chicharon. I've turned them into an Edible Bowl. This wrapping concept was from my friend Robert . He did fish wrapped in chicken skin, it's been a while that i couldn't remember if he fried them or baked. 

Well, i did my version. I wrapped tilapia fillet and frog legs with chicken skin and fried them. Served along with my Fiery Tomato Salsa . It not only added a crunch but it kept the frog legs and fish moist and the best part of it all, the skin added another layer of flavor which is so good. 

My daughter loves the frog legs and what a wonderful way to serve tilapia or any kind of fish fillet for that matter.

So, there! another way to make use of those chicken skin, oh in moderation... okay. You don't make this dish every single day so you'll be fine.;)


I don't have any specific measurements or specific ingredients, "recipe" for this dish. This is more of a concept and method.  It's pretty much a straight forward dish and so forgiving that you can do it your way. Add spices of your choice then fry.

The only imperative step you should do is to secure the skin with toothpicks to make sure they stay on to the meat as they are frying. Remove the toothpick right before serving. Enjoy!!!!


Tuesday, January 24, 2012

CHICKEN BEAN CURD ROLL (DIM SUM STYLE)

Dim Sum, is what i call the Chinese version to the French's hors d'oeuvre and the Spanish tapas. These are dishes served bite sizes or small portions often served on small bamboo steamers or stainless steel steamers. The "bad" thing for this style of food, Chinese Dim sum are only served from 11:00 a.m. until 3 p.m. so if you crave for dim sum at night...too bad!

So...that's why i'm sharing with you this recipe. These can be kept in the fridge for 4 days. But really, they don't last the following day every time i make them.

Also, don't be deceived by how long this recipe is. It's easy believe me. The only issue that one might have a problem is... finding the dried bean curd sheets. These are available at your Asian stores but  i've been seeing celebrity chefs using  them, so i'm pretty sure it will soon be available at the Oriental aisle of  any grocery stores anytime soon.

This dish needs a steamer but you can use a wok or frying pan if you don't have a steamer.


Chicken Bean Curd Rolls served with soy sauce, chili oil dip.


Ingredients:


2 lbs. chicken leg quarters*
5 pcs. Shitake mushrooms (soaked in water to rehydrate)*
1 medium sweet onions (julienne)
1 small can bamboo shoots (thinly sliced)*
For Marinade:
2 T sesame oil
3 T oyster sauce
3 T soy sauce
1 T ShaoXing wine (Chinese wine or Dry sherry)
2 T cornstarch
1  C chicken stock or water (store bought chicken stock or broth will do)*
*For chicken stock:
Chicken bones
2 Stalks of celery (chopped)
1 small onion (chopped)
2 pcs. Carrots (chopped)
6 C water

Preparation:
Step 1:
 - Clean and debone chicken leg quarters. Cut to bite sizes. Set aside.
- Discard the skin or save them for later use, like crispy skin. Save the bones to make your stock.
- On a pot, add water, bones, chopped celery, chopped onions, and chopped carrots.
- Bring to a boil for an hour. Set aside and let it cool. If you have extra stock save them for other use like soup.

Step 2:
- Mix all the marinade ingredients. Pour half of the mixture into the chicken and let it marinate for 30 minutes inside the refrigerator. Half of the marinade will be used later.

Step 3:
- While the chicken stock is cooling and the chicken meat are marinating, start heating up your steamer.
- Drain the soaked mushroom, discard the stems and thinly slice the mushroom cups.
- Julienne the onions.
- If you are using fresh bamboo shoots like I did, thinly slice them. Using a little of the chicken stock, Cook/ boil them until tender. Skip this step if using canned bamboo shoots. They are already tender.

Step 4:
- Now that everything are sliced and prepared, start soaking your bean curd in lukewarm water for few seconds. When it starts to soften, gingerly take the sheets out and lay them on a chopping board.
- Using a pair of scissors cut the bean curd sheets into 3- crosswise.
- Assemble your chicken roll by putting a piece of chicken, 2 pieces of mushrooms, 2 pieces of bamboo shoots, and some slices of the onions on the middle bottom part of the bean curd sheets. Roll and tuck and fold in both sides like you would a burrito.
- Place them on a deep dessert plate or on a pie plate seam side down.
- Repeat process until you have used all bean curd sheets.

Step 5:
Place plates in the steamer.
Pour the remaining marinade on to the plates and add little of the chicken.
Steam for an hour and half or until tender.
Keep adding chicken stock if necessary.

Serve with soy sauce and chili oil dip if you want.
Serve with steamed white rice.


This how it looks  inside ;)


Dried Bean Curd Sheets. These are also used for a Filipino dishes, check this out...  KiKiam . 


Dried Shitake mushrooms. Soak these in water to rehydrate.


Fresh Bamboo Shoots.


Position the meat, mushrooms, onions and bamboo shoots in the middle lower part of the sheet.


Roll and fold the sides inside like you would a borrito.


place them on a small plate or pie plate, seam side down.


Wednesday, December 14, 2011

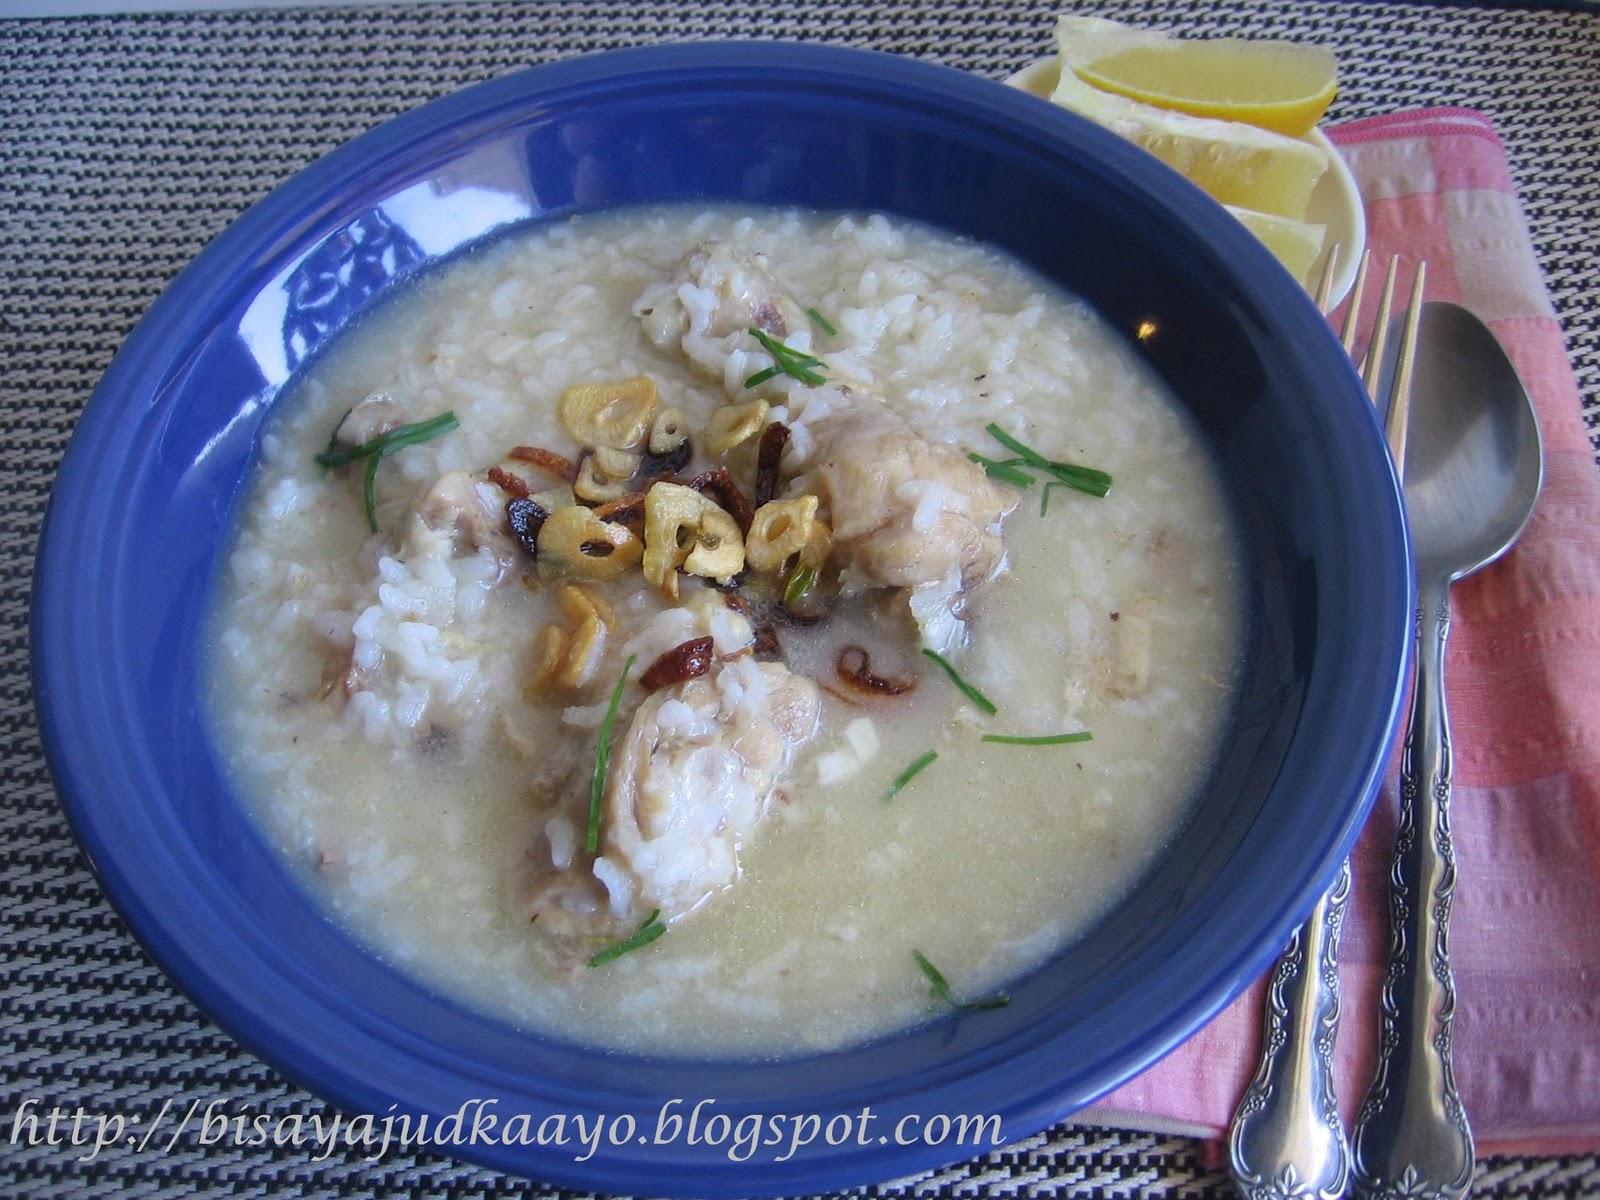
Pospas (Arroz Caldo)- November KC Challenge

Better late than never! This is my November Kulinarya Cooking Challenge. Thank you, Joy for the challenge. I really thought i have blogged pospas considering,  this is one of the staple food, comfort food at home.

Growing up and being a Cebuana, pospas is the best comfort food you could ever have and the best food espeically when you are under the weather. Even better than chicken noodle soup, i dare say. I remember how Mama would cook a big cast iron pot of pospas enough for breakfast and mirienda. I just love the aroma as she was cooking, i love the smell of the lemon grass and ginger in particular.

It was only when i went to Manila that i learned that pospas is also called Arroz Caldo and Chinese calls it congee. Actually others call it lugaw but i remember lugaw is just plain rice and chicken broth sans the chicken meat. Lugaw with beef tripes would be called Goto. Goto served with tokwa at baboy (crispy tofu, and crispy pig's jowl)  yum...oh i digress... that will be another version that i should blog.

Anyways, for those who aren't familiar with this dish, i highly suggest that you give this a try. Pospas is good anytime of the day. Like i mentioned earlier we have this for breakfast, mirienda (snacks), lunch, dinner, really anytime. Oh, even midnight snacks, and i'm serious, others, swear that this is a cure for hang over as well.

Also, pospas doesn't call for fish sauce, we use salt. Cebuanos doesn't use fish sauce (Patis) well at least back then. I know for a fact that patis for Cebuanos or Visayas region means soy sauce. It took me a while to adjust and accept that patis in Manila or Luzon region is fish sauce.

So that being said, my dish is staying true based on how my mama prepared it or shall i say a Cebuana's Pospas. This is so simple, ingredients are easy to find, a "straight forward dish" nothing complicated!


Pospas, Arroz Caldo, Congee, Lugaw ....however you call this, i really want you to give this a try if you haven't already. And you tell me which is better Chicken Noodle Soup or Pospas aka Arroz Caldo.


Ingredients:
Serves : 4

4 pcs. chciken leg quarters skin on*
1 1/2 C rice (Jasmine or Calrose) *
1 knob of ginger
2 stalks of lemongrass (remove the green top)
6 C water ( add more if necessary) *
2 T vegetable oil
1 T salt (sea salt or kosher salt)
Dash of white pepper
1 bulb of garlic (sliced thinly) I suggest to use mandoline.
4 pieces of shallots (thinly sliced) or one medium size onions
2 T chives or green onions (chopped. This is for garnish and flavoring)
1 lemon (sliced)

* Chop leg quarters to small pieces, at least 4 pieces per leg quarters. Clean and wash.
* Wash and rinse the rice until the water is clear.
* Should you prefer chicken breast i recommend to use chicken breast, skin on, bone in. Chicken bones gives more depth to the flavor profile.
* You can always add more liquid depending on how you want the consistency of your pospas. We prefer it to be runny, more liquidy

Step One: Use a Dutch oven or any Stew Pot.
Heat up the pot with 2 T vegetable oil.
Shallow fry the sliced garlic enough to make them brown but not burned. Remove and set aside.
Using the same oil shallow fry the sliced shallots until brown but not burned. Remove and set aside.

Step Two:
Using the same oil, sear and brown the chicken in batches. Set aside the brown pieces.
It is imperative to use the oil that was used to fry the garlic and shallots. The oil has been infused with garlic and onion flavor which means the chicken will be seared with the infused oil.
Continue the process until all chicken pieces are done.
Remove excess oil, leaving at least a tablespoon of the grease.

Step Three:
Return the seared chicken into the pot.
Add the ginger and lemongrass.
Sear a little bit or until you get a whiff of the ginger and lemongrass. (Did i tell, i love the aroma of these two being sauteed) I think i did!!! lol!!!
Add the washed and rinsed rice.
Stir until everything are mixed.
Add 6 C of water and salt.
Bring this to a rolling boil then lower the heat and bring to a simmer until the chicken and rice are cooked.
I'd say about 25 minutes.
Constantly and gingerly stir making sure the rice will not stick to the bottom.
Taste and adjust your salt since this is basically the only seasoning you have in this dish.
Add more water if needed.

Step Four:
Remove ginger and lemongrass.
Serve in a bowl.
Garnish with some fried garlic, fried shallots, chopped chives or green onions and squeeze some lemons.
If you can get fresh Kalamansi the better. But sad to say i can't get them here so i either use lemons or limes


Fried garlic


Fried and crispy shallots


Pospas boiling away with a knob of ginger and stalks of lemongrass


I wish you can smell this now. I also remember mama makes this during rainy days especially when we don't have school because the blackboards are  wet! ha!ha!ha! that's a joke. But yeah, she makes this when we have no school because of typhoon etc.


Monday, November 14, 2011

COOKING WITH TEA - NOVEMBER 2011 DARING COOKS CHALLENGE

 Sarah from Simply Cooked was our November Daring Cooks’ hostess and she challenged us to create something truly unique in both taste and technique!

What a perfect challenge. I was in Chicago last month and had a food tour that included tea at Tea Gschwendner and purchased different kinds of tea. So "went to town" and did three dishes using 3 different teas.

First i made, Braised Chicken which is pretty  much similar to the Filipino Chicken Adobo. The only difference is the addition of the tea... i used Bossa Nova and Rooibush Cream Caramel. And yes, that's right, Cream Caramel. The combination did blend with the dish.

I used my   CHICKEN ADOBO and PORK ADOBO recipe with the addition of 1 dried lemon, 1 Hungarian pepper and 1 Tablespoon each of Bossa Nova and Rooibush tea. I like that i get a hint of the caramel from the rooibush tea. The amount of tea was just right otherwise the caramel would be overpowering. Oh, the dried lemon was a last minute "hhmmm why not?" decision.

I have been drying some lemon for a middle eastern dish experiment. I can't wait to use my dried lemons...oh well i digress. Anyways, I will be blogging that dish soon;). The dried lemon actually didn't impart any flavor at all. I couldn't taste the lemon, perhaps i should have cut it  when it got tender?


I made my own sachet of tea by using a coffee filter tied with a butchers twine.
1 T of Bossa Nova and 1 T of Rooibush Tea


Added a dried lemon

Browned the chicken  pieces on both sides. Added all the ingredients and cooked until chicken are tender.


Filipino Chicken Adobo with Tea


Braised chicken + tea soaked hard cooked eggs = Perfect combination. Served with rice and fresh tomatoes...WINNER!!!! It's an Asian thing!!!


Hard Cooked Eggs served w/ Pinakurat (Filipino Coconut Vinegar) and fresh tomatoes from my garden.

Hard Cooked Eggs Recipe to follow.


I used Sara's recipe for the hard cooked egg w/c is called Chinese Egg Tea.
Servings: 6 eggs
Ingredients
6 eggs (any size)
2 tablespoons (30 ml) (6 gm) black tea leaves, or 4 tea bags
2 teaspoons (10 ml) (5 gm) Chinese five spice powder
1 tablespoon (5 ml) (3 gm) coarse grain salt
toasted sesame seeds, to garnish
Directions:
  1. In a large enough pot to avoid overcrowding, cover the eggs with cold water. Bring to a boil over medium heat and simmer for twelve minutes. 
  2. Remove the eggs with a slotted spoon and keep the cooking water.
  3. With a spoon, tap the eggs all over until they are covered with small cracks. This can also be done by tapping and rolling the eggs very gently on the counter.
  4. Return the eggs to the pan and add the tea leaves or bags, Chinese five spice powder, and salt. Cover the pan.
  5. Heat gently and simmer, covered, for one hour.
  6. Remove the pan from the heat and let the eggs cool down in the liquid for 30 minutes.
  7. Remove the eggs from the liquid. Peel one egg to check how dark it is; the others can be returned to the liquid if you wish to have the web-like pattern darker. Allow the eggs to cool fully.
  8. To serve, peel and slice the eggs in halves or quarters. Sprinkle with toasted sesame seeds.

    The Chinese tea eggs are best eaten within 24 hours and are unsuitable for freezing.


Salt, Black Tea, Chinese Five Spice Powder.


I didn't soak the eggs longer, that's why the crack marks aren't pronounced. And didn't get the taste of the tea. I will increase the amount of tea and soak the eggs longer next time i'll make this.


My third and last dish for this challenge is  TEA BRINED FRIED CHICKEN.

I used the egg tea ingredients and added  1/2 T of sugar to brine the chicken. Brined them for 24 hrs in the fridge. Pat them dry and deep fried. Served with green salad and rice topped with some kimchi.

It was crunchy and juicy as expected with the underlying flavor of the tea and the five spice. This actually reminds me of  the Chinese Crispy Chicken dish. Yum...you must give this a try!

Tea Brined Chicken served w/ green salad.


Tea Brined Chicken served with salad and steamed rice topped with homemade KIMCHI


I truly enjoyed doing this challenge. Thank you, Sara. I'm actually thinking of doing Tea Brined Turkey for Thanksgiving. And will be doing the Egg Tea for New Year, that'll be my round element which means prosperity/ more money.... again that's an Asian thing ;)

Wednesday, September 14, 2011

CHICKEN SALAD VERONIQUE

I bought a lot of seedless green grapes. They were on sale for 99 cents a pound, bought 5 lbs...sshhhh... i know!!!!  I got so excited only to realize we (Husband and I) can only eat so much of these humongous sweet crunchy green grapes  ;).

So, i went to my fridge and check what else can i do with them aside from eating them as it is, which is just fine because they are sweet, but really i bought so much. Anyways, back to my fridge, i have all the ingredients for chicken salad. I had the a-ha! moment....and thought of CHICKEN VERONIQUE...

What a great excuse to make a fancy chicken salad. I love this salad served with green leaf lettuce or with bread. I tried doing a wrap since i have some tortillas in the fridge also. Wrap worked out so good as well, give it a try.


Just wanted to show how huge these grapes are...as big as the soup spoon ;)

Ingredients:
2 lbs. chicken breasts (boiled or roasted) ***
1/3 cup chopped celery
1 ½  cup green seedless grapes, halved ( it will depend on the size of the grapes, you can add more if you want)
1/3 cup roasted skinless almonds (chopped or slivered)
1/4 cup craisins (optional)
1 cup mayonnaise (add more to make a creamier salad)
2 tablespoon white vinegar ( I used white balsamic)
2 tablespoons honey
salt & pepper

*** Store bought rotisserie chicken (use the breast only) or
*** boil chicken with S&P, celery, onions and water, bring to a boil until chicken is cook. Let chicken cool down.

Cut chicken breasts into small dice.
 In a large bowl, combine chicken, celery, grapes, almonds and craisins.
 In another bowl mix together mayonnaise, vinegar, honey, salt and pepper. This will be your dressing.
Fold and toss in the dressing over chicken mixture to coat.
Let this chill in the fridge for an hour, so flavor can set.
Serve as is or w/ croissant or wrap
.


Saturday, August 27, 2011

Persian Pomegranate and Walnut Stew (Koresht - e - Fesenjan)


4 pcs. chicken leg quarters
1 large onion, sliced thin
2 cloves of garlic, minced
1/2 lb walnuts, toasted and ground
1/2 cups pomegranate syrup
1/2 tsp cinnamon
1/2 tsp nutmeg
1-2 T sugar (depending on taste and sweetness of juice)
1/2 tsp cardamom powder
2 T lime juice
salt and pepper to taste
3 T olive oil
**water if needed

Brown chicken pieces in a heavy bottomed pan in oil. Remove and set aside. Using the same pan, sauté onions and garlic. Season with salt, pepper, cinnamon and nutmeg, stir and fry for a minute.

Mix in the walnut into the mixture. Add the browned chicken pieces and toss to coat. Stir in the pomegranate syrup. Bring the mixture to a boil. Add little water if chicken needed more cooking. then reduce heat to low and simmer for at least an hour until the sauce is thickened, the walnuts release their oil and the sauce has reduced to about half..

Add and stir in lemon juice and sugar according to taste. Adjust seasoning if needed. Continue cooking for a 20 more minutes. Mix in the ground cardamom few minutes before serving.

I like to serve these with steamed rice but you can serve these with warm pita bread.

These taste better the following day.


Recipe adapted from

 Koresht - e -Fesenjan!