Wednesday, April 1, 2009

LILY BULB STIR FRY

I get enthused everytime i see blogs of new recipes, another version of a recipe i like or new ingredients. I get interested and sometimes find it a challenge if i can't get the ingredient or find any substitution. This "root bulb" is something new to me and i was on a mission to find this "veggie". Thanks to my friend Debbie for introducing this root/bulb.

As i mentioned before i get my Japanese ingredients and stuff at a small Japanese grocery/produce market near my place. I've seen lots of ingredients that looks "alien" to me and always wonder how they are cooked and the taste..lily root bulbs are one but didn't bother coz i had no clue. Another example are the burdocks but that's going to be another blog.


Okay..when i say i'm on a mission..i really mean it. I was disappointed to learn that they (Japanese stored) don't sell lily bulbs anymore, it wasn't selling. Since i couldn't find lily roots in my place, I thought i'd be able to find them in Chinatown Chicago...yeah we were there last weekend. As i was going through the aisle of a Chinese supermarket, taking pictures acting like a tourist , i came across these vacuumed pack white "thingy" that looked like the lily root Debbie blogged.

As you can see from the picture below it's only labeled in Chinese, so i had to asked the cashier who fortunalety speaks English. She said it's edible lily bulb, widely used in Asian countries esp. in Korea, China and Japan. She surprisingly is well versed w/ this lily bulb, and told me that there are an array of varieties for lily root/bulb. She then described these veggie exactly as what Debbie described in her blog...aside from it's nutritional and medicinal value, people like it becoz it's creamy, sweet and has this refreshing flavour.

Regrets, regrets..i bought only one package! what was i thinking? Actually i was still kind of apprehensive to buy a lot. So i ended up making just the stir fry for now ha!ha!. It was very good!!! something that we would love to have for dinner again...if only i can purchase them here. Oh well, guess it'll have to wait until we go back to Chitown.


Edible lily bulb (Chinese variety) but accdg. to the lady it taste the same as the Japanese kind.


They look like elephant garlic bulbs . Clean them and take out the blemishes. Slowly take off the petals.


They look gorgeous! I took a bite and they were indeed crispy, with a tinge of sweetness, they had a crunch like endives or thin slice of celery but a much sweeter and crunchy taste.


I still have streak o' lean in the freezer...so i opted to use them in lieu of bacon. Streak o' lean btw are just thin slices of porkbelly.


Slice them in bits and render out the fat.


Yummy!!! Save the fat/lard..they are good in moderation ofcourse.


I had no idea what veggies i was going to cook..these are the veggies i had in my ref, yellow, red, orange bell peppers, edame and scallions.


Saute garlic, onions, then add the rest of the veggies ofcourse including the lily petals seasoned w/ S&P. Stir fry no longer than 1 minute or they will lose their sweet flavour and the crisp. Mix soy sauce, oyster sauce, little of fish sauce (optional), slurry (mixture of cornstarch and water) as thickener. Pour into the veggie mix and stir until sauce thickens. Taste and adjust the flavor.


STIRY FRY LILY ROOT BULB


EDAMAME AS THE APPETIZER.


ENJOY!!!!

Sunday, March 29, 2009

MANAKEESH "MIDDLE EASTERN PIZZA"

In the Middle East they serve and eat this for breakfast but for me it's anytime of the day. I make this at home using fresh baked pita w/c i buy from a middle eastern bakeshop. As you guys know i've been baking bread lately and thought of making pizza dough to make manakeesh. I think i prefer the thin crust pizza dough, i love the crisp as oppose to the chewyness of the pita, but really either way, FRESH pita bread or homemade pizza dough will work.


I made my pizza dough and divided them into 18 small balls. Then made free formed mini pizza.Make sure to crank up your oven temp to 500 DEGREES and have your pizza stone heated up.


ALL MY MEASUREMENTS ARE ESTIMATES. IT'LL ALL DEPEND ON HOW MANY CRUSTS YOU WILL MAKE.


Mix together 2 T Olive oil, 3 T Zatar, 1 T Sumac and 1 t Lemon juice. I know Zatar has sumac but i want to taste more sumac.

IF YOU MADE TOO MUCH MIXTURE USE THEM TO COAT ANYKIND OF FISH THEN BAKE..YUM!


ZATAR / ZAATAR/ ZA-ATAR - An herb mixture composed of savory, thyme, sumac, and sesame seeds. A prepared mixture of this herb mixture can be found at most Middle Eastern groceries


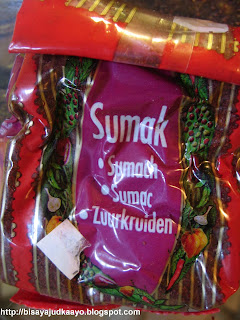
SUMAC/ SUMAK - A Middle Eastern spice that comes from the grated skin of a dark berry. It has a slightly acidic, astringent flavor. I also use this w/ my lentil soup, YUMMY!


The green powder is Zatar and the red is Sumac.


SAUCE TOPPING INGREDIENTS FOR MANAKEESH: Zatar, Sumac, Labna, Feta Cheese, Lemon


LABNA, LABNEH, LABNE - A Middle Eastern Yogurt cheese also called kefir cheese.


Make your own vegetable toppings. The Zatar/Sumac mixture will be your sauce toppings or if you can't really find or make your zatar make the yogurt as your sauce toppings.
Arrange them on your heated pizza stone and bake for 5 to 10 minutes.


I USED SPINACH, RED ONIONS, TOMATOES FOR MY VEGGIE TOPPINGS AND ADDED FETA CHEESE AND DOLLOP OF YOGURT OR MAKE SOME WITHOUT CHEESE BUT FOR THESE CRUSTS I SPREAD SOME LABNA FIRST THEN THE ZATAR MIXTURE

THESE ARE SOME OF THE MANAKEESH VARIATIONS I MADE.


MANAKEESH USING PITA BREAD. THIS WAS MY FIRST TIME TO MAKE THEM AT HOME, SO YOU'LL NOTICE THE DIFFERENCE BETWEEN MY FIRST AND THE LATEST I MADE. i'M TALKING 2005 - 2009.


I DIDN'T MIX THE ZATAR AND THE SUMAC WITH THE OLIVE OIL. I DRIZZLED THEM W/ OLIVE OIL. IT WAS STILL DELICIOUS!!


I PRECOOKED MY VEGGIES BUT THEN AGAIN IT WAS STILL DELICIOUS!!! GO FIGURE

Tuesday, March 24, 2009

MEYER LEMON BARS WITH CANDIED MEYER LEMON SLICES

Eureka Lemon and Meyer lemon

Meyer lemon (a cross between Mandarin Orange and Eureka Lemon)


CANDIED MEYER LEMON SLICES:


1 C sugar
2 large lemon thinly sliced *
1 Cup water
In a heavy sauce pan, combine the sugar with 1 cup water.
Bring to a boil to dissolve the sugar.
Add the lemon slices.
Cover and cook over medium heat for 30 minutes.
Remove from the heat and let the lemon slices cool in the syrup.
Let dry for hours or bake at 200 degrees F just to dry up the syrup.
Syrup can be used for lemonade or for your tea.
* 3 lemon if you’re using meyer lemons.


Lemon slices in syrup


Dry candied slices


Or bake at 200 degrees F for few minutes just until it starts to dry out.


Garnish lemon bars w/ the candied lemon slices


Place bars on cupcake liners for easy pick up and not make a mess.


Meyer Lemon Bars

Crust:

½ C unsalted butter (1 stick)
¼ C confectioners sugar
1 C all purpose flour
1/8 teaspoon salt

Lemon Filling:

2 large eggs
¾ C sugar *
1/3 cup lemon juice *
1 T grated lemon zest
2 T all purpose flour
Confectioners sugar

To make the crust:
Cream butter and sugar in a mixing bowl.
Mix in the flour and salt until the mixture looks like pebbles.
Press it down into a greased 8 inch square baking pan.
Bake in a preheated 350 degrees F oven until golden brown, about 18 minutes.


To make the filling:


Beat the eggs and sugar until smooth.
Mix in the lemon zest and juice.
Mix in the flour.Pour the mixture onto the crust.
Bake in a preheated 350 degrees F oven until set, about 20 minutes.
Cool completely before serving.
Dust with confectioners sugar.
Garnish w/ the candied meyer lemon slices.

* Adjust the measurements depending on what kind of lemon you’ll be using. For this recipe I used meyer lemon. If you use eureka lemons (the kind of lemon we see at the store) make the sugar 1 cup and lessen the juice because these are tart and sour compared to meyer lemon w/c are sweet and less tart.


THANKS TO KEVIN FOR THE INSPIRATION. http://closetcooking.blogspot.com/2009/03/meyer-lemon-bars.html


Wednesday, March 18, 2009

GREEN TEA AND BLUEBERRY CUPCAKES


I DOUBLED THE RECIPE TO MAKE BOTH THE GREEN TEA AND BLUEBERRY CUPCAKES. FOR THE BLUEBERRY, SUBSTITUTE GREEN TEA TO FRESH OR FROZEN BLUEBERRIES, IN MY CASE I USED FRESH BLUEBERRIES.
GREEN TEA CUPCAKE

1/2 cup (1 stick) butter, softened
1 cup sugar
1/2 pkg. (4 oz)Philadelphia cream cheese, softened
3 eggs
1 cup flour
1/2 T baking powder
1 t green tea powder (Matcha)
1/2 t. salt
1. Preheat oven to 350ºF. Beat butter in large bowl with electric mixer on medium speed. Gradually add sugar, beating well after each addition. Beat an additional 5 min. or until very light and fluffy. Add cream cheese; beat 1 min. Add eggs, one at a time, beating well after each addition.
2. Combine flour, baking powder, green tea powder and salt. Add to butter mixture. Beat until well blended. Pour batter into cupcake molds with cupcake linings and bake for 30 minutes or when a clean toothpick is clean when inserted into the cake.
FROSTING:
2 C confectioners’ sugar
4 t green tea powder (matcha)
8 oz cream cheese, softened
5 T unsalted butter, softened
1 t vanilla extract
Sift together confectioners' sugar and green tea powder. Set aside. Mix and beat together cream cheese, butter and vanilla on medium speed for at least 5 minutes. Reduce speed to low and add sugar/green tea mixture gradually. Increase speed to medium and beat for 5 minutes or until all are incorporated. Frost with a piping bag.

Thursday, February 26, 2009

NO KNEAD BREAD

Ok, so I’m a little late to jump on the bandwagon but as the saying goes “it’s better late than never”. I actually had this recipe for sometime now but because baking isn’t my cup of tea I totally ignored it. The snow storm made me do it!! ha-ha! . No where to go, I surfed the internet and came across this website showcasing her 4 yr. old son making/baking Jim Lahey’s no knead bread recipe. I then decided... that’s it, if a 4 yr. old kid can do it why can’t I?


Thanks to Jim Lahey for this brilliant idea. http://www.msplinks.com/MDFodHRwOi8vd3d3Lm55dGltZXMuY29tLzIwMDYvMTEvMDgvZGluaW5nLzA4bWluaS5odG1s. This no knead method has changed my mind, I never would have thought it possible for somebody like me to bake such beautiful bread. If I were to compare this bread…it almost taste like the bread from Macaroni and Grill restaurant sans the rosemary or the bread I buy from an Italian bakery.
I will do some tweaking on my next try, adding some rosemary, just wondering at w/c stage will I add the rosemary. I’m thinking on the second rise? Any advice/suggestions will be appreciated. I believe this recipe is so forgiving that tweaking can be done. I’ll let you know otherwise. Oh, I forgot, just so you’ll know it’s a 2 days process. Your patience will be tested as it did mine. I had to peek at the dough every 30 minutes as it was rising, crazy huh? The long wait was rewarded ‘tho, the smell of the bread baking, so exciting. The site of the bread rising as it’s baking is interesting oh and it sings too! Love the crackling sound of the bread the moment you pull it out off the oven. Again, the impatient me didn’t wait for the bread to rest and cool down. I of course had to slice it right away..hhmmm..the crust is perfect, crispy, soft and spongy inside, and the holes OMGosh.


If you haven’t tried baking this yet, you should give this a try and you’ll know what I mean. I’m hooked! Enough of my blah, blah, blah…I’m getting ready for my next try. This time i'd love this just dip w/ balsamic, extra vigin olive oil and fresh cracked black pepper yum!
My daughter whipped up her delicious Broccoli soup ala Panera to go w/ the bread. What a perfect combination. Thanks, anak!


THE INGREDIENTS:
3 cups bread flour or AP flour
1/4 teaspoon instant yeast
1 1/4 teaspoons salt
1 1/2 cup of lukewarm water


IN A BIG BOWL, MIX ALL THE INGREDIENTS USING A WOODEN SPOON. YES, IT'S SUPPOSE TO LOOK LIKE THIS.


WRAP UP THE DOUGH AND LET IT REST/RISE FOR AT LEAST 18 -20 HOURS AT A WARM PLACE.DON'T BE LIKE ME, I CHECKED IT EVERY 30 MINUTES. NOT GOOD!


THIS IS HOW IT LOOKS AFTER 19 HOURS. I LOVE THE YEAST SMELL.


CLOSE UP SHOT OF THE WET DOUGH 20 HOURS.


DUMP THE DOUGH ON A FLOURED SURFACE. THIS IS A MESSY STAGE. TO PREVENT THE DOUGH FROM STICKING, DIP THE SPATULA IN WATER AS YOU GATHER THE DOUGH. THEN USE YOUR HANDS TO FORM A BALL. NORMALLY WE PUT FLOUR TO OUR HANDS BUT AS SUGGESTED, WATER IS BETTER SINCE THERE ARE ENOUGH FLOUR ON THE BOARD. IT'S ALL ABOUT BALANCE. AFTERALL, IT IS THE HIGH WATER CONTENT THAT MAKES THIS BREAD SO DELICIOUSLY LIGHT AND THE CRUST VERY CRISP.


GINGERLY MOVE THE DOUGH ONTO A FLOURED TOWEL. LET IT RISE FOR ANOTHER 2 HOURS.
I WARNED YOU GUYS THIS IS A 2 DAY PROCESS. INVEST A LOT OF TIME BUT NOT AS LABORIOUS AS THE CONVENTIONAL WAY
FLOUR THE TOWEL LIBERALLY (I DIDN'T FLOUR ENOUGH SO IT WAS A BIT MESSY WHEN I TRANSFERED THE DOUGH INTO THE POT.
IT'S SUPPOSE TO DOUBLE IN SIZE.


HALF HOUR BEFORE THE SECOND RISING ENDS, SLIP COVERED POT (I USED MY LE CREUSET) INTO YOUR OVEN. CRANK UP THE HEAT TO 450F. LET IT PRE HEAT FOR 30 MINUTES.


AFTER PRE HEATING, REMOVE THE HOT POT FROM OVEN. SPRINKLE SOME CORNMEAL OR FLOUR IN THE POT THEN PLOP THE WET/WOBBLY DOUGH INTO THE POT. DON'T WORRY IF THE SHAPE IS MESSED UP..IT'S "RUSTIC".
COVER AND PUT BACK INTO THE OVEN. BAKED COVERED FOR 30 MINUTES.


THEN UNCOVER AND BAKE FOR 20 MINUTES MORE.
TO CHECK, YOU CAN EITHER TAP THE BREAD..SHOULD SOUND HOLLOW OR TEMPERATURE SHOULD BE 210 F IN THE MIDDLE. VIOLA!!! DONT FORGET TO LISTEN TO THE CRACKLINGS THE MOMENT YOU PULL IT OUT OFF THE OVEN.


AFTER PATIENTLY WAITING, I SAY IT WAS WORTH IT!!
THIN CRUNCHY BROWN CRUST, LARGE, OPEN HOLES, SPONGY, FLAVORFUL HHHMMMM! NEED I SAY MORE.


PAM'S BROCCOLI SOUP WAS THE PERFECT PAIR FOR THE BREAD. SORRY, THE FLASH DIDN'T DO JUSTICE TO THE SOUP. BUT AS ALWAYS MY DAUGHTER MAKES THE BEST BROCCOLI SOUP....AND I MEAN THAT.FOR THE BROCCOLI SOUP RECIPE PLS.
HERE'S THE ORIGINAL RECIPE.

Published: November 8, 2006....
Adapted from Jim Lahey, ....Sullivan Street.... Bakery
Time: About 1½ hours plus 14 to 20 hours’ rising

3 cups all-purpose or bread flour, more for dusting
¼ teaspoon instant yeast
1¼ teaspoons saltCornmeal or wheat bran as needed.

1. In a large bowl combine flour, yeast and salt. Add 1 5/8 cups water, and stir until blended; dough will be shaggy and sticky. Cover bowl with plastic wrap. Let dough rest at least 12 hours, preferably about 18, at warm room temperature, about 70 degrees.
2. Dough is ready when its surface is dotted with bubbles. Lightly flour a work surface and place dough on it; sprinkle it with a little more flour and fold it over on itself once or twice. Cover loosely with plastic wrap and let rest about 15 minutes.
3. Using just enough flour to keep dough from sticking to work surface or to your fingers, gently and quickly shape dough into a ball. Generously coat a cotton towel (not terry cloth) with flour, wheat bran or cornmeal; put dough seam side down on towel and dust with more flour, bran or cornmeal. Cover with another cotton towel and let rise for about 2 hours. When it is ready, dough will be more than double in size and will not readily spring back when poked with a finger.
4. At least a half-hour before dough is ready, heat oven to 450 degrees. Put a 6- to 8-quart heavy covered pot (cast iron, enamel, Pyrex or ceramic) in oven as it heats. When dough is ready, carefully remove pot from oven. Slide your hand under towel and turn dough over into pot, seam side up; it may look like a mess, but that is O.K. Shake pan once or twice if dough is unevenly distributed; it will straighten out as it bakes. Cover with lid and bake 30 minutes, then remove lid and bake another 15 to 30 minutes, until loaf is beautifully browned. Cool on a rack.
Yield: One 1½-pound loaf.