Showing posts with label Chocolate. Show all posts

Wednesday, August 31, 2011

Peanut Butter Chili Fudge Mallows (Fudgey Mish- Mosh)

I know there are similar recipes out there, but this fudge was totally made just so i can save some items that were expiring that's why i originally called it "Kitchen Sink Fudge". But i have to change the name because Kitchen Sink Fudge doesn't sound appetizing right? Erin suggested Fudgey Mish- Mosh which i like ;) but then, i would like the readers to at least get an idea what kind of a fudge these are, so i opted to call it Peanut Butter Chili Fudge Mallows a.k.a Fudgey Mish Mosh.. Thank you Erin ;)

Wow!!!! these were really good.  It was actually a toss between cupcakes and fudge but opted for the later all because it was easier to make! ha!ha! No regrets though!

I  love the flavor profile. You get a hint of chili, a  hint of a bitter sweet from the chocolate. You can taste the salt flavor, the crunch  from the almonds and of course the peanut butter flavor. Then  the sweetness from the marshmallow and a hint of sour and creaminess from the cream cheese. Oh yeah!!! This is a keeper for sure!
Who would have "thunk it" a successful recipe was made out of saving expiring ingredients rather than throwing them away;)


1  8 oz. cream cheese (Philadelphia)
1 small bag of mini marshmallows ( I used GFS brand)
1 pack of 12 oz semi sweet chocolate chips (Nestle)
2 bars of Moser Roth chili chocolate
1 cup peanut butter
1 cup chopped  roasted and salted almonds

1. Melt chocolate with peanut butter and cream cheese in a sauce pan over low heat. Stir until mixed and smooth.

2. Fold in the marshmallow and almonds.

3. Pour into parchment lined baking pan and chill until firm.

4. Cut into ½ inch cube. Cutting it bigger will be too sweet.


Saturday, February 19, 2011

KCC Challenge- Feb=Valentines=Aphrodisiac Filipino Food:Champorado (Chocolate Rice Porridge)

I'm privileged to host this month's KCC challenge. Please click HERE
for further information about Kulinarya Cooking Club. Come and join us and share your Filipino recipes or learn how to make Filipino dishes and learn the Filipino culture as well.

The theme i chose for this month is February=Valentines=Aphrodisiac Filipino Foods. I thought that this would  be an opportunity for us to prepare a scrumptious valentine Filipino dish for our love ones.

I know balut would be the first food that come into ones mind but really there are a lot of Filipino foods that could be considered aphrodisiac foods. Check Aphrodisiac Food List for some idea on what to prepare on Valentines day or any day that you feel romantic. Oysters would be a good one but  a dozen of them wouldn't suffice, they are so expensive here.

So i thought of one of my favorite breakfast dish that calls for the most popular yet affordable aphrodisiac ingredient..CHOCOLATE!!!  My family love, love champorado.  So perfect for valentines day or any day actually. We could eat it for breakfast, mirienda, lunch, mirienda again and dinner, i kid you not. I am happy with a drizzle of condensed milk but with the addition of cheese, oh my goodness, I'm in heaven!!! See, what i mean?!! lol!!

You can be creative with your champorado presentation. You can form a heart as you drizzle your condensed milk, cut your cheese into heart shapes or the rustic way, tear the cheese.

This is a very simple, easy recipe yet so amazingly delicious!

Ingredients: Serves 4
1 C glutinous rice
3 C water
3 disc/tablet of chocolate (Tablea/Tabliya) or 1/2 C of cocoa powder
1/2 C brown sugar
Condensed milk
Slices of cheddar cheese and cheese you like.


Cook rice in a medium-sized pot with 3 C water. Stir constantly. When rice is ready (rice should be transparent and fluffy), add more water if needed. Then add cocoa and sugar. Serve in bowls with drizzle of sweet condensed milk and cheese on top.

TIPS:

*You can use regular rice if you can't find glutinous rice.

*Add more water if you want a thinner porridge consistency.

*I want my champorado on the darker color so i add more cocoa powder if needed.

*You can use white sugar if you don't have the brown sugar. But i prefer the brown sugar because it gives a molasses flavor w/c i like.

* Southern Luzon serves this w/ dried fish too. It's good but since this is a valentines breakfast w/c is meant to be an aphrodisiac, i believe serving it w/ dried fish is just not right=;)


100% Cocoa (Filipino Chocolate disc called Tablea/Tabliya).


The main ingredients: Chocolate disc, Brown Sugar, Glutinous Rice


The Valentine presentation=;)


The rustic presentation


The simple presentation=;). Ha!ha! i poured the condensed milk!


Thursday, January 6, 2011

VANILLA BEAN MACARONS WITH GANACHE FILLING

Now that i got the hang of it, yes, i'm talking about French macarons, the flavors are endless. I'm not intimidated to make these macarons anymore!!. Ofcourse, mine aren't perfect, but practice, practice...i'll eventually make the most beautiful macarons i'd ever make! lol!

I made vanilla bean macarons this time. I guess i spoke to soon coz the batter for this macaron was a bit thick but inspite of that they still came out good. The shape is not that perfect but i like it!!!! annnddd it still got their feet! ha!ha!ha! isn't that what matters most?

I used the madagascar vanilla bean pods. They are expensive but reallyyyy worth it. After i take out the vanilla beans "seeds" i save the pods and put them in my jar of sugar. Those pods will impart vanilla smell and taste to your sugar.

For more macaron flavors, "secrets on how to make successful macarons" and the recipe for both the macaron shell and the ganache filling...pls check my other blogs...MY FRENCH MACARONS GOT FEET and MACARONS .


MY FRENCH MACARONS GOT FEET!!!

Well, well, it's been a long time since i last made macarons. As i mentioned in my other macaron blog MACARONS these little jewels are an obsession of mine. I am proud to say that my macarons has improved immensely. I can tell you that I'm comfortable making them this time. Rate of success? hhhmmm about 85% ..yes, I'm so proud to say that. They all had feet and yes, there were cracked shells but not much...can i hear a woot! woot! sshhh!!! i did a happy dance. I'm entitled to my opinion right?

Thanks to my friend Tina  and macaron bloggers, i took notes which i call "secrets" to make a perfect macaron. See, when i made them the first time, the cookbook i read and macaron blogs just straight up shared the recipe but never mentioned about the extra steps you have to do in order for you to make a beautiful macaron. Which leads to frustration and disappointment because you believe you followed the recipe word for word, step by step but your end product is no way similar or the same as theirs.

So, I'm sharing the notes that i have learned. This is to save you from the frustration and disappointments.

1. It is imperative to use a scale. That's my opinion.
2. Age your egg whites. Use a day old egg whites.
3. Some say sift your dry products..i didn't it still came out good.
4. Use a template for a uniform size. (I must admit, i need more practice on this step)
5. Use parchment paper or silpat pls.
6. Don't over mix your batter. It should be runny but not to runny=;)
7. Preheat your oven to 400 degrees then lower to 300 degrees few minutes before you put them in.
8. They say bake one sheet pan at a time w/c i did but didn't even think about the reason for it. But Tina thought that it does make sense especially for small oven, to avoid over crowding.

There has been an influx of macaron recipes but i'm sticking to my original recipe with slight adjustments based on the notes i have made.

I MADE MATCHA MACARONS. I ADDED A TSP OF MATCHA (JAPANESE GREEN TEA) POWDER TO THE DRY INGREDIENTS. A TSP. OF THE MATCHA WOULD SUFFICE OTHERWISE THE TASTE OF THE GREEN TEA WILL BE OVERPOWERING.

3 egg whites (about 90 gr)
30 gr granulated sugar
200 gr powdered sugar
110 gr almond flour or finely ground almonds
pinch of salt

Preparation:

1- Preheat the oven to 320 f. (SEE MY NOTES REGARDING THE TEMPERATURE)  Line 2 baking sheets with parchment paper and set aside.

2- In a food processor, combine the ground almonds, powdered sugar. Mix until you get a thin powder. (ADD THE MATCHA)  Remove from the bowl, Sift the mixture. Set aside.

3- Beat the egg whites with a pinch of salt until soft peak. Gradually, add the granulated sugar and continue to beat until the mixture becomes shiny. At this point, you add the desired food coloring (if using).

4- Sift the dry ingredients over the egg whites in 3 steps. fold the mixture until shiny. Do not over mix.

5- Fill a pastry bag fitted with a round 1/2 inch tip with the batter and pipe evenly the cookies leaving 2 inches between them. Let the cookies rest for about 20 minutes.

6- Cook the macarons for 12 to 15 minutes. Let them cool before filling.


Ganache filling:

1 pint heavy cream
8 oz semi- sweet or bittersweet chocolate chips

1. In a heavy saucepan, boil heavy cream. Turn off the heat. Add chocolate chips and let it rest until melted. Use a rubber spatula to stir the mixture until all the pieces are melted.


2. Pour it into a room-temperature bowl and cover with plastic wrap.


Thursday, November 4, 2010

CHOCOLATE DULCE DE LECHE CUPCAKES

My oh my...me and my cupcakes! lol! Okay this time i used chocolate cake mix. This is the season to take advantage with cake mix, they are on sale.

What you will need:

1 can dulce de leche

1 box chocolate cake mix - For the ingredients and how to make the cupcake batter, follow the box instructions.

Buttercream Frosting
Ingredients

3 cups confectioners' sugar
1 cup butter
1 teaspoon vanilla extract
1 to 2 tablespoons whipping cream
2 t dulce de leche

Directions

In a standing mixer fitted with a whisk, mix together sugar and butter. Mix on low speed until well blended and then increase speed to medium and beat for another 3 minutes.

Add vanilla and cream and continue to beat on medium speed for 1 minute more, adding more cream if needed for spreading consistency.

Fold in 2 T of dulce de leche into the frosting.


Bake the chocolate cupcake according to cake mix instructions.


Using a melon baller, scoop out a little portion  in the middle of the cupcake. Save the small piece.


A can of Dulce de Leche


Put a teaspoon or less depending on how much dulce de leche you like on the scooped out portion.


Place back the small piece of the cake to cover .


With the buttercream frosting cover and decorate your cupcakes.


Wednesday, November 3, 2010

TIRAMISU CUPCAKES

I love cupcakes! This is another favorite of mine. It's easy, so good and kid friendly...yup!! no alcohol on this recipe!. I've tried baking both from scratch and the scratch the box=;). Obviously making your cake from scratch is better but when you are in a hurry "scratch the cake mix box" is also good. Seriously, i like them both.


I will post both, now you decide which one you'd like to make first. Again i like both the cake mix box and making your own cake.


TIRAMISU CUPCAKES FROM SCRATCH


Makes 24 cupcakes

• 1 1/4 cups all purpose flour

• 1 1/4 teaspoon baking powder

• 1/8 teaspoon salt

• 3/4 cup milk

• 11/2 tsp vanilla extract

• 6 tablespoons unsalted butter, room temperature, cut into pieces

• 1 large egg

• 1 cup sugar

• Unsweetened cocoa powder, for dusting

• Espresso or coffee syrup (recipe to follow)

• Mascarpone Frosting (recipe to follow)

Directions

1. Preheat oven to 325 degrees. Line standard muffin tins with cupcake liners.

2. Sift together the flour, baking powder, and salt. Set aside.

3. With an electric mixer on medium speed, cream butter and sugar until light and fluffy .

4. Add the egg and vanilla, mix until combined into the batter.

5. Finally, alternately add the dry ingredients and milk.

6. Divide batter evenly among lined cups, filling each three-quarter full.

7. Bake, rotating tins halfway through, until centers are completely set and edges are light golden brown, about 20 minutes.

8. Transfer tins to wire racks to cool completely before removing cupcakes.

9. To finish, brush tops of cupcakes evenly with coffee syrup; repeat until all syrup has been used.

10. Allow cupcakes to absorb liquid 30 minutes. Dollop frosting onto cupcakes; refrigerate up to overnight in airtight containers. Dust generously with cocoa powder just before serving.

Espresso/Coffee Syrup

1 C freshly brewed espresso or concentrated coffee

11/2 T sugar
Stir until sugar has dissolved.


*****Mascarpone Frosting:

Makes about 2 cups

• 1 cup heavy cream

• 8 ounces mascarpone cheese, room temperature

• 1/2 cup confectioners' sugar, sifted

Directions

1. With an electric mixer on medium speed, whisk heavy cream until stiff peaks form (be careful not to overbeat, or cream will be grainy). In another bowl, whisk together mascarpone and confectioners' sugar until smooth. Gently fold whipped cream into mascarpone mixture until completely incorporated. Use immediately.

****If you can't find mascarpone you can use cream cheese as the substitute

****The chocolate chips are optional. You can garnish them w/ chocolate shavings if you want.


TIRAMISU CUPCAKES USING A YELLOW CAKE MIX.

Check the cake mix box for ingredients and instructions to make the cupcakes.
I used the same recipe for both the Espresso Syrup and the Mascarpone Frosting.


Monday, July 26, 2010

LAMINGTONS

I had no idea what a lamington cake was until Kris of Bake in Paris blogged it. What actually caught my attention were her photos of the cake, they were so beautiful. It makes you want to make the cake ASAP.
Well, actually i didn't get to make it ASAP=;) but unbeknownst to me i made this cake on the 21st of July w/c happens to be THE AUSTRALIAN NATIONAL LAMINGTON DAY what a coincidence!! And yes i seriously didn't know, i was surfing for other ideas and recipes and came across the website about the national lamington day.

I got my inspiration from Kris, i also made two kinds of coating. I made the chocolate and an orange curd coat. Thank you, Kris. Lamington will definitely grace our table especially this coming holiday!

FOR THE SPONGE CAKE

2 C all purpose flour
2 t baking powder
1/4 t salt
1 C whipping cream **
1 C milk
2 C sugar
4 large eggs

**If you want your cake creamier you can use 2 C (1 pint) of whipping cream and omit 1 C milk.

Procedure:

1. Preheat oven to 375° F.
2. Mix flour, baking powder and salt into a bowl.
3. Whisk cream and sugar. Beat eggs and add, one by one, alternating with a tablespoon of flour each time.
4. Fold in remaining flour.
5. Transfer it to a greased square cake pan.
6. Bake 40 minutes to an hour.
7. Let them cool.


FOR THE COATING/ICING:

2 C powdered sugar
1/3 C cocoa powder
2 T butter cut into small cubes
1/2 C hot milk
2 C desiccated/ flaked unsweetened coconut

Procedure:
1. Sift sugar and cocoa into a small bowl.
2. Add butter and milk, mix until smooth.
3. In a saucepan on a low heat, heat the mixture and mix well to create a nice coating but not too runny.
4. Place coconut in a shallow container.


FOR THE ORANGE CURD:

2 eggs beaten lightly
1/3 C sugar
1/2 C orange juice
5 T butter, chopped coarsely
2 T cornstarch dissolved in 1 T orange juice (slurry)

Combine the first four ingredients, stirring constantly until mixture starts to thicken. Slowly add the slurry, stirring constantly until you achieve the curd consistency.


ASSEMBLY TIME:

1. Cut the sponge cake into 36 squares.
2. Coat the cake squares with the chocolate icing and the orange curd, then roll in coconut.
3. Let them cool on a sheet of parchment paper.


Saturday, July 3, 2010

BANANA UPSIDE DOWN BROWNIE FUDGE

My daughter was craving for some brownies and bananas at 12 midnight, so i suggested to bake both. This banana upside down brownie fudge was the end product of both the cravings and wow did this hit the spot!!!

Brought some to work the following day and they asked for the recipe. So I've got to share this semi-homemade "sinfully delicious" brownie fudge.

Ingredients:

1 box brownie fudge
2 eggs
1/4 C water
1/2 C vegetable oil
1/3 C brown sugar (light or brown)
2 pieces of ripe bananas (sliced on a bias)
Non stick cooking spray

1. Pre-heat the oven at 375 degrees F.
2. Follow the cake mix instructions to make the brownie batter.
3. Arrange the sliced bananas on a greased baking pan.
4. Sprinkle the brown sugar on top of bananas and around the baking pan.
5. Pour the brownie batter over.
6.  Bake for 35 - 40 minutes or do the toothpick method, stick a clean toothpick in the cake, when it comes out clean then it's done.
7. Cool for about 10 minutes then turn the pan upside down.


Monday, March 22, 2010

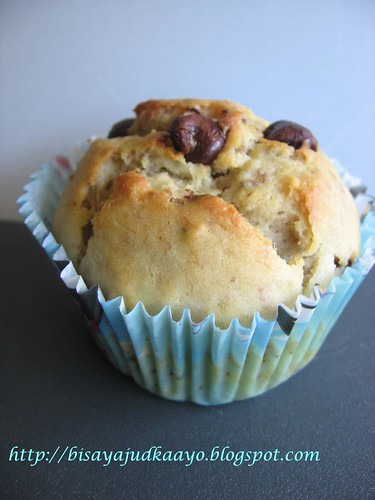
BANANA NUTS AND CHOCOLATE CHIPS MUFFINS

Ingredients

1 3/4 cups plus two tablespoons all-purpose flour
1/2 teaspoon salt
1/2 tablespoon baking powder
1/2 teaspoon baking soda
2 large eggs
1/4 cup vegetable oil
1/3 brown sugar
1/3 cup granulated sugar
2/3 cup sour cream
2 tablespoons milk
1 cup ripe bananas, mashed (about two smaller bananas)
1 teaspoon vanilla extract
1 cup nuts, finely chopped
1 cup chocolate chips or morsels

Directions

Preheat the oven to 425 degrees.

1. In a medium bowl, mix the flour, salt, baking powder, and baking soda together.

2. In another bowl, mash the bananas. Whisk two large eggs and add those to the bananas. Add the oil, milk, sugars, and sour cream. Blend well. Stir in the nuts and chips.

3. With a spatula, mix the dry ingredients into the liquid mixture. Stir until just combined. Spoon the batter into 12 well-greased muffin tins or muffin liners. Ten muffins will give you large, nicely-domed muffins. Fill any unused muffins cups half full of water.

4. Bake for eight minutes at 425 degrees. Reduce the temperature to 350 degrees and continue baking for another 6 to 10 minutes or stick a toothpick in the muffins and when it comes out clean it is cooked. Let the muffins sit in the tins for a few minutes and then remove them to wire racks to cool.

TIP: The burst of heat in the initial high temperature helps dome the muffins.


Wednesday, March 10, 2010

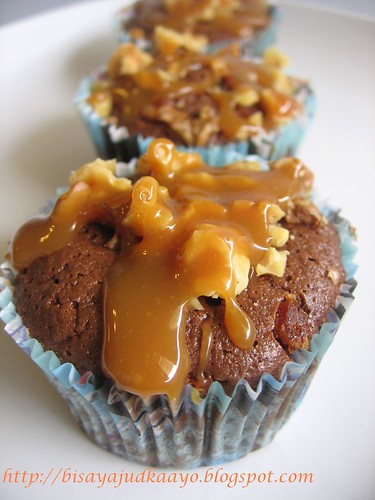
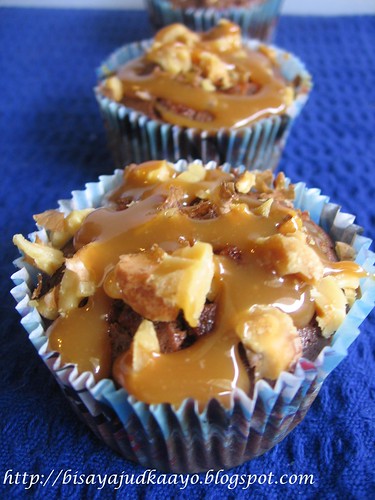
CHOCOLATE BACON CUPCAKE WITH WALNUT CARAMEL SAUCE

I have been seeing this salty and sweet cupcake/cake combination on food TV shows and around the food "blogsphere". Bacon with sugar is not new to me though, a member of my in laws used to dip her bacon with sugar which i thought was weird at that time, i just couldn't imagine the taste.

Okay, okay i succomb to the temptation and made these cupcakes. It is surprisingly good. So, i brought some to work and didn't tell my co-workers that it had bacon, until they finished all the cupcakes.  They loved it, they wouldn't have thought that the hint of the saltiness was the bacon w/c worked well with the chocolate and the caramel.  I probably should have added more bacon to make the bacon distinct? nah...i don't think i will like it if i added more bacon bits.


The recipe for the chocolate cupcake was adapted from the book "Best Loved Hershey's Sweet and Sensational"- Chocolate Squares with Nutty Caramel Sauce

Ingredients:
Y: 16 cupcakes
1 C sugar
3/4 C all purpose flour
1/2 C hersheys cocoa powder
1 /2 t baking powder
1/2 t salt
3/4 C oil
3 eggs
1/4 C milk
1/2 t vanilla extract
12 pcs caramel candies
1/2 C milk (for caramel sauce)
1 C roasted walnuts or pecans
6 slices of bacon ( about 1 C bacon bits)
brown sugar for the bacon

Heat oven to 350 degrees F.

Arrange bacon slices on a sheet pan, sprinkle brown sugar and bake until crispy.

Set aside and let it cool.

Roast walnuts or pecans in the oven for 10 minutes. Cool then chop finely. Set aside.

Stir together sugar, flour, cocoa, baking powder and salt in mixer.

Add oil, eggs, milk and vanilla; beat until smooth.

Pour batter evenly into the cupcake liners.

Bake 20 to 25 minutes or until wooden toothpick inserted in center comes out clean.

Cool completely.

Remove wrappers from caramels. Combine caramels and milk in small saucepan.

Cook over low heat stirring occasionally until smooth and well blended.

Sprinkle chopped walnuts on top of the cupcake then drizzle with caramel sauce.