Showing posts with label eggs. Show all posts

Wednesday, May 30, 2012

LECHON SISIG


Traditionally, left over lechon will be "morphed" into lechon paksiw. Lechon (Whole roasted pig) , Paksiw (A vinegar, soy sauce based stew) or fry them. I had the hankering for Sisig so i decided to use the left over lechon. Please check here for my sizzling sisig blog.

This is definitely not the typical sisig. The good part of this version is skipping the laborious step of the original sisig recipe. ;) I used the belly part of the lechon, marinated them with a little of soy sauce and vinegar. While the meat was marinating, i did my mise en place..... i chopped a large size sweet onions, chopped Thai bird chili, minced garlic, crumbled few pieces of chicharon, sliced scallions and lemon for garnish.


My version served on a sizzling plate topped with an egg.


 Chinese Lechon ( yes, they season and roast their pig differently) but i still love them. I used the belly part of this lechon ;) They don't stuff the pig with aromatics/herbs but rub them instead with spices.


Saute' the onions and garlic until translucent, add and stir the chopped meat. Add the seasonings sparingly, taste then adjust. Remember the meat is already well seasoned. Then add one raw egg and stir until well incorporated. The egg will give the creamy texture to the dish


I prefer my sisig served on a sizzling plate. Garnish with crumbled chicharon , sliced scallions, lemon slices and some Thai bird chili. Top with another egg before serving. Served with ice cold Red Horse this time ;)


I like it. The creaminess of the egg and the crunch of the chicharon definitely added another layer of flavor goodness. You get the hint of adobo flavor because of the vinegar, soy sauce marinade. There is also a hint of Chinese five spice which is an ingredient of a Chinese Roasted Pig. I will probably skip the soy sauce, vinegar marinade the next time i make Lechon Sisig just to have a comparison. This however is a great way to morph your left over lechon rather than cooking the same old same old way....Lechon Paksiw.

Tuesday, November 29, 2011

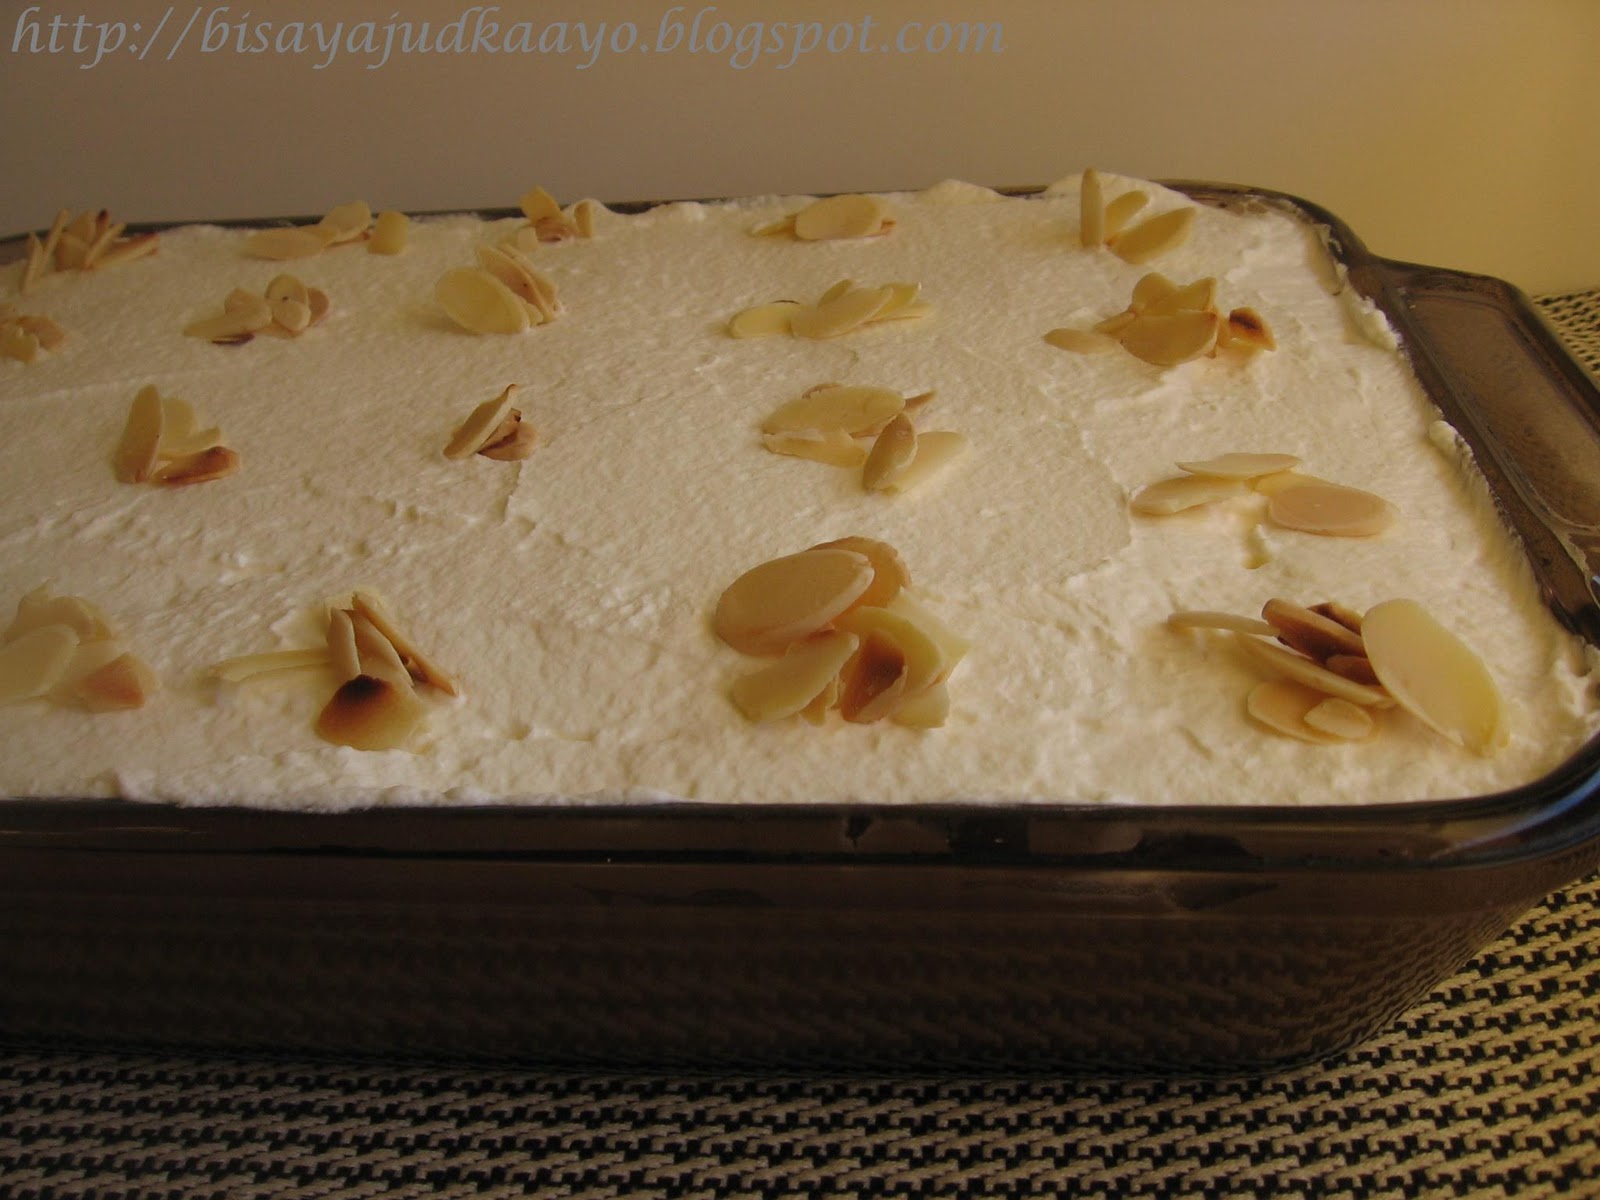
Ekmek Kataifi (A Greek Dessert)

I have a long list of favorite desserts and this is one of them. I finally found a good recipe in English. I'm sure there are a lot of good recipes but just not in English.  Got this recipe from Kali Orexi .

Ekmek, Ekmek Kadayifi, Ekmek Kataifi (pronunciation - silent K  (ek-meh) silent i (kah-da-if) however it's called all i can say...they are "to die for"
If you like custard, phyllo and whipped cream then you are in for a treat....A MUST TRY DESSERT. ;)

 If you can't find the shredded phyllo  you can  Make your own Kadaif . 

** I'm so happy w/ the end result.
**Next time, i will bake my kataifi a little bit longer to get the brown color which i'm sure will give another layer of flavor.
**I will add more almonds but make sure to add them after slicing to get a perfect and beautiful slice of your ekmek.


Brush the Kataifi strands with the melted butter then place the pan in the oven. 


Toast the Kataifi strands until golden brown.


For the pastry base:

1lb. Kataifi pastry
1/2 cup melted unsalted butter, plus a pat more for buttering the pan

For the Syrup:
1 cup sugar
1/2 cup water
1 tsp. fresh lemon juice

For the Custard:
7 egg yolks
6 cups milk
1 1/2 cups sugar
7 tablespoons fine semolina
4 tablespoons corn starch
1 teaspoon vanilla
2 Mastiha crystals, ground with a mortar and pestle (Skipped this step)


Preheat oven to 375 degrees. Butter a large rectangular baking pan (about 11×15 inches), making sure it is relatively deep enough to accommodate the layers of pastry, custard and whipped cream. To begin making the base, take the strands of Kataifi and pull them apart slightly while layering them in the bottom of the buttered pan–no need to press down on the Kataifi strands as they are better left light and fluffy. Brush the Kataifi strands with the melted butter then place the pan in the oven. Toast the Kataifi strands until golden brown.

Meanwhile, begin making the syrup by boiling the sugar with the water in a small saucepan for about 5 minutes. Remove from the heat and stir in the lemon juice, then pour the hot syrup over the toasted pastry base.

To make the mastiha-flavored custard, add the sugar and the egg yolks in a medium saucepan and whisk until combined. Alternating as you go, slowly begin adding the semolina, milk and corn starch whisking until well incorporated. Move the saucepan to a burner and set it over medium heat. Cook the mixture stirring constantly and being careful not to scorch it. Once the custard thickens, remove the saucepan from the heat and beat in the vanilla and ground mastiha. Cool slightly, then pour the custard over the Kataifi base. Let it all cool completely before adding the fresh whipped cream topping. (At this point you can cover the dessert and refrigerate overnight if you prefer, simply adding the whipped cream the next day just before serving.)

Just before serving, combine 2 cups heavy cream and 2 or 3 tablespoons sugar in the bowl of a standmixer (using the whisk attachment) and beat the cream to stiff peaks. Spoon the whipped cream over the custard layer and carefully spread it to each corner of the pan. Carefully cut the Ekmek Kataifi into square servings. Top with a pistachio spoonsweet or, more traditionally, with toasted almond slivers or chopped pistachios.
TOP WITH ROASTED SLIVERED ALMONDS


Custard w/ semolina flour and cornstarch (YUM)


Let this cool before adding the whipped cream.

It's way better if you whip your own cream.


Let this cool for perfect slices...i'm all about presentation...presentation ;). Arrange the slivered almonds strategically in that way you'll not ruin your slices. Add more after slicing.


Top view!!!


Monday, June 13, 2011

HEALTHY POTATO SALAD FROM AROUND THE WORLD - DARING COOKS CHALLENGE FOR JUNE 2011 PART 2

Part two for the DC June Challenge. This brings back memories. My mom makes this for special occasions. I don't have her exact recipe. My version may not be as good as my mom but i know it's close enough! ha!ha!  I'm calling this " Filipino Potato Salad".

Ingredients:

FOR THE SALAD:

1 lb.Yukon Gold Potatoes (washed)

1/4 C Carrots (washed, peeled, diced)

1/4 C Celery (washed, diced, same size as carrots)

1 T Chives (washed and chopped small)

1 small Red onions- you can use sweet/vidalia onions (peeled, minced)

1 dozen Eggs - i used quail eggs (hard cooked). 4 if using regular eggs.


FOR THE DRESSING:

2 C Mayonnaise (start w/ 1/2 then adjust if necessary)

1 T Honey1 1/2 T Pickle Relish

1/4 C Pineapple tidbits (drained but save about 1/2 cup of the juice)

1/2 C Cheddar cheese (diced same size as carrots)

pinch of salt and pepper

1. Boil potatoes in a salted water until cooked for 15-20 minutes or until potatoes are tender but not too soft. Let the potatoes cool.

2. Mix the salad dressing until you get the consistency you like. Taste and adjust add pineapple juice if needed. Set this aside in the refrigerator while you're prepping the rest of the ingredients.

3. Cut the vegetables in uniform size.
4. Peel potatoes and cut in cubes, bite size.

5. Cook quail eggs in boiling water for 15 minutes. Cool and peel. cut in half.

6. Mix all ingredients. Taste and adjust.

7. I served this w/ grilled mushroom burgers..  


Thursday, April 14, 2011

The Daring Cooks’ April, 2011 Challenge: EDIBLE CONTAINERS (savory)

Well, hang tight and you will be in for a ride! This months Daring Cooks Challenge is about Edible Container. Kudos to Renata of Testado, Provado,& Aprovado. I can say that this is one challenge that i have enjoyed immensely. Not only because this challenge would entail a prize, it basically didn't call for a specific recipe for us to follow but instead gave us the freedom to go outside the box.

This challenge indeed challenged each member to be creative and creative we were. Oh my goodness, such a slew of brilliant ideas. Check  DC member’s Creations.

I made three edible containers. I opted to blog them separately because i believe each dish warrants a blog of their own;) Oh boy...what was I thinking?!!! Three dishes??? But really in all honesty..it was well worth it!!!! SO PLS. CLICK ON EACH DISH TO CHECK THE RECIPES.

Let's start with my "outside the box" edible container.
SZECHUAN CHICKEN ON CRISPY CHICKEN SKIN BOWL


The "outside the box" part of this dish is the bowl. I tried to experiment on both the skin from the leg quarters and the breast you would think the ones from the leg quarters would be sturdy/firm enough to form a bowl but surprisingly the skin from the breast was the ones that shaped into a perfect bowl.


According to my guinea pig (my family) this was really good, the crispy skin went well/complimented with the filling.


CONCLUSION:

Taste wise -We really love the combination and the addition of the crispy chicken skin.
Presentation wise - Beautiful, very appetizing

But if you ask me if I’ll do it again? Yes, of course but not making it into a bowl, I’d crush the chicken chicharon and add it on top of a bowl of rice and Szechuan chicken. This is a must try!!!


My second dish "Not so new dish" Edible Container
FILIPINO SEAFOOD CHOPSUEY ON CRISPY NOODLE BOWL


Now this one is a Filipino dish. What made this as my challenge dish? It’s the noodles.


Usually the noodles are just deep fried then top with the chopsuey. What i did was form the noodles into a bowl or nest.


CONCLUSION:

TASTE WISE: Yes, Yes....Crispy noodles are always good! You can actually make this with chicken, pork or beef. A must try dish too!

PRESENTATION WISE: Making the crispy noodles yes but forming them into a bowl not necessary but if you want to impress your guest then by all means make a crispy bowl.

*** The bowl will collapse as soon as you pour the chopsuey. The crispy noodles will absorb the sauce quickly.

OKAY, I WILL SAY THIS...I WILL MAKE THE CRISPY NOODLES AGAIN BUT WITH A FILLING THAT DOES NOT HAVE MUCH SAUCE OR GRAVY. AN ASIAN SALAD WILL BE PERFECT!!!


My last dish for April DC Challenge - "Must try dish" Edible Container.

XIAOLONGBAO-SHANGHAI STEAMED SOUP DUMPLINGS


I first learned about this from my nephew who worked in China. I was so intrigued that i had to put this in my "to do list". This has been in my to do list for the longest time and i finally have no excuse not to make it this time. I thought what a perfect dish for the challenge. XLB could be served 2 ways, a huge dumpling with a straw and the ones that I made. There are a lot of recipes around but i made my own version, the inspiration of this recipe is from my "Chinese Cooking" Cookbook.


XIAOLONGBAO-STEAMED SOUP DUMPLINGS (XLB) small steaming basket is commonly known as Shanghai Steamed Soup Dumplings, are traditionally filled with broth and pork but i added quail eggs on mine. The broth inside is made by using some meat gelatin w/c melts when steamed. 


CONCLUSION:
I love, love it but if you ask me will i make it again? Perhaps on special occasion! Okay, okay..here are the reasons.


1. Can I say...LABORIOUS!!! Too much work can you believe that! lol!!!. I had a hard time with the pleating!!

2. These needs to be served right off the steamer otherwise you will loose the broth. I believe it's absorbed by the dough because I didn’t have any leak on the steamer or on the plate. SO NOT GOOD FOR PARTIES.

3. Lets just say I'd leave this to the experts! I rather sit down, order lots of XLB's and enjoy them. But if you haven't tried or tasted these and you're up to making them no matter how long the process will be...go for it!!! It's really good!!!

AT LEAST I CAN NOW SAY THAT I'VE TASTED AND MADE THESE BEAUTIFUL JEWELS!!!! ANOTHER DISH DONE ON MY TO DO LIST!!!


THANK YOU RENATA FOR THIS CHALLENGE!!!

Monday, March 14, 2011

The Daring Cooks March 2011Challenge: ¡Me Encanta Perú! - Ceviche and Papas Rellenas

This month's challenge  was hosted by Kathlyn of Bake like a Ninja . We tackled Peruvian dishes for this month which i enjoyed very much. She gave us the choice to do both Ceviche and Papas Rellanas or do just one . I opted to do both even if at first i was a bit iffy with ceviche. See, ceviche is not new to me, in fact i love, love them. Filipinos call it Kilawin or Kinilaw depending on w/c province you come from. There are two ways to prepare our version one is to add fresh coconut cream and the other one is just like the ceviche. I know that in order for you to make "Kilawin/Ceviche" it is imperative to have FRESH seafood, this is the reason why i was not sure if i could make the ceviche.

But then i thought of sashimi/sushi hhmmm...Yes!Yes! i can make my ceviche using sashimi grade seafood, so off i went to my favorite Japanese market and bought a little of the sashimi stuff, didn't even care about how expensive they were;) My mission was to do the challenge and to fix my craving! I haven't had kilawin/ceviche in yeaarrrssss!!!!  So, Thank You Kathryn for the push!


The Japanese Store i always go to! Clawson, Michigan.


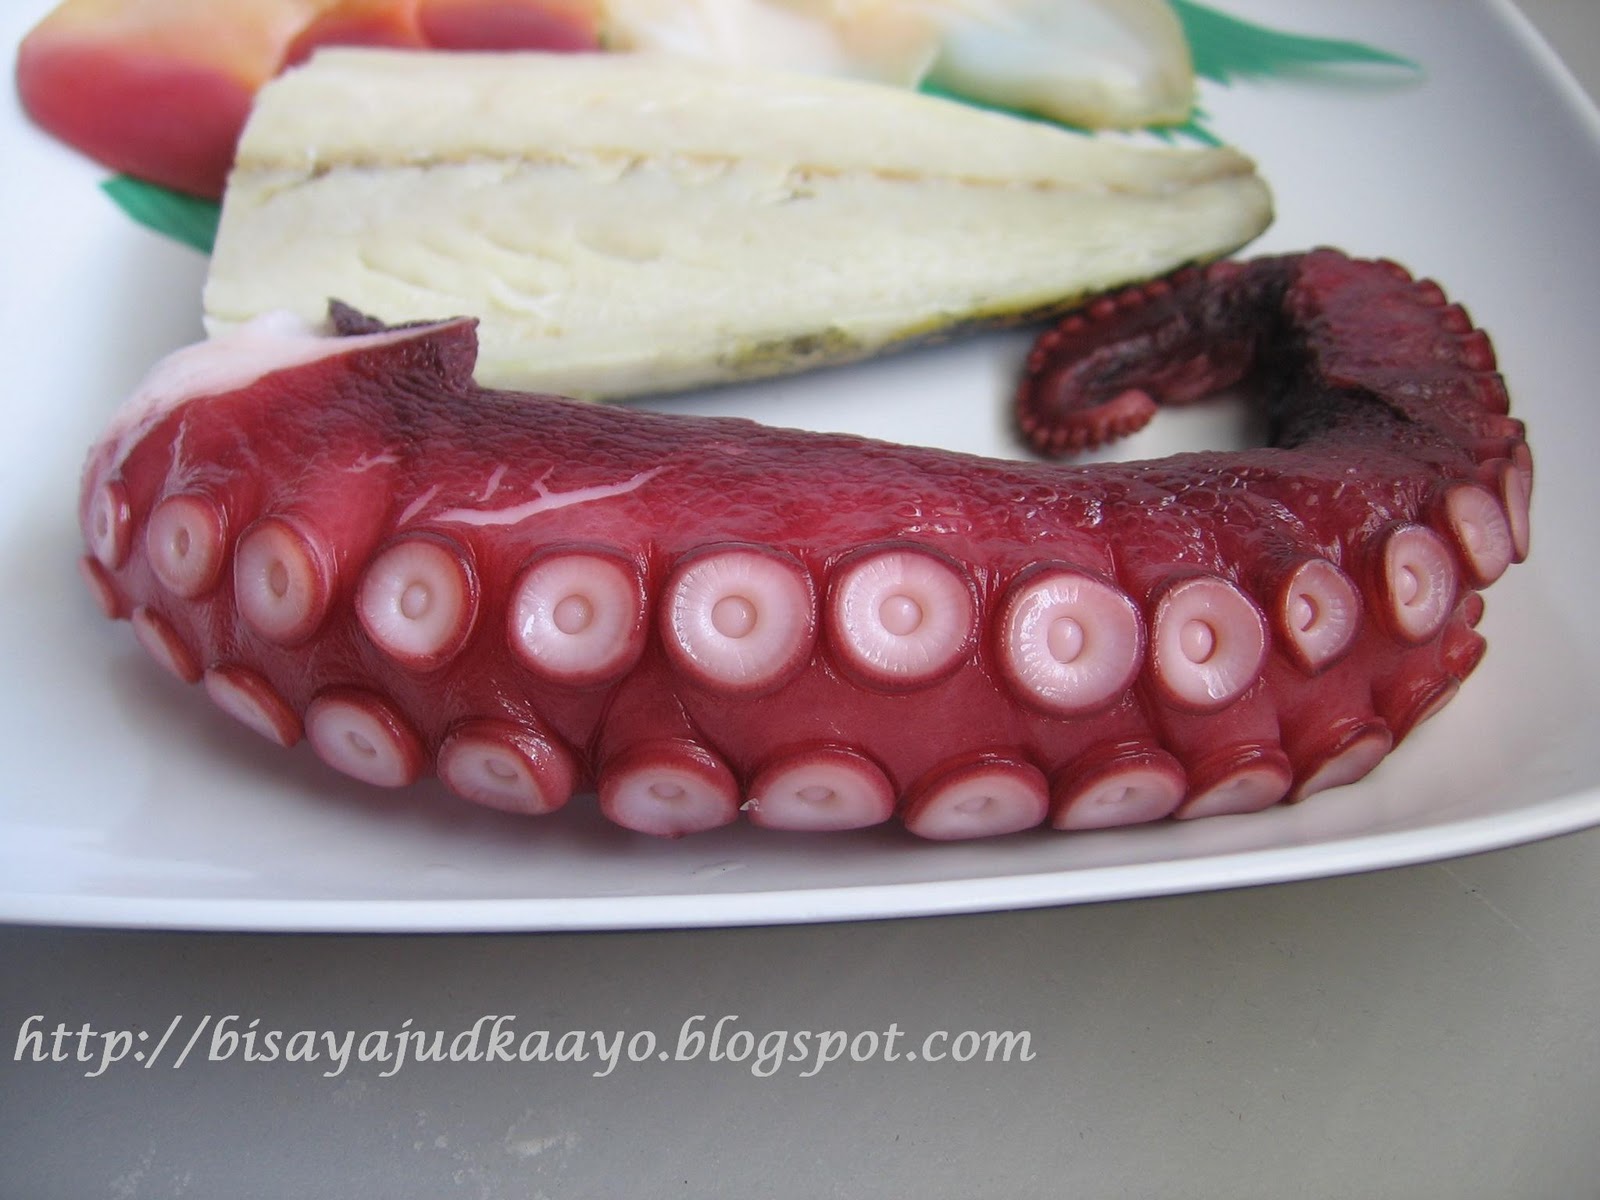
THESE ARE THE SASHIMI SEAFOOD I BOUGHT. A BIT EXPENSIVE BUT IT WAS WELL WORTH IT!


TAKO (OCTOPUS) COOKED

SHIMESABA (MACKEREL)  


HOKKIGAI CLAM (SURF CLAM)


TSUBUGAI CLAM (PEARL CLAM)

THIS BROUGHT ME BACK LOTS OF MEMORIES.


Cheviche de Pescado (Fish Ceviche):


Ingredients

2 lbs. (about 1 kg) firm white fish (scallops or other seafood may be substituted)*
2 garlic cloves, mashed
1 chili pepper, minced (I USED THAI BIRD CHILI)
1 cup (240 ml) freshly squeezed lime juice (between 8-12 limes)
Fresh juice only, no bottled. Can use lemons in lieu of limes.
1 tablespoon (15 ml) (4 grams) (1/8 oz) fresh coriander (cilantro), finely chopped
1 red onion, thinly sliced lengthwise
Salt and pepper (to taste)

Garnish: (DIDN'T HAVE THESE, I FIGURED I DON'T HAVE TO SINCE I SERVED MY CEVICHE W/ MY PAPAS)

1 large sweet potato
1 large ear of corn
Lettuce leaves

Directions:

1.Boil sweet potato and corn (separately) if using for garnish. Allow to cool. (Can be done hours or even a day in advance)

2.Wash and trim your fish. Slice into pieces between ½ inch (15 mm) cubes to 2 inch (50mm) pieces, depending on taste.**
3.Place fish in a non-reactive, shallow pan in a thin layer. Season with salt and pepper.
4.Combine lime juice, chili pepper, coriander and garlic. Pour mixture over fish. Stir lightly to expose all the fish to some of the lime juice mixture.
5.Put sliced onion on top of fish as it “cooks”
6.Let fish stand for 10 minutes.*** Lift fish out of the lime juice and plate individual portions ,**** garnishing with lettuce, slices of sweet potato and slices or kernels of corn if using.

* It is important to use high quality, really fresh fish. You can use previously frozen (I’ve been using it because I am too cheap to buy this much sashimi grade fish), but it’s not as good. The better your fish, the better your ceviche.

** The fish is going to “cook” in the lime juice – how thick you make the pieces will determine how much the fish cooks, so keep your own preference in mind when you are cutting the fish up.


PAPAS RELLENAS the other challenge w/c i also love. I loved them that i have to make it twice. Once again...thank you, Kathryn;)


Papas Rellenas (de carne):  DC  Challenge/ Kathryn's recipe


Makes 6
Ingredients

For the dough:

2¼ lb (1 kg) russet potatoes

1 large egg (I USED QUAIL EGGS)


For the filling:

2 tablespoon (30 ml) of a light flavored oil

½ lb (250 grams) ground (minced) beef

6 black olives, pitted and chopped (use more if you love olives)

3 hard boiled large eggs, chopped

1 small onion, finely diced (about 1 cup (240 ml))

½ cup (120 ml) (90 gm) (3 oz) raisins, soaked in 1 cup (240 ml) boiling water for 10 minutes, then minced

1 finely diced aji pepper (ok to sub jalapeño or other pepper – if you are shy about heat, use less)

2 cloves garlic, minced or passed through a press (if you love garlic, add more)

1 teaspoon (5 ml) (4 gm) (1/8 oz) ground cumin (use more if you like cumin)

½ teaspoon (2.5 ml) (2 gm) (1/16 oz) sweet paprika

¼ c. white wine, water or beef stock for deglazing

Salt and pepper to taste


For the final preparation:

1 large egg, beaten

1 cup (240 ml) (140 gm) (5 oz) all-purpose flour
Dash cayenne pepper

Dash salt

1 cup dry (240 ml) (110 gm) (4 oz) or fresh (240 ml) (60 gm) (2 oz) bread crumbs (you can use regular, panko, make your own or use store-bought) (I USED PANKO BREADCRUMBS)


Oil for frying (enough for 2” (50 mm) in a heavy pan like a medium sized dutch oven)

Directions:

In order to save time, you can boil the potatoes, and while they are cooling, you can make the filling. While that is cooling, you can make the potato “dough.” In this way, little time is spent waiting for anything to cool.

For the dough:

1.Boil the potatoes until they pierce easily with a fork. Remove them from the water and cool.

2.Once the potatoes have cooled, peel them and mash them with a potato masher or force them through a potato ricer (preferred).

3.Add egg, salt and pepper and knead “dough” thoroughly to ensure that ingredients are well combined and uniformly distributed.

While the potatoes cool down before finishing the dough, you can make the filling:

1.Gently brown onion and garlic in oil (about 5 minutes).
2.Add the chili pepper and sauté for a couple more minutes.
3.Add ground beef and brown.
4.Add raisins, cumin and paprika and cook briefly (a few seconds).
5.Deglaze the pan with white wine.
6.Add olives and cook for a few moments longer.
7.Add hard boiled eggs and fold in off heat.
8.Allow filling to cool before forming “papas.”

Forming and frying the papas:
1.Use three small bowls to prepare the papas. In one, combine flour, cayenne and salt. In the second, a beaten egg with a tiny bit of water. Put bread crumbs in the third

2.Flour your hands and scoop up 1/6 of the total dough to make a round pancake with your hands. Make a slight indentation in the middle for the filling.


3.Spoon a generous amount of filling into the center and then roll the potato closed, forming a smooth, potato-shaped casing around the filling. Repeat with all dough (you should have about 6 papas).


4.Heat 1 ½ - 2 inches (4 – 5 cm) of oil in a pan to about 350 – 375° F (175 - 190°C).

5.Dip each papa in the three bowls to coat: first roll in flour, then dip in egg, then roll in bread crumbs.


6.Fry the papas (in batches if necessary) about 2-3 minutes until golden brown. Flip once in the middle of frying to brown both sides.


7.Drain on paper towel and store in a 200ºF (95ºC) (gas mark ¼) oven if frying in batches.


8.Serve with salsa criolla (or other sauce of preference) immediately.


PAPAS RELLENAS WITH SALSA CRIOLLA AND SEAFOOD CEVICHE. THESE WAS A PERFECT MEAL!!!!!


SALSA CRIOLLA: MY NEW FAVORITE SALSA ;)


Ingredients

2 medium red onions, cut in half and very thinly sliced (as half-circles)

1/2 chili pepper (your preference)

1 tablespoon vinegar

Juice from 1 lime

Salt and pepper to taste


1.Soak the onions in cold salt water for about 10 minutes to remove bitterness. Drain.

2.In a medium bowl, combine the onions with the rest of the ingredients, season with salt and pepper.

3.Cover with plastic wrap and refrigerate for at least 30 minutes for the onions to macerate and the flavors to combine