Thursday, June 2, 2011

GINATAANG BILO- BILO /PINALTOK (GLUTINOUS RICE BALLS WITH COCONUT MILK)- MAY KULINARYA THEME

Better late than never;) Sefie and Connie chose Flores de Mayo for the Kulinarya Cooking Club theme for May. Flores de Mayo (Flowers of May) is one of so many events i look forward to. Pls. click http://en.wikipedia.org/wiki/Flores_de_Mayo for a better idea on what this means.

To me, May also means a collage of colors. Not only because of the beautiful flowers, the Procession in honor of  The Virgin Mary,  but because of  the fiesta celebrations, Santa Cruzan and the food!

This is why i opted for Bilo-Bilo because of the colors and a popular snack served during fiestas;) 

Ingredients:
1 pack glutinous rice flour
½ cup water (for the dough) and more if necessary
1 cup water to be mixed with the coconut milk
2 cups sugar
2 cans coconut milk
1 cup tapioca pearls
1 can jackfruit (langka), cut into strips

1. 
 
Mix glutinous rice flour and water into dough. Add more water if needed. Shape into balls depending on what size you want your bilo bilo to be. I prefer a size of an olive. These will expand as they get cooked. I use only half of what was made and freeze the rest of the dough for future use.* (I'D LIKE TO MAKE THEM ALL AT ONCE TO SAVE SOME TIME FOR NEXT BILO BILO)

 2. In a large pot, bring 1 can coconut milk, 1 cup water, 2 cups sugar, and tapioca pearls to a boil. Tapioca pearls are cooked when they turn transparent in color, and  rice balls.are soft and chewy.


3. Add remaining coconut milk and jackfruit when tapioca pearls and rice balls are cooked. At this point taste and adjust the sugar. Boil for 5 more minutes.

4. Serve hot.


Make dough balls, a size of an olive.


.


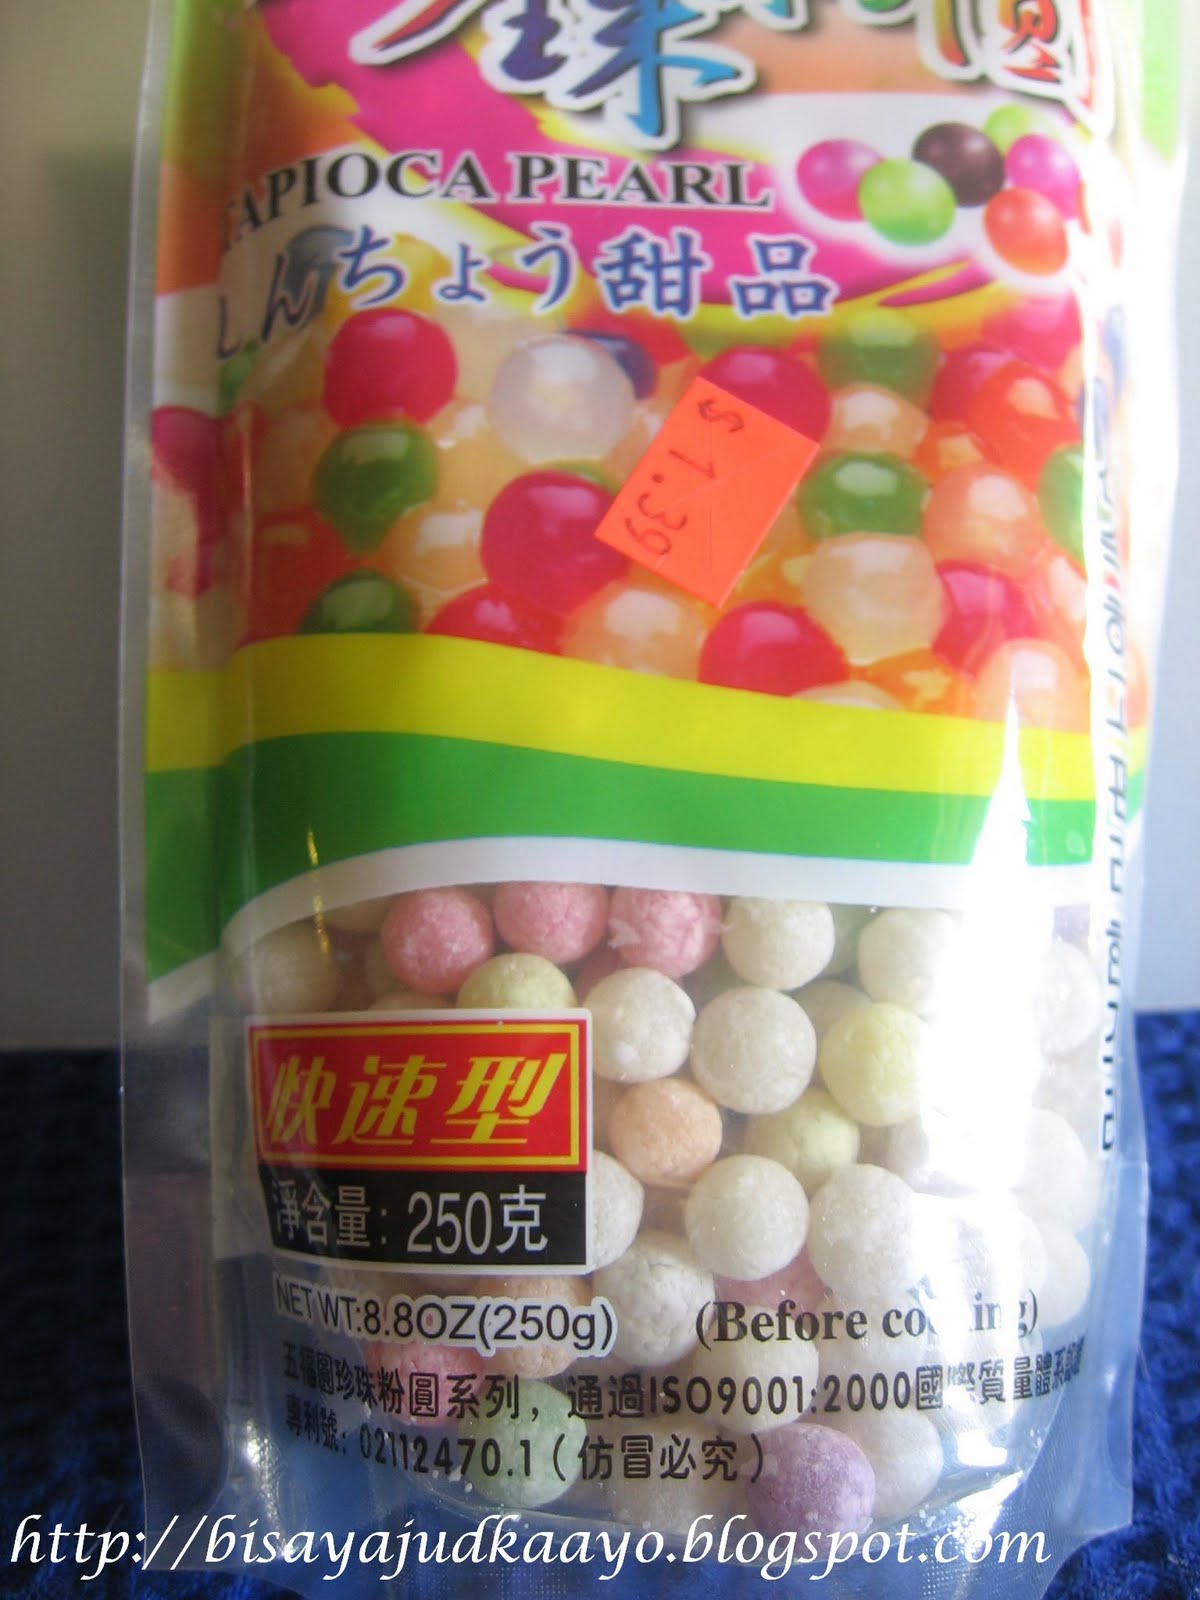
Use the colored tapioca pearls.


Colorful Tapioca Pearls


Bring the glutinous rice balls, tapioca pearls, sugar, coconut milk and water to a boil until tapioca pearls and glutinous rice balls are cooked.


Add more coconut milk, jack fruit. Taste and adjust sugar and the coconut milk.


        How to freeze the dough balls. Arrange them on a sheet pan like you would a cookie dough and put in the freezer uncovered for few minutes or until it hardens. Then transfer in a freezer bag. Freeze for future use.


Thursday, April 28, 2011

Mango Refrigerator Cake (April Kulinarya Theme)

This is my blog for this month's - April Kulinarya theme. Our host Lala of  This Little Piggy challenged us w/ DECADENCE food and the first that came to mind is mango!!! It is Asian mango season here. I know, you'll probably say whattt? they are always available. Yes, the greenish, reddish type of mango which i don't like. and no, i'm not a snub, i'm just spoiled ha!ha!.. Try the other variety of mango which is commonly called Asian mango or Atulfo, i'm sure you'll agree with me. .Asian mangoes are way better. They are sweeter and not fibrous at all. 


This is just to compare and show how big these mangoes are.


I've blogged mango dishes please click http://bisayajudkaayo.blogspot.com/search/label/Mangoes.
Mango Cheesecake
http://bisayajudkaayo.blogspot.com/2010/08/mango-cheesecake.html


Mango Ice Cream
http://bisayajudkaayo.blogspot.com/2009/08/mango-ice-cream.html


This time i made MANGO REFRIGERATOR CAKE. This dessert is easy, no baking needed and oh so good!!!


THE  QUANTITY/MEASUREMENT FOR THIS DISH ARE ESTIMATES.  I BELIEVE THAT IT WILL REALLY DEPEND ON HOW MUCH YOU'D LIKE TO MAKE AND HOW MUCH MANGOES YOU'D LIKE TO PUT IN YOUR CAKE.


Cake and Mango
Ingredients:

5 packs of broas (Lady fingers) add more if you want more layers.

6 mangoes sliced thinly (depend on the size of the mango)


Directions:
1. Slice mangoes thinly, discard the seeds. Set aside.
2. Coat the baking pan with softened butter.

3. Arrange and layer broas on bottom of the pan.
4. Pour and spread about 1/2 cup of the buttercream frosting.
5. Arrange sliced mangoes.

6. Repeat process, layer broas, then buttercream then mangoes.
7. The top most must be the buttercream layer.
8. Arrange the sliced mangoes. I made two different ways to arrange the mangoes. Please see below pictures.
9. Chill in the fridge for an hour or more and Enjoy!!!


Buttercream Frosting
Ingredients:


2 cans 18.7 oz. condensed milk
2 sticks unsalted butter, softened
2 t vanilla extract
1/2 cup confectioners' sugar (as needed)

Directions:
1. Beat softened butter, condensed milk, vanilla, and slowly add the  confectioners' sugar..

2. Continue beating until frosting  reaches desired consistency. I want mine a bit loose.


Rosette mangoes as garnish.


    Arrange sliced mangoes this way.


    A slice of the cake the following day. The color of the mango will change but the flavor is not compromised. Still delicious!!


      Thursday, April 14, 2011

      The Daring Cooks’ April, 2011 Challenge: EDIBLE CONTAINERS (savory)

      Well, hang tight and you will be in for a ride! This months Daring Cooks Challenge is about Edible Container. Kudos to Renata of Testado, Provado,& Aprovado. I can say that this is one challenge that i have enjoyed immensely. Not only because this challenge would entail a prize, it basically didn't call for a specific recipe for us to follow but instead gave us the freedom to go outside the box.

      This challenge indeed challenged each member to be creative and creative we were. Oh my goodness, such a slew of brilliant ideas. Check  DC member’s Creations.

      I made three edible containers. I opted to blog them separately because i believe each dish warrants a blog of their own;) Oh boy...what was I thinking?!!! Three dishes??? But really in all honesty..it was well worth it!!!! SO PLS. CLICK ON EACH DISH TO CHECK THE RECIPES.

      Let's start with my "outside the box" edible container.
      SZECHUAN CHICKEN ON CRISPY CHICKEN SKIN BOWL


      The "outside the box" part of this dish is the bowl. I tried to experiment on both the skin from the leg quarters and the breast you would think the ones from the leg quarters would be sturdy/firm enough to form a bowl but surprisingly the skin from the breast was the ones that shaped into a perfect bowl.


      According to my guinea pig (my family) this was really good, the crispy skin went well/complimented with the filling.


      CONCLUSION:

      Taste wise -We really love the combination and the addition of the crispy chicken skin.
      Presentation wise - Beautiful, very appetizing

      But if you ask me if I’ll do it again? Yes, of course but not making it into a bowl, I’d crush the chicken chicharon and add it on top of a bowl of rice and Szechuan chicken. This is a must try!!!


      My second dish "Not so new dish" Edible Container
      FILIPINO SEAFOOD CHOPSUEY ON CRISPY NOODLE BOWL


      Now this one is a Filipino dish. What made this as my challenge dish? It’s the noodles.


      Usually the noodles are just deep fried then top with the chopsuey. What i did was form the noodles into a bowl or nest.


      CONCLUSION:

      TASTE WISE: Yes, Yes....Crispy noodles are always good! You can actually make this with chicken, pork or beef. A must try dish too!

      PRESENTATION WISE: Making the crispy noodles yes but forming them into a bowl not necessary but if you want to impress your guest then by all means make a crispy bowl.

      *** The bowl will collapse as soon as you pour the chopsuey. The crispy noodles will absorb the sauce quickly.

      OKAY, I WILL SAY THIS...I WILL MAKE THE CRISPY NOODLES AGAIN BUT WITH A FILLING THAT DOES NOT HAVE MUCH SAUCE OR GRAVY. AN ASIAN SALAD WILL BE PERFECT!!!


      My last dish for April DC Challenge - "Must try dish" Edible Container.

      XIAOLONGBAO-SHANGHAI STEAMED SOUP DUMPLINGS


      I first learned about this from my nephew who worked in China. I was so intrigued that i had to put this in my "to do list". This has been in my to do list for the longest time and i finally have no excuse not to make it this time. I thought what a perfect dish for the challenge. XLB could be served 2 ways, a huge dumpling with a straw and the ones that I made. There are a lot of recipes around but i made my own version, the inspiration of this recipe is from my "Chinese Cooking" Cookbook.


      XIAOLONGBAO-STEAMED SOUP DUMPLINGS (XLB) small steaming basket is commonly known as Shanghai Steamed Soup Dumplings, are traditionally filled with broth and pork but i added quail eggs on mine. The broth inside is made by using some meat gelatin w/c melts when steamed. 


      CONCLUSION:
      I love, love it but if you ask me will i make it again? Perhaps on special occasion! Okay, okay..here are the reasons.


      1. Can I say...LABORIOUS!!! Too much work can you believe that! lol!!!. I had a hard time with the pleating!!

      2. These needs to be served right off the steamer otherwise you will loose the broth. I believe it's absorbed by the dough because I didn’t have any leak on the steamer or on the plate. SO NOT GOOD FOR PARTIES.

      3. Lets just say I'd leave this to the experts! I rather sit down, order lots of XLB's and enjoy them. But if you haven't tried or tasted these and you're up to making them no matter how long the process will be...go for it!!! It's really good!!!

      AT LEAST I CAN NOW SAY THAT I'VE TASTED AND MADE THESE BEAUTIFUL JEWELS!!!! ANOTHER DISH DONE ON MY TO DO LIST!!!


      THANK YOU RENATA FOR THIS CHALLENGE!!!

      SHANGHAI STEAMED SOUP DUMPLINGS -XIAOLONGBAO

      Finally, my last dish for April DC Challenge - One of my "Must try dish" Edible Container. I first learned about this from my nephew who worked in China. I was so intrigued that i had to put this in my "to do list". This has been in my to do list for the longest time and i finally have no excuse not to make it this time. I thought what a perfect dish for the challenge. XLB could be served 2 ways, a huge dumplings with a straw and the ones that i made. There are a lot of recipes around but i made my own version, the inspiration of this recipe is from my "Chinese Cooking" Cookbook.

      Xiaolongbao -(XLB) small steaming basket is commonly known as Shanghai Steamed Soup Dumplings, are traditionally filled with broth and pork but i added quail eggs on mine. The broth inside is made by using some meat gelatin w/c melts when steamed.

      This type of dish are for those who are really determined. Patience and commitment are imperative! Lots of preparation and definitely a 2 days process.


      First step, i made the meat gelatin/soup. A lot of recipes calls for pork bones, chicken bones then add agar-agar or knox. I didn't like the addition of the agar agar so i opted to use pigs feet and chicken feet which i know for a fact are gelatinous and i know i won't need agar agar. I had it in the fridge for a day to congeal.


      For the gelatin/soup:

      1 lb. pigs feet
      1 lb. chicken feet
      1 small onion chopped
      2 cloves garlic
      water
      pinch of salt and white pepper

      Wash the bones and add them into a pot of boiling water. Boil for at least 10 minutes and then turn off the heat. Drain and rinse the bones thoroughly this is an important step. The rinsing will give you a clear broth.

      Place all ingredients in a large pot. Bring to a boil. Simmer over low heat until liquid has reduced by half, about 2 hours.

      Skim the scum constantly to keep soup clean and clear. Strain stock into a bowl. Discard solids.

      Allow the liquid to cool down in the fridge to congeal and form into jelly. The broth can be kept in the fridge for up to 5 days or freeze for months.


      Second step - The following day i made the dough had it rest for 30 minutes as i was making the pork filling. Again some recipes call for shrimp and ground pork but i decided the later only. After that it was assembly time.

      For the Dumpling:

      1 C all purpose flour
      1/2 C boiling water

      Put flour into a bowl. Mix in boiling water with a fork or chopsticks. Work dough several minutes until it holds together, then knead on a lightly floured board until smooth and velvety (about 10 minutes).

      Cover and let rest at room temperature for 30 minutes

      Roll dough into a log 24 inches long, cut log into 1 inch lengths, then cut each length in half to make 48 pieces.

      Keep remaining pieces covered to prevent drying as you shape each dumplings


      Third Step - make the filling

      For filling:

      1 lb. ground pork
      2 dozens quail eggs (hard cooked) - some of my dumplings didn't have the eggs
      1/3 C water chestnuts, finely chopped
      1 1/2 T soy sauce
      1/2 t salt
      1/8 t pepper
      1/2 t minced fresh ginger
      2 t dry sherry
      1 t sesame oil

      Combine pork, water chestnuts, onion, soy, salt, pepper, ginger, sesame oil and sherry until well mixed.
      Fourth Step - Cook quail eggs

      Check for cracked eggs. Wash eggs and place your eggs in a pot, cover with enough water and bring to a boil for 5 minutes max. Cool egg under running water. Gingerly crack the shells around then start peeling. Peeling is easy when you crack the shells.


       Fifth Step - Assemble the dumplings.


      Roll out each piece of dough into a thin round shape and place a spoonful of the filling in the center including at least 2 or 3 "gelatin broth" cubes and a quail egg.

      Gather up the edges, pleating them together, then bring to a point, pinch together and twist to give the right shape. Flatten the bases so that they will stand upright


      Obviously i had a hard time pleating them especially the ones w/ the egg on it.

      Place on baking sheet. Repeat the process covered with moist towel to prevent dumplings from drying.

      You can refrigerate or freeze some at this stage.

      Prepare the steamer


      Line each layer of bamboo steamer basket with cabbage leaves ( cabbage will give extra flavour), wax paper or parchment paper; place over wok filled with enough water to reach just below bottom of bamboo steamer basket. Place dumplings making sure they are spaced apart to prevent the dumplings from sticking to each other, otherwise you'll have a mess and leakage. Steam for about 15 minutes over high heat until done.

      Serve immediately with the dipping sauce.

      Mine looked totally different from the pictures of the XLB. I think i need to pleat about a hundred for me to perfect XLB!! LOL!!


      For the Dipping Sauce:

      1/2 C vinegar
      1/2 C soy sauce
      1 t sesame oil

      Well...perfect pleated dumplings or not...they are "The Bomb"....i added the dipping sauce into the dumplings. Wow!!! Amazing that you get to have your soup inside a dumpling. EAT THEM WITH CAUTION THO' THEY ARE PIPING HOT!!!


      Conclusion:
       
      I love, love it but if you ask me will i make it again? Perhaps on special occasion!  okay, okay..here are the reasons.
      1. Can i say...LABORIOUS!!! Too much work can you believe that! lol!!!. I had a hard time with the pleating!!
      2. These needs to be served right off the steamer otherwise you will loose the broth. I believe it's absorbed by the dough because i didn't have any leak on the steamer nor on the plate.  SO NOT GOOD FOR PARTIES.
      3. Let's just say I'd leave this to the experts! I rather sit down, order lots of XLB's and enjoy them. But if you haven't tried or tasted these and you're up to making them no matter how long the process will be...go for it!!! It's really good!!!
      AT LEAST I CAN NOW SAY THAT I'VE TASTED AND MADE THESE BEAUTIFUL JEWELS!!!! ONE DISH DONE ON MY TO DO LIST!!!