Saturday, March 19, 2011

ATCHARANG SITAO (Pickled Long Beans)- KCC Theme for March

For this months challenge our host Erika of ivoryhut challenged Kulinarya members to "showcase" vegetables....the front and center. There is a plethora of Filipino dish that calls for just vegetables, i chose atchara which i believe is a favorite (well, it's our favorite) especially as a side dish for grilled or fried meat or seafoods.

Atchara basically means pickled vegetables. The most popular atchara is the green papaya which i love but i opted to pickle long beans also called string beans. This recipe works great for almost all vegetables, such as okra, radish, peppers and more.

Ingredients:

2 C apple cider vinegar
2 C sugar ( or less if you want it tart)
2 T salt
1 t whole peppercorns
1 lb long beans (usually sold in bundles)
4 cloves garlic, julienned
1 medium sized carrots (julienned)
1 knob of ginger (julienned)
1 medium red onions or sweet onions (julienned)


1. Bring vinegar, sugar and salt to a boil in a large saucepan.
2. Arrange all the vegetables, spices in a cleaned sterilized jar.
3. Pour hot vinegar liquid over the beans and cover.
4. Set aside to cool.
5. Place cooled jars in the refrigerator.
The atchara is ready in a day or two and will keep refrigerated for several weeks which never happen in our house especially during "grilling season"! Oh it's gone in few days!

Some recipes call for cooking the vegetables first, and that may be necessary if you’re canning them. But cooking them first makes for mushy pickles, so I prefer to skip that step. Just make sure to really wash the beans really good!  I believe the fresher the long beans, the crunchier the pickle.


Thanks, Erika for a great challenge!

Thursday, March 17, 2011

BUKO PANDAN CHEESECAKE

So i made this as a dessert for St. Patrick's Day. Nope this is not an Irish dessert not even close, the color yes! Actually i added a really tiny bit of green color just so I'd get the perfect hue.

Buko and Pandan are ingredients for a delicious Filipino dessert. Buko is a young coconut, the meat is soft and gelatinous. The liquid is turned to coconut juice. These are available in Asian markets, fresh and in cans.

Pandan is a tropical plant, ubiquitous to Asian countries commonly used both for dessert and savoury dishes. Pandan leaves can be purchased at Asian markets, and may be bought fresh or, more likely, frozen and are also available as an extract form which is what i used for this dessert. Pandan is fragrant and aromatic with a distinct flavor.

I have the hankering for buko pandan for the longest time but i don't have enough gelatin to make the pandan gelatin. But i have 4 boxes of cream cheese in the fridge, i can't even remember why?..  i had the "ahhhaa" moment..why not make Buko Pandan Cream Cheese and what a perfect time to make them. Green for St. Patrick's day! ;)

Oh and did i mention this is a no bake cream cheese? I don't have enough eggs in the fridge hence the no bake recipe. I didn't want to go out just for eggs!

This turned out to be soooo goood! Got my fix for some buko pandan;) I highly recommend this dessert!

INGREDIENTS FOR  CRUST:

1 cup Graham Crackers (crushed)

1/3 T butter melted

INGREDIENTS FOR CREAM CHEESE FILLING:

2 T butter
2 T honey
2 T buko liquid (to be used with gelatine)
2 T pandan extract**
2 t gelatine dissolved in 2 T buko liquid
1 can condensed milk
2 block of 8 oz. Cream Cheese, softened
**add a little of green food coloring if you want a darker shade of green.
 
Combine graham crackers and butter. Press into a base of a 20cm spring form pan. Chill.


Heat condensed milk, honey and butter in a saucepan until combined. Boil for 10 minutes stirring continuously.

Beat cream cheese until soft, stir in gelatine mixture and condensed milk mixture. Pour into prepared crumb base. Chill for 2-3 hours.
 
 
INGREDIENTS FOR THE BUKO:
 
1 can of buko (young coconut) Sliced thinly
1 T corn syrup
1/4 C buko liquid
1/4 C sugar
 
Bring all the ingredients to a boil until syrup consistency.
Garnish on top of the chilled cream cheese.
 
 
BUKO (YOUNG COCONUT) IN CAN


PANDAN EXTRACT


GRAHAM CRACKERS (CRUSHED)
**I LINED THE SPRINGFORM PLATE WITH PLASTIC WRAP JUST TO AVOID LEAKAGE.***


CREAM CHEESE MIXTURE


LOOK HOW PRETTY!! ;)
 
 A SLICE FOR ME WITH MORE BUKO ON TOP


THIS IS A KEEPER! 


Tuesday, March 15, 2011

Papas Rellenas Cuban Style

Well, isn't it obvious i can't get over the papas rellenas yet, i have to post another blog! This time i used Marina's recipe, who happen to be my dear friend and Food Editor of Taste of Homes. Her recipe is the Cuban version. Both papas recipes are similar w/ the addition of tomato sauce and sweet peppers for Marina's version. Oh and the shape, Peruvian is oval while the Cuban is round. Check my DC Challenge Papas Rellenas

Ingredients:

1 lb. lean ground beef or sirlion
1 small onion, minced
1 small green bell pepper, diced small
½ cup or more tomato sauce
½ cup thinly sliced green olives
½ cup dark raisins
Salt & pepper to taste
Paprika to taste
8 boiled Russet potatoes, mashed
1 tsp. salt
1 tsp. pepper
1 tsp. garlic powder
1-2 large eggs, beaten
1-2 cups seasoned bread crumbs


Fry ground beef, onions and bell pepper in pan.
Add tomato sauce and simmer until cooked.
Season meat with salt, pepper and paprika to taste.
Add olives and raisins if desired.
Stir well and let meat cool.
Seasoned plain mashed potatoes with salt, pepper, and garlic powder.
Place small amount of mashed potato into palm of hand (golf ball size).
Flatten potatoes into small round disc.
Add beef mixture intocenter of disc.
Enclose beef mixture with potatoes. (Make sure beef mixture is completely covered.) Gently dip stuffed potato ball into beaten eggs then into bread crumbs.
Fry until golden brown in a deep fryer or deep frying pan.
Potato balls may also be baked at 450 degrees until brown and crispy about 20 minutes.

TIP:

DO NOT ADD BUTTER OR MILK TO MASHED POTATOES.


Monday, March 14, 2011

The Daring Cooks March 2011Challenge: ¡Me Encanta PerĂº! - Ceviche and Papas Rellenas

This month's challenge  was hosted by Kathlyn of Bake like a Ninja . We tackled Peruvian dishes for this month which i enjoyed very much. She gave us the choice to do both Ceviche and Papas Rellanas or do just one . I opted to do both even if at first i was a bit iffy with ceviche. See, ceviche is not new to me, in fact i love, love them. Filipinos call it Kilawin or Kinilaw depending on w/c province you come from. There are two ways to prepare our version one is to add fresh coconut cream and the other one is just like the ceviche. I know that in order for you to make "Kilawin/Ceviche" it is imperative to have FRESH seafood, this is the reason why i was not sure if i could make the ceviche.

But then i thought of sashimi/sushi hhmmm...Yes!Yes! i can make my ceviche using sashimi grade seafood, so off i went to my favorite Japanese market and bought a little of the sashimi stuff, didn't even care about how expensive they were;) My mission was to do the challenge and to fix my craving! I haven't had kilawin/ceviche in yeaarrrssss!!!!  So, Thank You Kathryn for the push!


The Japanese Store i always go to! Clawson, Michigan.


THESE ARE THE SASHIMI SEAFOOD I BOUGHT. A BIT EXPENSIVE BUT IT WAS WELL WORTH IT!


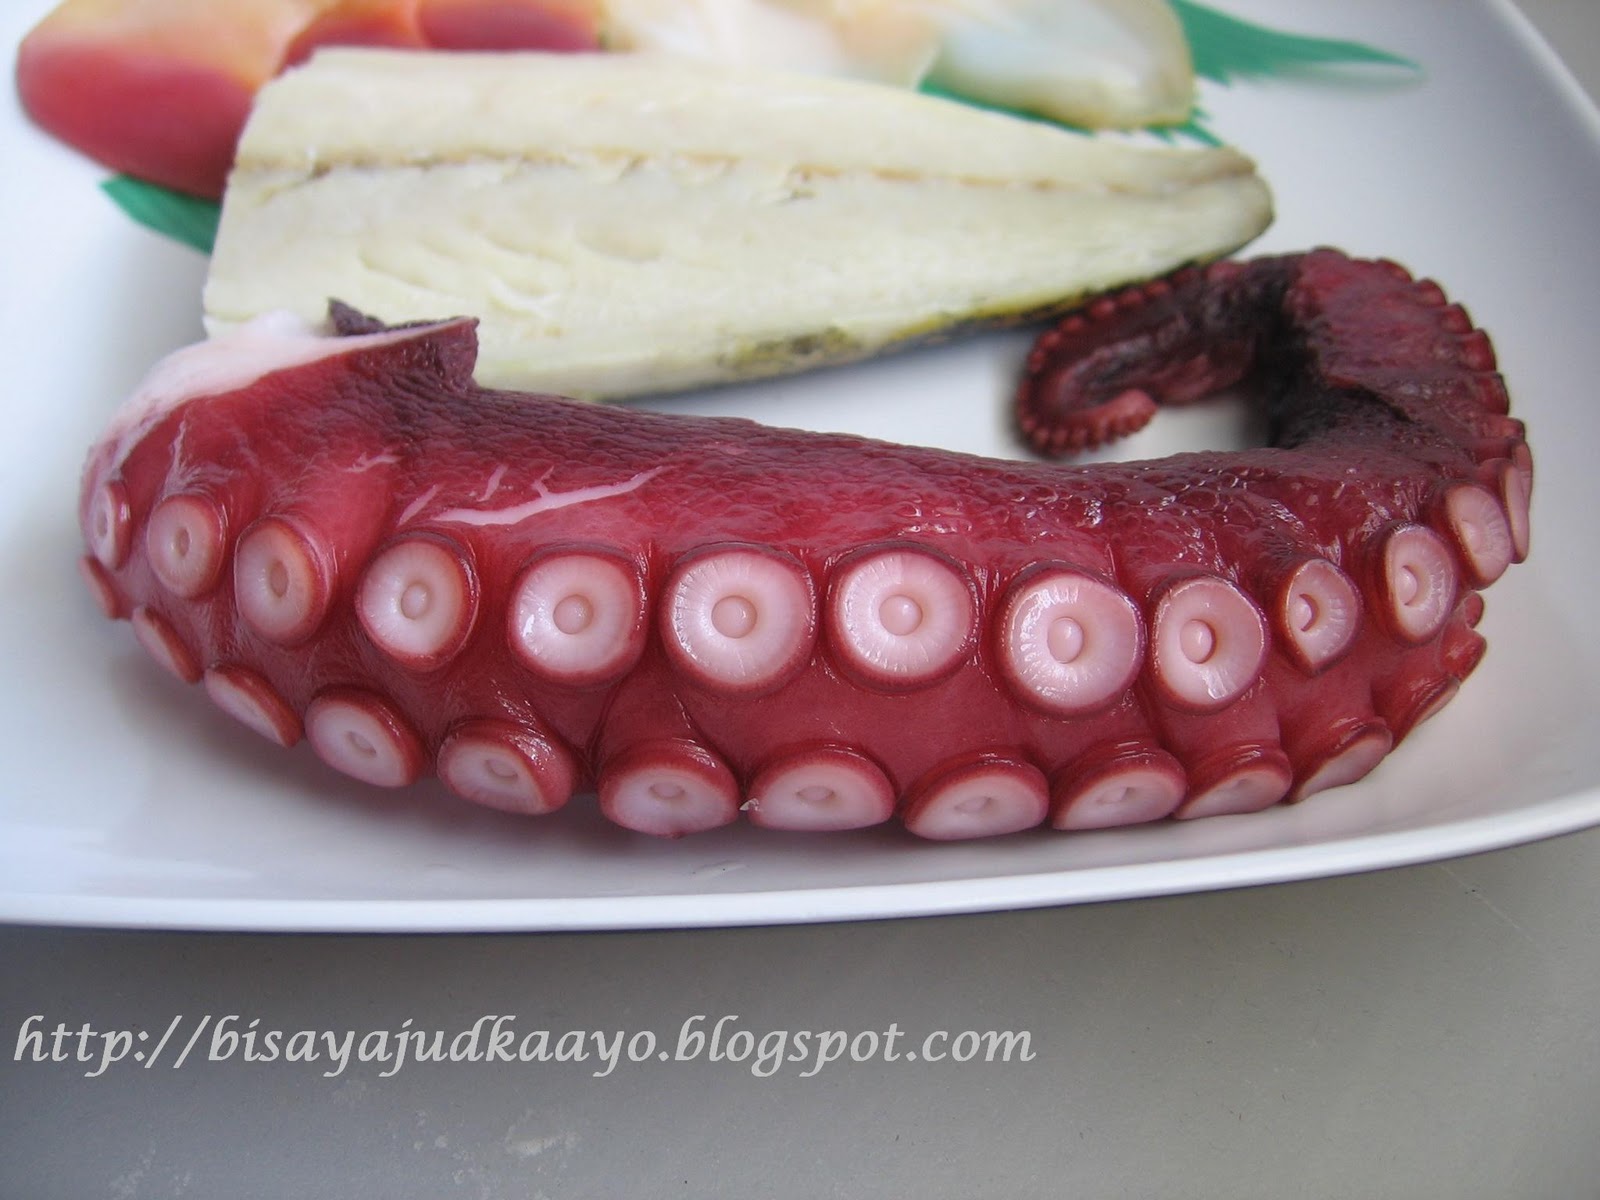
TAKO (OCTOPUS) COOKED

SHIMESABA (MACKEREL)  


HOKKIGAI CLAM (SURF CLAM)


TSUBUGAI CLAM (PEARL CLAM)

THIS BROUGHT ME BACK LOTS OF MEMORIES.


Cheviche de Pescado (Fish Ceviche):


Ingredients

2 lbs. (about 1 kg) firm white fish (scallops or other seafood may be substituted)*
2 garlic cloves, mashed
1 chili pepper, minced (I USED THAI BIRD CHILI)
1 cup (240 ml) freshly squeezed lime juice (between 8-12 limes)
Fresh juice only, no bottled. Can use lemons in lieu of limes.
1 tablespoon (15 ml) (4 grams) (1/8 oz) fresh coriander (cilantro), finely chopped
1 red onion, thinly sliced lengthwise
Salt and pepper (to taste)

Garnish: (DIDN'T HAVE THESE, I FIGURED I DON'T HAVE TO SINCE I SERVED MY CEVICHE W/ MY PAPAS)

1 large sweet potato
1 large ear of corn
Lettuce leaves

Directions:

1.Boil sweet potato and corn (separately) if using for garnish. Allow to cool. (Can be done hours or even a day in advance)

2.Wash and trim your fish. Slice into pieces between ½ inch (15 mm) cubes to 2 inch (50mm) pieces, depending on taste.**
3.Place fish in a non-reactive, shallow pan in a thin layer. Season with salt and pepper.
4.Combine lime juice, chili pepper, coriander and garlic. Pour mixture over fish. Stir lightly to expose all the fish to some of the lime juice mixture.
5.Put sliced onion on top of fish as it “cooks”
6.Let fish stand for 10 minutes.*** Lift fish out of the lime juice and plate individual portions ,**** garnishing with lettuce, slices of sweet potato and slices or kernels of corn if using.

* It is important to use high quality, really fresh fish. You can use previously frozen (I’ve been using it because I am too cheap to buy this much sashimi grade fish), but it’s not as good. The better your fish, the better your ceviche.

** The fish is going to “cook” in the lime juice – how thick you make the pieces will determine how much the fish cooks, so keep your own preference in mind when you are cutting the fish up.


PAPAS RELLENAS the other challenge w/c i also love. I loved them that i have to make it twice. Once again...thank you, Kathryn;)


Papas Rellenas (de carne):  DC  Challenge/ Kathryn's recipe


Makes 6
Ingredients

For the dough:

2¼ lb (1 kg) russet potatoes

1 large egg (I USED QUAIL EGGS)


For the filling:

2 tablespoon (30 ml) of a light flavored oil

½ lb (250 grams) ground (minced) beef

6 black olives, pitted and chopped (use more if you love olives)

3 hard boiled large eggs, chopped

1 small onion, finely diced (about 1 cup (240 ml))

½ cup (120 ml) (90 gm) (3 oz) raisins, soaked in 1 cup (240 ml) boiling water for 10 minutes, then minced

1 finely diced aji pepper (ok to sub jalapeño or other pepper – if you are shy about heat, use less)

2 cloves garlic, minced or passed through a press (if you love garlic, add more)

1 teaspoon (5 ml) (4 gm) (1/8 oz) ground cumin (use more if you like cumin)

½ teaspoon (2.5 ml) (2 gm) (1/16 oz) sweet paprika

¼ c. white wine, water or beef stock for deglazing

Salt and pepper to taste


For the final preparation:

1 large egg, beaten

1 cup (240 ml) (140 gm) (5 oz) all-purpose flour
Dash cayenne pepper

Dash salt

1 cup dry (240 ml) (110 gm) (4 oz) or fresh (240 ml) (60 gm) (2 oz) bread crumbs (you can use regular, panko, make your own or use store-bought) (I USED PANKO BREADCRUMBS)


Oil for frying (enough for 2” (50 mm) in a heavy pan like a medium sized dutch oven)

Directions:

In order to save time, you can boil the potatoes, and while they are cooling, you can make the filling. While that is cooling, you can make the potato “dough.” In this way, little time is spent waiting for anything to cool.

For the dough:

1.Boil the potatoes until they pierce easily with a fork. Remove them from the water and cool.

2.Once the potatoes have cooled, peel them and mash them with a potato masher or force them through a potato ricer (preferred).

3.Add egg, salt and pepper and knead “dough” thoroughly to ensure that ingredients are well combined and uniformly distributed.

While the potatoes cool down before finishing the dough, you can make the filling:

1.Gently brown onion and garlic in oil (about 5 minutes).
2.Add the chili pepper and sauté for a couple more minutes.
3.Add ground beef and brown.
4.Add raisins, cumin and paprika and cook briefly (a few seconds).
5.Deglaze the pan with white wine.
6.Add olives and cook for a few moments longer.
7.Add hard boiled eggs and fold in off heat.
8.Allow filling to cool before forming “papas.”

Forming and frying the papas:
1.Use three small bowls to prepare the papas. In one, combine flour, cayenne and salt. In the second, a beaten egg with a tiny bit of water. Put bread crumbs in the third

2.Flour your hands and scoop up 1/6 of the total dough to make a round pancake with your hands. Make a slight indentation in the middle for the filling.


3.Spoon a generous amount of filling into the center and then roll the potato closed, forming a smooth, potato-shaped casing around the filling. Repeat with all dough (you should have about 6 papas).


4.Heat 1 ½ - 2 inches (4 – 5 cm) of oil in a pan to about 350 – 375° F (175 - 190°C).

5.Dip each papa in the three bowls to coat: first roll in flour, then dip in egg, then roll in bread crumbs.


6.Fry the papas (in batches if necessary) about 2-3 minutes until golden brown. Flip once in the middle of frying to brown both sides.


7.Drain on paper towel and store in a 200ºF (95ºC) (gas mark ¼) oven if frying in batches.


8.Serve with salsa criolla (or other sauce of preference) immediately.


PAPAS RELLENAS WITH SALSA CRIOLLA AND SEAFOOD CEVICHE. THESE WAS A PERFECT MEAL!!!!!


SALSA CRIOLLA: MY NEW FAVORITE SALSA ;)


Ingredients

2 medium red onions, cut in half and very thinly sliced (as half-circles)

1/2 chili pepper (your preference)

1 tablespoon vinegar

Juice from 1 lime

Salt and pepper to taste


1.Soak the onions in cold salt water for about 10 minutes to remove bitterness. Drain.

2.In a medium bowl, combine the onions with the rest of the ingredients, season with salt and pepper.

3.Cover with plastic wrap and refrigerate for at least 30 minutes for the onions to macerate and the flavors to combine

Monday, March 7, 2011

Chef Takashi's Braised Pork Belly (My version- The pre google era)

Do you remember the pre google era?. I do. Do you remember how you got your recipes? I do! Oh i remember those days:

1. I was glued to the TV every Sunday watching Julia Child's "The French Chef" and Stephen Yan's "Wok W/ Yan" with my pencil and paper on hand. I loved wok w/ yan's aprons;).

2. Tear pages from a magazine especially at M.D.'s office. Shhh! ;) oh please don't tell me you haven't done that before!

3. Go to the library and borrow some cookbooks or copy/ write them down. Nooo...not tear the pages!!!...thought of that before but never did, too scared, I'd get in trouble! lol!!!!

4. From my mother, MIL, grandma and relatives. The only problem w/ this source? you did not get the exact measurements. You usually get the "oh, i don't know..maybe a handful of this, half a palm of that or i have this special spoon or ladle that i make as my standard base for my measurement".  But i managed to get my mama's exact measurements by cooking the dish with her and document the process step by step!

5. Deconstruct. I still do this up to now. I savor dishes slowly and analyze what spices, herbs etc. are in the dish. In fact this is the reason for this blog.

My sister and I recently visited my daughter in Chicago and dined at Takashi (a Michelin Starred Restaurant) where she work at the garde manger station. We had a wonderful time and enjoyed everything we had from the appetizer to the dessert. Now that'll be a different blog. It'll follow.

This blog will be about a specific dish we ordered. OMGosh!! they were sooo good. My sister and i sort of did the " guessing game" or the " i can name that spice/herb in few minutes" lol!!!

I got challenged that i had to replicate the dish sans the googling of the recipe. Just to see if my sister and i did good while deconstructing the dish. To me it was a simple yet complex dish. Layered with wonderful flavors.

We tasted and smell star anise or Chinese 5 spice of some sort. There was soy sauce for sure, since he's Japanese i assumed he used Japanese soy sauce. I thought there was oyster sauce and hoisin sauce. For me the flavor profile is akin to a Filipino adobo hence my addition of vinegar to the recipe. I believe it's the execution and the process  that made this dish so tender and tasteful. The best pork belly ever. A must try dish at Takashi Restaurant.

Aahhh, pork belly, this will be another blog for sure. Just to "showcase" my "love affair" with pork belly! ha!ha!ha!

Okay enough already. Here's how i did my version of Chef Takashi's Braised Pork Belly w/ Steamed Buns. By the way, because i did this the pre google era way..i will have to do the "handful", "a half palmful of this" way! ;p. No, really, i will have to make this again just so i can come up with the measurements i did.

Anyway..i'm posting Chef's Takashi's recipe here as well! Ofcourse!!!!

Ingredients: (My version)

Y: 2

Pork Belly- a pound, with skin please. Cut into cubes.
water - enough to cover the meat
oyster sauce-  to taste*
hoisin sauce - to taste*
soy sauce - to taste*
sherry wine- to taste*
vinegar - about 1/2 T
star anise - 2 pieces
garlic - 1 clove minced
onions - small piece chopped
brown sugar- 1/2 teaspoon*
whole black peppercorns
bay leaf - 2 pieces

Chinese mustard mixed with sriracha **
mesclun salad
steamed buns - store bought but you can make you're own.


* start with a tablespoon then taste, add if needed.
** Side sauce.

Mix all the ingredients from the pork belly to bay leaves. Bring this to a boil until meat is tender.
Remove pork belly from liquid.
Pass the liquid through a sieve to get rid of the "chunky" stuff.
Simmer liquid until it thickens to a sauce like consistency.
Please taste and adjust the seasoning.
As the liquid is simmering, fry the pork until light brown.
Place the fried pork back into the sauce and cook for few minutes. Just enough for the meat to absorb the sauce and look like it was glazed.

Arrange the  pork belly with steamed buns and the salad.

My version was really good but no way was it the same as Takashi's.  I think i made a different dish;). It's a good one,  now i have to call it Pia's braised pork belly! ha! sure...why not!


HERE IS CHEF TAKASHI'S BRAISED PORK BELLY WITH STEAMED BUNS!!  I SOOOO WANT THIS RIGHT ABOUT NOW!!! I HIGHLY RECOMMEND THAT YOU VISIT TAKASHI RESTAURANT, CHICAGO WHEN YOU'RE IN CHITOWN.


Source:   WGNTV.COM  TAKASHI'S BRAISED PORK BELLY


Serves 4:
Pork Belly
1/2 T vegetable oil
9 oz. pork belly
4 cups cold water
1/2 C sake
1 (1 inch) piece fresh ginger, peeled and smashed

Braising Liquid
1 1/2 C cold water
1 C Japanese soy sauce
3/4 cups sugar
1 piece star anise
1/2 t whole black peppercorns
1 cinnamon stick
1 (1 inch) piece fresh ginger, peeled and smashed

Garnishes
1/4 head iceberg lettuce
1/4 cucumber, thinly sliced on the diagonal

Sauce
2 T hoisin sauce
1 t cold water
1 t cornstarch

Mustard Sauce
2 t mustard powder
2 t water

4 steamed buns ( also called "milk steamed bread" available at Asian and Chinese stores), defrosted and halved.

Directions:


To prepare the pork belly, place an 11-inch sauté pan over high heat. Add the vegetable oil and heat until the oil just begins to smoke. Using tongs, carefully place the fatty side of the pork belly in the pan and cook until it turns golden brown, about 2 minutes. Turn the pork belly over and repeat on the other sides until nicely browned all over. Decrease the heat if the oil begins to smoke again.

In a 4-quart saucepan, combine the seared pork belly, the cold water, sake, and smashed ginger, and place over high heat. Bring the liquid to a boil, then decrease the heat; simmer, uncovered, for 45 minutes.

To make the braising liquid, combine all the ingredients in a 4-quart saucepan.

Drain the pork belly and discard the liquid, then add the pork belly to the braising liquid in the saucepan. Bring to a boil, then reduce the heat to a simmer and cover. Braise for 11⁄2 hours, or until the pork belly is very tender.

Transfer the pork belly and braising liquid to a container and refrigerate, uncovered, until cool, then cover and chill overnight. The next day, assemble a steamer on the stove top. You can use a perforated pan, steam basket, or bamboo steamer. Fill the bottom with water, cover, and set over high heat. Decrease the heat to medium once the water comes to a boil.

To prepare the garnishes, discard the outer leaves of the iceberg lettuce. Place 3 large leaves in a bowl of cold water along with the cucumber slices. Set aside. (I like to soak cut vegetables in cold water for 10 minutes because it helps them retain their freshness and crispness.)

To make the sauce, combine 1⁄2 cup of the chilled braising liquid and the hoisin sauce in a small saucepan and set over high heat. In a bowl, mix the water and cornstarch until smooth. When the sauce just begins to boil, whisk in the cornstarch and cook briefly, just until the sauce begins to thicken. Make sure that it doesn't thicken too much--the sauce should run in a steady stream when poured. Set aside.

To make the mustard sauce, mix the mustard powder and water in a small bowl. Set aside.

Remove the pork belly from the remaining braising liquid and cut into 8 slices, each 1⁄4 inch thick. (You'll have leftover pork belly after you cut these slices. See below for other uses.) Place the slices in a single layer side by side with the halved buns on a plate small enough to fit in the steamer (don't put the buns directly on the steamer because they will stick to it). If you have a large steamer, you can do this in one batch. If your steamer is smaller, just steam the pork belly and buns in several batches. Set the plate in the steamer, cover, and cook for 3 to 4 minutes, or until soft and heated through.

While the pork belly and buns are steaming, finish preparing the garnishes by draining the lettuce and cucumber and patting dry with a towel. Cut the lettuce into pieces the size of the steamed buns and stack in 4 small piles. Top each pile with 2 slices of cucumber.

To serve, assemble a braised pork "sandwich" by placing the lettuce, cucumber, and 2 slices of pork belly on half of a bun. Drizzle the sauce over the meat and top with the other half of the bun. Serve the mustard on the side.

Repeat for the remaining 3 buns.


Ideas for Leftover Pork Belly:

Any leftover pork belly and remaining braising liquid can be frozen for up to 2 months. The braising liquid can be used in the Shoyu Ramen broth and the pork belly can be used as a garnish for various ramens or for fried rice.

Friday, February 25, 2011

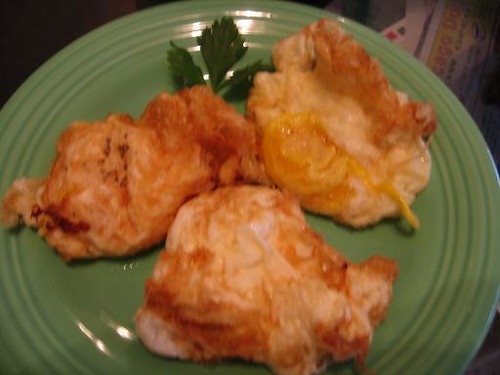
Fried Eggs Dec 18, 2007


Fried Eggs Dec 18, 2007, originally uploaded by TaGa_Luto.
LOL! Made this Dec. 18, 2007. Obviously i had no clue on how to take food pics=;). I will have to make this again and update the photo!

Thursday, February 24, 2011

POTSTICKERS (GYOZA/CHINESE DUMPLINGS)

Y: 1 pack of wonton wrapper about 50 pcs.

Filling:

4 C Napa cabbage (sliced thin)

1 ½ t salt

1 lb ground pork

1/2 lb fresh shrimps (cleaned and minced)

2 to 3 stalks of green scallions (minced)

2 pieces of wood ears mushrooms /black fungus (optional)

1/4 t white pepper

2 ½ T soy sauce

1 ½ T freshly grated ginger

2 cloves of garlic, minced

2 egg whites, lightly beaten

1/2 t sesame oil

Oil and water for cooking

Slurry to seal the edges of the wonton wrappers:

2 T cornstarch

4 T water


Dipping Sauce:

1/2 C soy sauce

2 T rice wine vinegar

Dash of sesame oil

Chili oil to taste

Scallions minced to garnish


Procedure:

For the Dipping Sauce – Combine all ingredients in bowl. Set aside, can also be refrigerated for a week.


For the Slurry – Mix and stir cornstarch and water. Microwave for few seconds until you achieve a paste consistency.

For the Pot stickers:

1. Rehydrate/soak wood ears in luke warm water until tender, then chop.

2. Toss cabbage and salt. Squeeze out the liquid from the cabbage.

3. Combine the cabbage and all the filling ingredients in a bowl and mix thoroughly.

4. Fry a teaspoon of the filling to check and adjust the seasoning.

5. Refrigerate until cold about 30 minutes. It’s easier to wrap the filling when cold.

6. Place a spoonful of filling in the center of the wonton wrapper. Use enough of the mixture to fill out the wrapper completely without overstuffing it. Make sure to keep the edges clean giving you room to enclose the filling w/ the wrapper. Moisten the edges of the wonton wrapper with slurry.

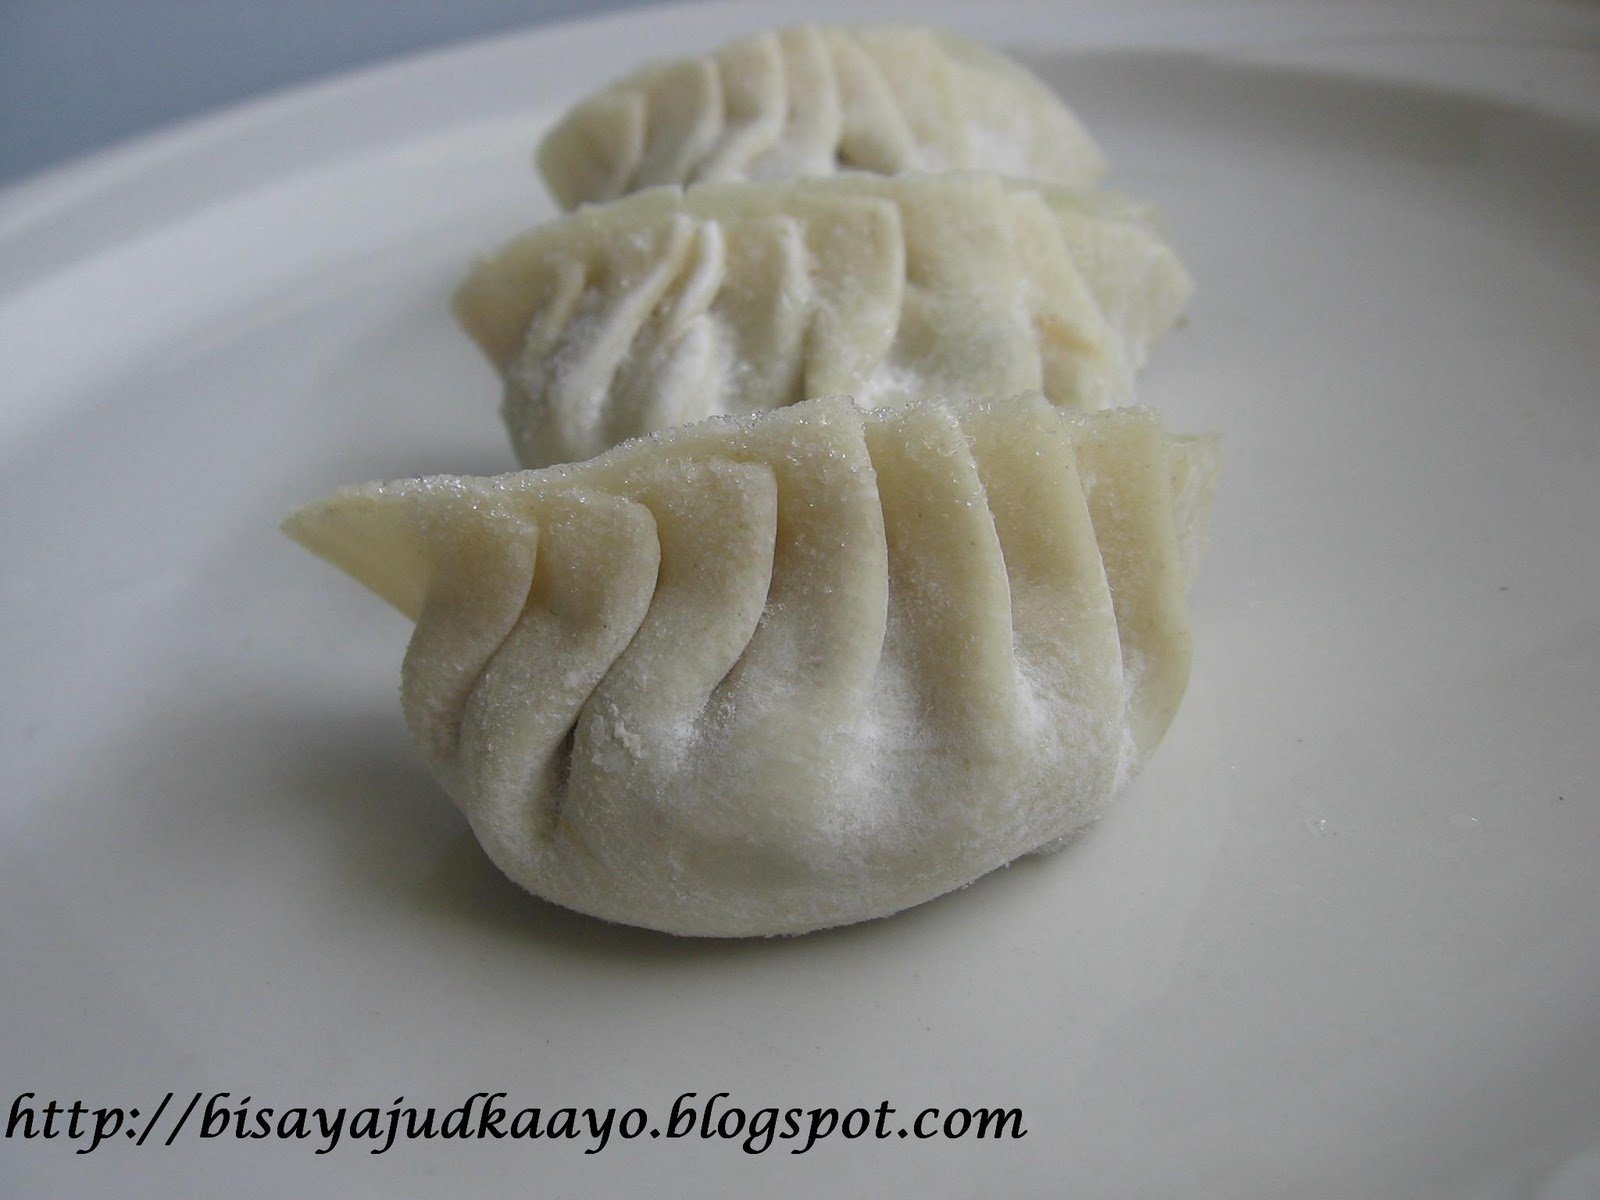
7. Fold the bottom half of the wrapper to meet the top half that you moistened in the previous step and seal. At this point you will have the option to make a pleated or simple pot stickers.

8. Grease bottom of a nonstick pan with oil. Add the pot stickers by batches to the hot pan, laying them flat and being sure not to crowd. Place pan over medium high heat and cook for 4-5 minutes without moving. You want the sides to become golden brown.

9. Pour about 3 T of water and cover the pan for another 10 minutes. This is to steam the pot stickers.

9. Serve with the Dipping Sauce. These are delicious served hot!


I grind my own meat as much as possible.


Mis en place


A spoonful of filling in the middle of the wrapper. Moisten the edges of the wonton wrapper with slurry.


Make the pleats on one side of the wrapper.


It should look like this.


I always make a lot, freeze them for later use. Place the potstickers on a sheet pan and place in the freezer.  Once the potstickers are frozen, transfer them to a freezer bag. The potstickers can be frozen for up to 3 months.


Cook the potstickers without thawing.