Friday, February 25, 2011
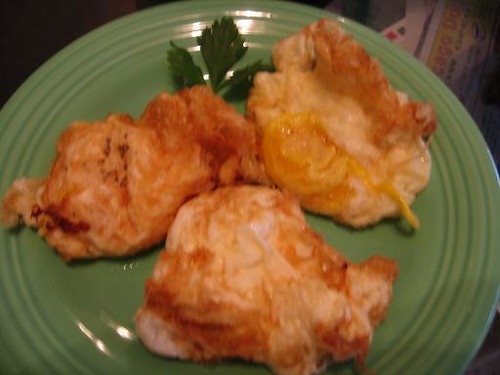
Fried Eggs Dec 18, 2007
LOL! Made this Dec. 18, 2007. Obviously i had no clue on how to take food pics=;). I will have to make this again and update the photo!


Thursday, February 24, 2011
POTSTICKERS (GYOZA/CHINESE DUMPLINGS)
Y: 1 pack of wonton wrapper about 50 pcs.
Filling:
4 C Napa cabbage (sliced thin)
1 ½ t salt
1 lb ground pork
1/2 lb fresh shrimps (cleaned and minced)
2 to 3 stalks of green scallions (minced)
2 pieces of wood ears mushrooms /black fungus (optional)
1/4 t white pepper
2 ½ T soy sauce
1 ½ T freshly grated ginger
2 cloves of garlic, minced
2 egg whites, lightly beaten
1/2 t sesame oil
Oil and water for cooking
Slurry to seal the edges of the wonton wrappers:
2 T cornstarch
4 T water
Dipping Sauce:
1/2 C soy sauce
2 T rice wine vinegar
Dash of sesame oil
Chili oil to taste
Scallions minced to garnish
Procedure:
For the Dipping Sauce – Combine all ingredients in bowl. Set aside, can also be refrigerated for a week.
For the Slurry – Mix and stir cornstarch and water. Microwave for few seconds until you achieve a paste consistency.
For the Pot stickers:
1. Rehydrate/soak wood ears in luke warm water until tender, then chop.
2. Toss cabbage and salt. Squeeze out the liquid from the cabbage.
3. Combine the cabbage and all the filling ingredients in a bowl and mix thoroughly.
4. Fry a teaspoon of the filling to check and adjust the seasoning.
5. Refrigerate until cold about 30 minutes. It’s easier to wrap the filling when cold.
6. Place a spoonful of filling in the center of the wonton wrapper. Use enough of the mixture to fill out the wrapper completely without overstuffing it. Make sure to keep the edges clean giving you room to enclose the filling w/ the wrapper. Moisten the edges of the wonton wrapper with slurry.
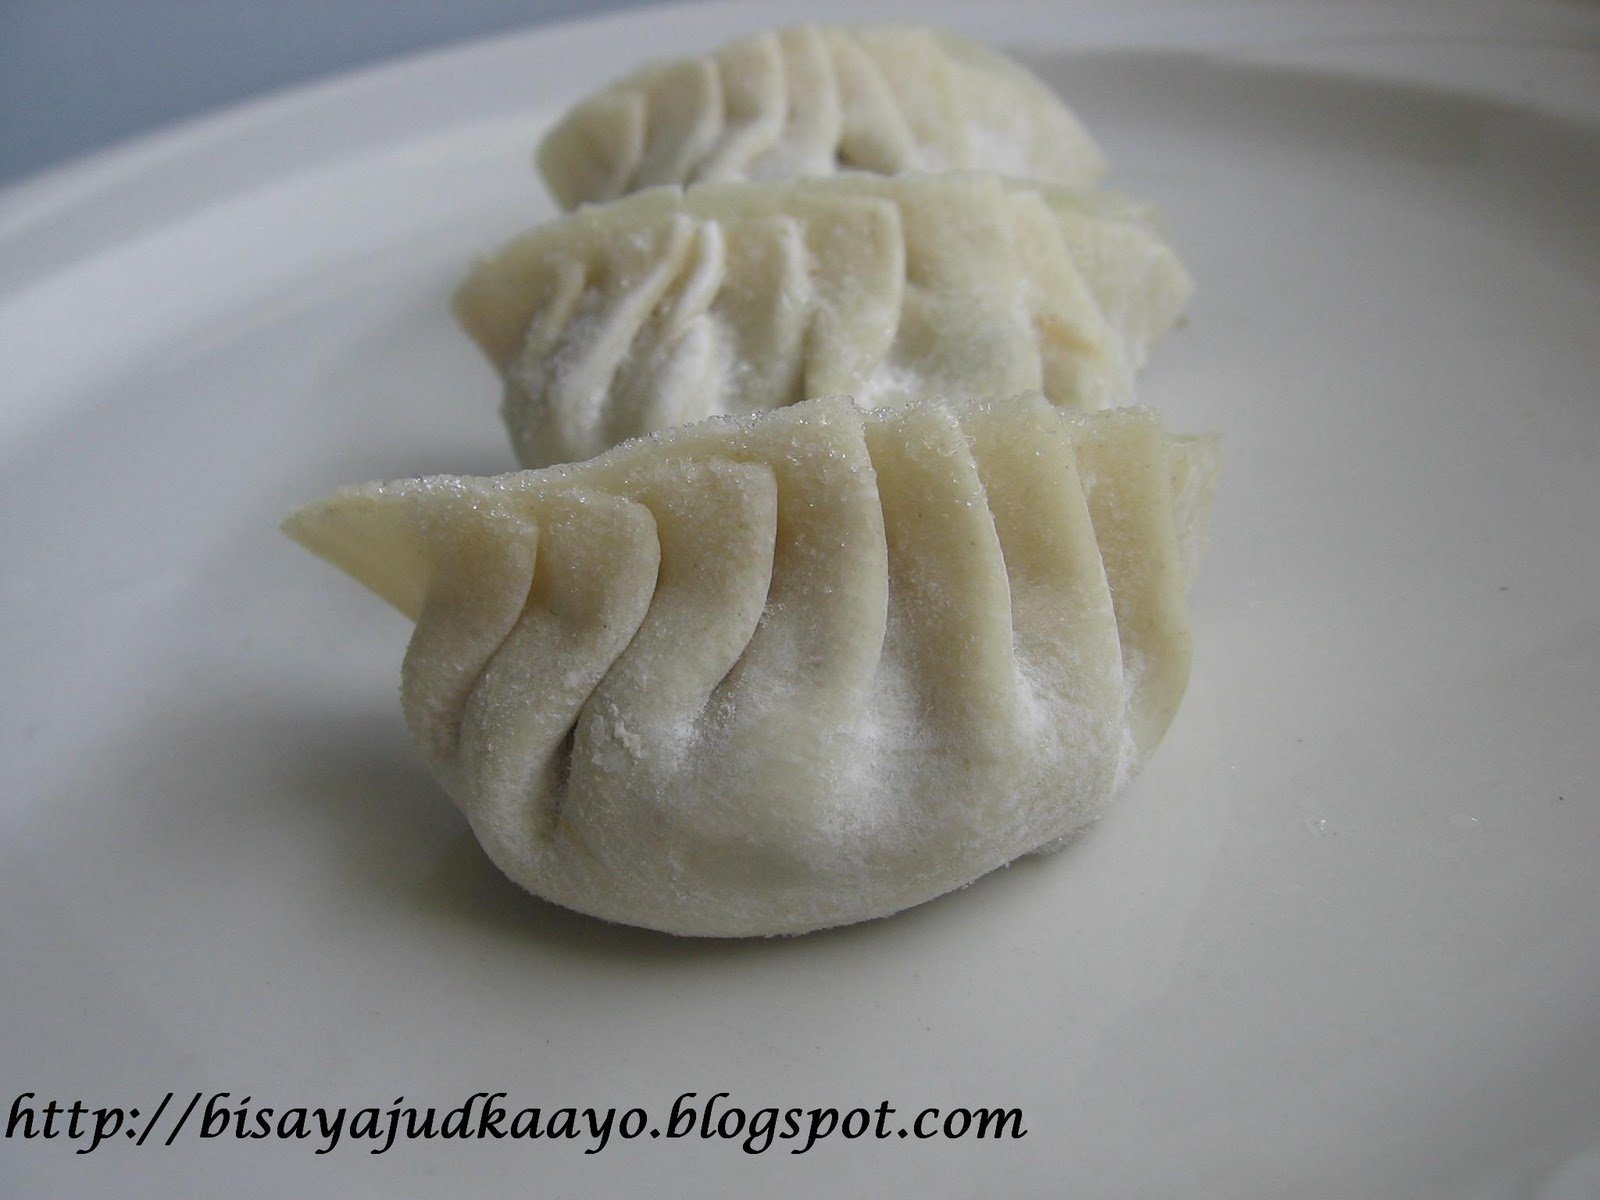
7. Fold the bottom half of the wrapper to meet the top half that you moistened in the previous step and seal. At this point you will have the option to make a pleated or simple pot stickers.
8. Grease bottom of a nonstick pan with oil. Add the pot stickers by batches to the hot pan, laying them flat and being sure not to crowd. Place pan over medium high heat and cook for 4-5 minutes without moving. You want the sides to become golden brown.
9. Pour about 3 T of water and cover the pan for another 10 minutes. This is to steam the pot stickers.
9. Serve with the Dipping Sauce. These are delicious served hot!
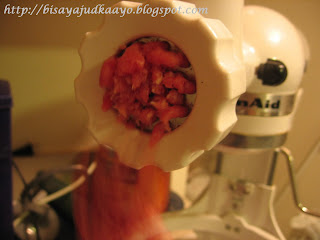
I grind my own meat as much as possible.



Filling:
4 C Napa cabbage (sliced thin)
1 ½ t salt
1 lb ground pork
1/2 lb fresh shrimps (cleaned and minced)
2 to 3 stalks of green scallions (minced)
2 pieces of wood ears mushrooms /black fungus (optional)
1/4 t white pepper
2 ½ T soy sauce
1 ½ T freshly grated ginger
2 cloves of garlic, minced
2 egg whites, lightly beaten
1/2 t sesame oil
Oil and water for cooking
Slurry to seal the edges of the wonton wrappers:
2 T cornstarch
4 T water
Dipping Sauce:
1/2 C soy sauce
2 T rice wine vinegar
Dash of sesame oil
Chili oil to taste
Scallions minced to garnish
Procedure:
For the Dipping Sauce – Combine all ingredients in bowl. Set aside, can also be refrigerated for a week.
For the Slurry – Mix and stir cornstarch and water. Microwave for few seconds until you achieve a paste consistency.
For the Pot stickers:
1. Rehydrate/soak wood ears in luke warm water until tender, then chop.
2. Toss cabbage and salt. Squeeze out the liquid from the cabbage.
3. Combine the cabbage and all the filling ingredients in a bowl and mix thoroughly.
4. Fry a teaspoon of the filling to check and adjust the seasoning.
5. Refrigerate until cold about 30 minutes. It’s easier to wrap the filling when cold.
6. Place a spoonful of filling in the center of the wonton wrapper. Use enough of the mixture to fill out the wrapper completely without overstuffing it. Make sure to keep the edges clean giving you room to enclose the filling w/ the wrapper. Moisten the edges of the wonton wrapper with slurry.
7. Fold the bottom half of the wrapper to meet the top half that you moistened in the previous step and seal. At this point you will have the option to make a pleated or simple pot stickers.
8. Grease bottom of a nonstick pan with oil. Add the pot stickers by batches to the hot pan, laying them flat and being sure not to crowd. Place pan over medium high heat and cook for 4-5 minutes without moving. You want the sides to become golden brown.
9. Pour about 3 T of water and cover the pan for another 10 minutes. This is to steam the pot stickers.
9. Serve with the Dipping Sauce. These are delicious served hot!
I grind my own meat as much as possible.


Mis en place

A spoonful of filling in the middle of the wrapper. Moisten the edges of the wonton wrapper with slurry.

Make the pleats on one side of the wrapper.


It should look like this.

I always make a lot, freeze them for later use. Place the potstickers on a sheet pan and place in the freezer. Once the potstickers are frozen, transfer them to a freezer bag. The potstickers can be frozen for up to 3 months.


Cook the potstickers without thawing.


Saturday, February 19, 2011
KCC Challenge- Feb=Valentines=Aphrodisiac Filipino Food:Champorado (Chocolate Rice Porridge)
I'm privileged to host this month's KCC challenge. Please click HERE
for further information about Kulinarya Cooking Club. Come and join us and share your Filipino recipes or learn how to make Filipino dishes and learn the Filipino culture as well.
The theme i chose for this month is February=Valentines=Aphrodisiac Filipino Foods. I thought that this would be an opportunity for us to prepare a scrumptious valentine Filipino dish for our love ones.
for further information about Kulinarya Cooking Club. Come and join us and share your Filipino recipes or learn how to make Filipino dishes and learn the Filipino culture as well.
The theme i chose for this month is February=Valentines=Aphrodisiac Filipino Foods. I thought that this would be an opportunity for us to prepare a scrumptious valentine Filipino dish for our love ones.
I know balut would be the first food that come into ones mind but really there are a lot of Filipino foods that could be considered aphrodisiac foods. Check Aphrodisiac Food List for some idea on what to prepare on Valentines day or any day that you feel romantic. Oysters would be a good one but a dozen of them wouldn't suffice, they are so expensive here.
So i thought of one of my favorite breakfast dish that calls for the most popular yet affordable aphrodisiac ingredient..CHOCOLATE!!! My family love, love champorado. So perfect for valentines day or any day actually. We could eat it for breakfast, mirienda, lunch, mirienda again and dinner, i kid you not. I am happy with a drizzle of condensed milk but with the addition of cheese, oh my goodness, I'm in heaven!!! See, what i mean?!! lol!!
You can be creative with your champorado presentation. You can form a heart as you drizzle your condensed milk, cut your cheese into heart shapes or the rustic way, tear the cheese.
This is a very simple, easy recipe yet so amazingly delicious!
Ingredients: Serves 4
1 C glutinous rice
3 C water
3 disc/tablet of chocolate (Tablea/Tabliya) or 1/2 C of cocoa powder
1/2 C brown sugar
Condensed milk
Slices of cheddar cheese and cheese you like.
Cook rice in a medium-sized pot with 3 C water. Stir constantly. When rice is ready (rice should be transparent and fluffy), add more water if needed. Then add cocoa and sugar. Serve in bowls with drizzle of sweet condensed milk and cheese on top.
TIPS:
*You can use regular rice if you can't find glutinous rice.
*Add more water if you want a thinner porridge consistency.
*I want my champorado on the darker color so i add more cocoa powder if needed.
*You can use white sugar if you don't have the brown sugar. But i prefer the brown sugar because it gives a molasses flavor w/c i like.
* Southern Luzon serves this w/ dried fish too. It's good but since this is a valentines breakfast w/c is meant to be an aphrodisiac, i believe serving it w/ dried fish is just not right=;)
100% Cocoa (Filipino Chocolate disc called Tablea/Tabliya).

The main ingredients: Chocolate disc, Brown Sugar, Glutinous Rice

The Valentine presentation=;)

The rustic presentation

The simple presentation=;). Ha!ha! i poured the condensed milk!

Monday, February 14, 2011
Cold Soba Salad & Tempura-The Daring Cooks February 2011 Challenge
This month's challenge was hosted by Lisa of http://blueberrygirlinoz.blogspot.com/ . Japanese fare a fave at home especially tempura, sushi and noodles . So, thanks for this great challenge Lisa!
This challenge made me experiment on something i've been planning on trying at home, tempura sushi. Love it! love it! another way to present your sushi. It's like two in one...sushi/tempura.. ha!
I used Nobu's tempura batter and Simple Butter Ponzu Sauce recipes from his book "Nobu Now". The batter was "so, so" i still want my batter w/o eggs. I believe that tempura will stay crispy longer sans the eggs.
The Ponzu Sauce added another layer of flavor to the tempura, Yum!
SIMPLE BUTER PONZU SAUCE:
4 T ponzu****
1 T melted clarified butter
PONZU RECIPE***
4 T soy sauce
8 T rice vinegar
2 T lemon juice
3/4 inch square piece of konbu*(omit if you can't find them)
Mix all the ponzu ingredients (better if you soak this overnight) then add the melted clarified butter.
Butter ponzu sauce needs to be served immediately because the fat will separate when it cools down.
TEMPURA BUTTER:
1 egg yolk
6 3/4 fl oz. iced water
3 1/2 AP flour
1. Make the tempura batter by lightly mixing the ingredients.
2. Blanch the vegetables or seafood briefly if raw.
3. Heat oil for deep frying to 355 degrees F. Dust the vegetables or seafoods lightly with flour, dip in the batter and fry in the hot oil for about 2 minutes. With the sushi, you can dip them straight into the batter.
4. Place finished tempura pieces on a wire rack so that excess oil can drip off. Continue frying the other items, frequently scooping out any bits of batter to keep the oil clean and prevent the oil (and the remaining tempura) from getting a burned flavor.


COLD SOBA NOODLES, A WONDERFUL "GO TO" LUNCH OR DINNER. HEALTHY AND SO FILLING.
SOBA NOODLES:
Ingredients
2 quarts (2 Liters) water + 1 cup cold water, separate
12 oz (340 g) dried soba (buckwheat) noodles (or any Asian thin noodle)
Directions:
Cooking the noodles:
1.Heat 2 quarts of water to a boil in a large pot over high heat. Add the noodles a small bundle at a time, stirring gently to separate. When the water returns to a full boil, add 1 cup of cold water. Repeat this twice. When the water returns to a full boil, check the noodles for doneness. You want to cook them until they are firm-tender. Do not overcook them.
2.Drain the noodles in a colander and rinse well under cold running water until the noodles are cool. This not only stops the cooking process, but also removes the starch from the noodles. This is an essential part of soba noodle making. Once the noodles are cool, drain them and cover them with a damp kitchen towel and set them aside allowing them to cool completely.
Spicy Dipping Sauce:
Ingredients
¾ cup 70gm/2½ oz spring onions/green onions/scallions, finely chopped
3 tablespoons soy sauce- it's a must to use Japanese soy sauce like Kikkoman to achieve the flavor.
2 tablespoons rice vinegar
½ teaspoon granulated sugar
¼ teaspoon Asian mustard powder
1 tablespoon canola oil
1 tablespoon sesame oil (if you can’t find this just omit from recipe.)
Sea salt and freshly ground black pepper to taste - roughly 1/3 a teaspoon of each
Directions:
1. Shake all the ingredients together in a covered container. Once the salt has dissolved, add and shake in 2 tablespoons of water and season again if needed
TOPPED WITH FRIED TOFU, EGGS, SCALLIONS AND SESAME SEEDS.


This challenge made me experiment on something i've been planning on trying at home, tempura sushi. Love it! love it! another way to present your sushi. It's like two in one...sushi/tempura.. ha!
I used Nobu's tempura batter and Simple Butter Ponzu Sauce recipes from his book "Nobu Now". The batter was "so, so" i still want my batter w/o eggs. I believe that tempura will stay crispy longer sans the eggs.
The Ponzu Sauce added another layer of flavor to the tempura, Yum!
SIMPLE BUTER PONZU SAUCE:
4 T ponzu****
1 T melted clarified butter
PONZU RECIPE***
4 T soy sauce
8 T rice vinegar
2 T lemon juice
3/4 inch square piece of konbu*(omit if you can't find them)
Mix all the ponzu ingredients (better if you soak this overnight) then add the melted clarified butter.
Butter ponzu sauce needs to be served immediately because the fat will separate when it cools down.
TEMPURA BUTTER:
1 egg yolk
6 3/4 fl oz. iced water
3 1/2 AP flour
1. Make the tempura batter by lightly mixing the ingredients.
2. Blanch the vegetables or seafood briefly if raw.
3. Heat oil for deep frying to 355 degrees F. Dust the vegetables or seafoods lightly with flour, dip in the batter and fry in the hot oil for about 2 minutes. With the sushi, you can dip them straight into the batter.
4. Place finished tempura pieces on a wire rack so that excess oil can drip off. Continue frying the other items, frequently scooping out any bits of batter to keep the oil clean and prevent the oil (and the remaining tempura) from getting a burned flavor.


Butternut Squash (must blanch them first before frying)

Sweet Potatoes (must blanch first before frying)

Green beans

Shiso leaves


Tempura- Sushi, Sweet Potatoes, Butternutsquash, Green Beans!

COLD SOBA NOODLES, A WONDERFUL "GO TO" LUNCH OR DINNER. HEALTHY AND SO FILLING.
SOBA NOODLES:
Ingredients
2 quarts (2 Liters) water + 1 cup cold water, separate
12 oz (340 g) dried soba (buckwheat) noodles (or any Asian thin noodle)
Directions:
Cooking the noodles:
1.Heat 2 quarts of water to a boil in a large pot over high heat. Add the noodles a small bundle at a time, stirring gently to separate. When the water returns to a full boil, add 1 cup of cold water. Repeat this twice. When the water returns to a full boil, check the noodles for doneness. You want to cook them until they are firm-tender. Do not overcook them.
2.Drain the noodles in a colander and rinse well under cold running water until the noodles are cool. This not only stops the cooking process, but also removes the starch from the noodles. This is an essential part of soba noodle making. Once the noodles are cool, drain them and cover them with a damp kitchen towel and set them aside allowing them to cool completely.
Spicy Dipping Sauce:
Ingredients
¾ cup 70gm/2½ oz spring onions/green onions/scallions, finely chopped
3 tablespoons soy sauce- it's a must to use Japanese soy sauce like Kikkoman to achieve the flavor.
2 tablespoons rice vinegar
½ teaspoon granulated sugar
¼ teaspoon Asian mustard powder
1 tablespoon canola oil
1 tablespoon sesame oil (if you can’t find this just omit from recipe.)
Sea salt and freshly ground black pepper to taste - roughly 1/3 a teaspoon of each
Directions:
1. Shake all the ingredients together in a covered container. Once the salt has dissolved, add and shake in 2 tablespoons of water and season again if needed
TOPPED WITH FRIED TOFU, EGGS, SCALLIONS AND SESAME SEEDS.


Cold Soba Noodles with crispy tofu and eggs. Garnished with sesame seeds and scallions.


Thursday, January 20, 2011
KIMCHI DOG
OMG!!!! Thanks to another great cyber friend for this idea. Tasha a.k.a Kalimah=;) posted a picture of a "tantalizing" hotdog sandwich, not an ordinary dog. It was that inviting and tantalizing that i promised myself to make them on my day off.
Well, today is my day off and as promised i made Tasha's Kimchi Dawg! lol!!! it was what i imagined it to be. One of THE best hotdog i've ever had...okay next to the Chicago dog w/c i also love.
If you haven't had kimchi, this probably will be a good way for you try and appreciate it. We love kimchi that i make them all the time. Pls. check for my homemade kimchi HERE
The combination of the hotdog and the kimchi is just perfect and if you prepare your hotdog w/ panko (Japanese breadcrumbs)..OMG!!! heaven!!!
What you will need:
Kimchi- homemade or store bought (Available at the Asian produce/refrigerated aisle)
Hot dogs - we love the Ball Park Angus Franks
Hot dog buns
mayonnaise
pickle relish - optional
Cilantro - optional
Roma tomatoes - thinly sliced.
Assemble your own hotdog sandwich and enjoy!

Panko ( Japanese breadcrumbs) crusted hotdogs. You don't have to coat them w/ the breadcrumbs if you can't buy panko. But it adds texture to the sandwich.


Well, today is my day off and as promised i made Tasha's Kimchi Dawg! lol!!! it was what i imagined it to be. One of THE best hotdog i've ever had...okay next to the Chicago dog w/c i also love.
If you haven't had kimchi, this probably will be a good way for you try and appreciate it. We love kimchi that i make them all the time. Pls. check for my homemade kimchi HERE
The combination of the hotdog and the kimchi is just perfect and if you prepare your hotdog w/ panko (Japanese breadcrumbs)..OMG!!! heaven!!!
What you will need:
Kimchi- homemade or store bought (Available at the Asian produce/refrigerated aisle)
Hot dogs - we love the Ball Park Angus Franks
Hot dog buns
mayonnaise
pickle relish - optional
Cilantro - optional
Roma tomatoes - thinly sliced.
Assemble your own hotdog sandwich and enjoy!
Angus Franks is our favorite + Kimchi = Perfection

Panko ( Japanese breadcrumbs) crusted hotdogs. You don't have to coat them w/ the breadcrumbs if you can't buy panko. But it adds texture to the sandwich.

Presenting to you one of THE BEST HOTDOG i've ever had=;)


CHIPOTLE HONEY ROASTED PEANUTS
I have been blessed with wonderful cyber friends who i've known for years, thanks to cyberworld. How close and good friends we've become? If meeting with each other, texting/talking over the phone for hours, sharing our ups and downs, receiving care packages, cards and more from each other will not count, then i don't know how else to describe what a good and wonderful cyber friends i have.
Received a bday package from VERONICA and in the package is this addicting peanuts among other yummy stuff. This is so good that i could finish a pound of these in one seating, i kid you not=;) I know, i know it's not good but hey...
So i have to ask for the recipe, click her name for her version. The only thing i changed was the kind of peanuts. Her reicpe calls for peeled while i used the unpeeled because it was what i had. But really, there's no difference they are both as good.
INGREDIENTS
1/3 cup white sugar
1 1/2 teaspoons chipotle chile powder
1/4 teaspoon chili powder
1/4 teaspoon garlic powder
2 tablespoons butter
2 tablespoons honey
1 teaspoon kosher salt
1 pound skinless peanuts (i used with skin)
DIRECTIONS
Preheat oven to 325 degrees F (165 degrees C). Stir together the sugar, chipotle powder, chili powder, and garlic powder in a small bowl; set aside.
Stir together the butter, honey, and kosher salt in a large saucepan over medium heat until the butter has melted, and the mixture is bubbly. Stir in the peanuts until well coated, then pour out into a 9x13 inch baking dish.
Bake in preheated oven until the nuts are golden brown, about 30 minutes. Stir the mixture 2 or 3 times to ensure even cooking. Once done, scrape the peanuts into a large metal bowl, and sprinkle with the spice mixture. Toss the peanuts to evenly coat with the spice mixture. Allow the peanuts to cool to room temperature, tossing every few minutes so the nuts do not stick together.
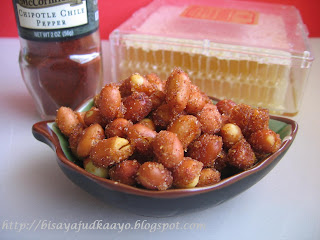
Received a bday package from VERONICA and in the package is this addicting peanuts among other yummy stuff. This is so good that i could finish a pound of these in one seating, i kid you not=;) I know, i know it's not good but hey...
So i have to ask for the recipe, click her name for her version. The only thing i changed was the kind of peanuts. Her reicpe calls for peeled while i used the unpeeled because it was what i had. But really, there's no difference they are both as good.
INGREDIENTS
1/3 cup white sugar
1 1/2 teaspoons chipotle chile powder
1/4 teaspoon chili powder
1/4 teaspoon garlic powder
2 tablespoons butter
2 tablespoons honey
1 teaspoon kosher salt
1 pound skinless peanuts (i used with skin)
DIRECTIONS
Preheat oven to 325 degrees F (165 degrees C). Stir together the sugar, chipotle powder, chili powder, and garlic powder in a small bowl; set aside.
Stir together the butter, honey, and kosher salt in a large saucepan over medium heat until the butter has melted, and the mixture is bubbly. Stir in the peanuts until well coated, then pour out into a 9x13 inch baking dish.
Bake in preheated oven until the nuts are golden brown, about 30 minutes. Stir the mixture 2 or 3 times to ensure even cooking. Once done, scrape the peanuts into a large metal bowl, and sprinkle with the spice mixture. Toss the peanuts to evenly coat with the spice mixture. Allow the peanuts to cool to room temperature, tossing every few minutes so the nuts do not stick together.

Friday, January 14, 2011
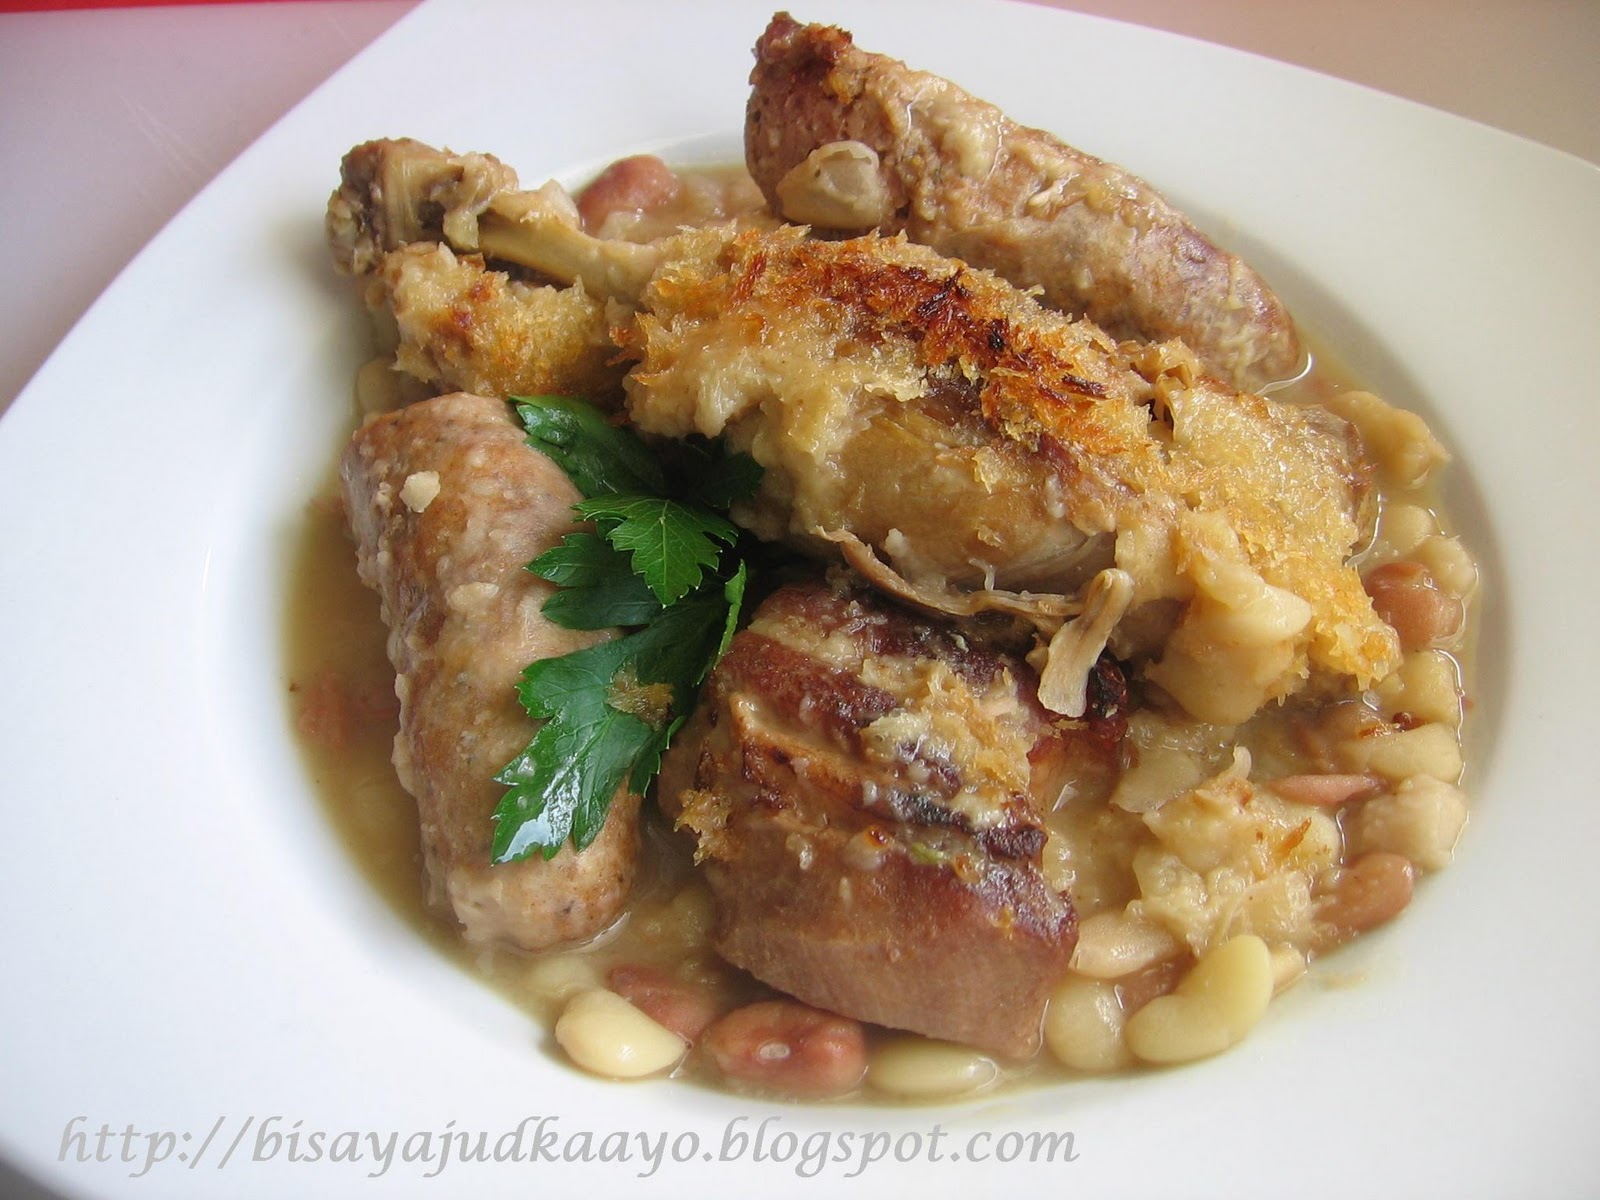
The Daring Cooks January 2011 Challenge:The French Hearty Winter Stew - Cassoulet
Hello! Hello! Remember me? I'm back after a long hiatus! What a wonderful challenge for me to start anew.
Knowing that the posting date is near, I thought i'd be able to join next month since i checked on the challenge two days ago . I guess i got lucky? i have all the ingredients ready for this challenge.
My daughter made 8 pcs. of duck confit a couple of months ago. I have all the proteins needed, pork belly and some Polish and spicy Italian sausages. For my beans, i had cranberry beans and baby lima beans in my pantry which i had to use inorder for me to be able to start right away.
Wow, the recipe was way too much for me and my husband. I have to divide the ingredients and i'm planning on making another batch but this time w/ tomatoes.
The verdict? yum!!! We love it! who wouldn't..Meat Galore!! What a perfect meal for a cold winter night! Thanks Lisa and Jenni!
This months challenge were hosted by Jenni of The Gingered Whisk and Lisa from Parsley, Sage, Desserts and Line Drives and the challenge is Cassoulet.
Cassoulet is a rich, slow cooked stew or casserole that originated in the south of France during the 14th century. It traditionally contains pork, sausages, and white beans as well as a duck or goose confit and then topped with fried bread crumbs or cracklings. The dish is named after its traditional cooking vessel, the cassole, which is a deep, round earthenware pot with slanted sides. This is a dish that traditionally takes about three days to prepare, but is oh so worth all the effort!! A confit, in case you don’t know, is one of the oldest ways to preserve food. It is essentially any kind of food that has been immersed in any kind of fat for both flavor and preservation. When stored in a cool place, confit can last for several months! Typically meats (most often waterfowl) are preserved in fats, while fruits are preserved in sugar.
Ingredients for Cassoulet
5 cups/1200 ml/1100 g/39 oz dried Tarbais beans or white beans such as Great Northern or Cannelini (if you use canned beans be aware that you will need double this amount!) (I USED CRANBERRY BEANS AND BABY LIMA BEANS)
2 pounds/900 gm fresh pork belly
1 onion, cut into 4 pieces
1 pound/450 gm pork rind (OMITTED)
1 bouquet garni (tie together two sprigs parsley, 2 sprigs thyme and one bay leaf)
salt and pepper
1/4 cup/60 ml/55 gm duck fat
6 pork sausages (I USED POLISH AND SPICY ITALIAN SAUSAGES)
3 onions, thinly sliced
1 garlic clove, thinly sliced
4 confit duck legs (USED ONLY 2)
( THIS RECIPE IS WAY TOO MUCH SO CUT THEM IN HALF)
Day One
1.Place the beans in the large bowl and cover with cold water so that there are at least 2 or 3 inches (50mm or 75mm) of water above the top of the beans. Soak overnight. That was hard, right? (Beans will double in size upon soaking, so use a big bowl!)
Day Two
1. Drain and rinse the beans and place in the large pot.
2. Add the pork belly, the quartered onion, and the bouquet garni.
3. Cover with water, and bring to a boil. Reduce to a simmer and cook for about 30 minutes. Season with salt and pepper to taste and continue to simmer until the beans are tender, about 30 minutes more.
4. Let cool for 20 minutes, then discard the onion and the bouquet garni.
5. Remove the pork belly, cut it into 2-inch/5-cm squares, and set aside. (If you plan to wait another day before finishing the dish, wait to cut the pork belly until then.)
6. Strain the beans and the rind and set aside, reserving the cooking liquid separately.
7. In the sauté pan, heat all but 1 tablespoon/15 ml/15 gm of the duck fat over medium-high heat until it shimmers and becomes transparent.
8. Carefully add the sausages and brown on all sides
9. Remove sausages and set aside, draining on paper towels.
10. In the same pan, over medium-high heat, brown the sliced onions, the garlic and the reserved squares of pork rind from the beans (not the unused pork rind; you'll need that later).
11. Once browned, remove from the heat and transfer to the blender. Add 1 tablespoon//15 ml/15 gm of the remaining duck fat and purée until smooth. Set aside.
12. Preheat the oven to moderate 350ºF/180ºC/gas mark 4.
13. Arrange all your ingredients in alternating layers, beginning with a layer of beans, then sausages, then more beans, then pork belly, beans, duck confit and finally more beans, adding a dab of the onion and pork rind purée between each layer.
14. Add enough of the bean cooking liquid to just cover the beans, reserving 1 cup/240 ml in the refrigerator for later use.
15. Cook the cassoulet in the oven for 1 hour, then reduce the heat to very slow 250ºF/130ºC/gas mark ½ and cook for another hour.
16. Remove from the oven and allow to cool. Refrigerate overnight. (SKIP THIS AND CONTINUE THE 3RD DAY PROCESS.)
Day Three (I DIDN'T WAIT FOR THE 3RD DAY)
1. Preheat the oven to moderate 350ºF/180ºC/gas mark 4 again.
2. Cook the cassoulet for an hour.
3. Break the crust (I USED PANKO BREAD CRUMBS) on the top with the spoon and add 1/4 cup/60 ml of the reserved cooking liquid. (Don't get fancy. Just pile, dab, stack and pile. It doesn't have to be pretty.)
4. Reduce the heat to very slow 250ºF/130ºC/gas mark ½ and continue cooking another 15 minutes, or until screamingly hot through and through. Then serve.


Knowing that the posting date is near, I thought i'd be able to join next month since i checked on the challenge two days ago . I guess i got lucky? i have all the ingredients ready for this challenge.
My daughter made 8 pcs. of duck confit a couple of months ago. I have all the proteins needed, pork belly and some Polish and spicy Italian sausages. For my beans, i had cranberry beans and baby lima beans in my pantry which i had to use inorder for me to be able to start right away.
Wow, the recipe was way too much for me and my husband. I have to divide the ingredients and i'm planning on making another batch but this time w/ tomatoes.
The verdict? yum!!! We love it! who wouldn't..Meat Galore!! What a perfect meal for a cold winter night! Thanks Lisa and Jenni!
This months challenge were hosted by Jenni of The Gingered Whisk and Lisa from Parsley, Sage, Desserts and Line Drives and the challenge is Cassoulet.
Cassoulet is a rich, slow cooked stew or casserole that originated in the south of France during the 14th century. It traditionally contains pork, sausages, and white beans as well as a duck or goose confit and then topped with fried bread crumbs or cracklings. The dish is named after its traditional cooking vessel, the cassole, which is a deep, round earthenware pot with slanted sides. This is a dish that traditionally takes about three days to prepare, but is oh so worth all the effort!! A confit, in case you don’t know, is one of the oldest ways to preserve food. It is essentially any kind of food that has been immersed in any kind of fat for both flavor and preservation. When stored in a cool place, confit can last for several months! Typically meats (most often waterfowl) are preserved in fats, while fruits are preserved in sugar.
Ingredients for Cassoulet
5 cups/1200 ml/1100 g/39 oz dried Tarbais beans or white beans such as Great Northern or Cannelini (if you use canned beans be aware that you will need double this amount!) (I USED CRANBERRY BEANS AND BABY LIMA BEANS)
2 pounds/900 gm fresh pork belly
1 onion, cut into 4 pieces
1 pound/450 gm pork rind (OMITTED)
1 bouquet garni (tie together two sprigs parsley, 2 sprigs thyme and one bay leaf)
salt and pepper
1/4 cup/60 ml/55 gm duck fat
6 pork sausages (I USED POLISH AND SPICY ITALIAN SAUSAGES)
3 onions, thinly sliced
1 garlic clove, thinly sliced
4 confit duck legs (USED ONLY 2)
( THIS RECIPE IS WAY TOO MUCH SO CUT THEM IN HALF)
Day One
1.Place the beans in the large bowl and cover with cold water so that there are at least 2 or 3 inches (50mm or 75mm) of water above the top of the beans. Soak overnight. That was hard, right? (Beans will double in size upon soaking, so use a big bowl!)
Day Two
1. Drain and rinse the beans and place in the large pot.
2. Add the pork belly, the quartered onion, and the bouquet garni.
3. Cover with water, and bring to a boil. Reduce to a simmer and cook for about 30 minutes. Season with salt and pepper to taste and continue to simmer until the beans are tender, about 30 minutes more.
4. Let cool for 20 minutes, then discard the onion and the bouquet garni.
5. Remove the pork belly, cut it into 2-inch/5-cm squares, and set aside. (If you plan to wait another day before finishing the dish, wait to cut the pork belly until then.)
6. Strain the beans and the rind and set aside, reserving the cooking liquid separately.
7. In the sauté pan, heat all but 1 tablespoon/15 ml/15 gm of the duck fat over medium-high heat until it shimmers and becomes transparent.
8. Carefully add the sausages and brown on all sides
9. Remove sausages and set aside, draining on paper towels.
10. In the same pan, over medium-high heat, brown the sliced onions, the garlic and the reserved squares of pork rind from the beans (not the unused pork rind; you'll need that later).
11. Once browned, remove from the heat and transfer to the blender. Add 1 tablespoon//15 ml/15 gm of the remaining duck fat and purée until smooth. Set aside.
12. Preheat the oven to moderate 350ºF/180ºC/gas mark 4.
13. Arrange all your ingredients in alternating layers, beginning with a layer of beans, then sausages, then more beans, then pork belly, beans, duck confit and finally more beans, adding a dab of the onion and pork rind purée between each layer.
14. Add enough of the bean cooking liquid to just cover the beans, reserving 1 cup/240 ml in the refrigerator for later use.
15. Cook the cassoulet in the oven for 1 hour, then reduce the heat to very slow 250ºF/130ºC/gas mark ½ and cook for another hour.
16. Remove from the oven and allow to cool. Refrigerate overnight. (SKIP THIS AND CONTINUE THE 3RD DAY PROCESS.)
Day Three (I DIDN'T WAIT FOR THE 3RD DAY)
1. Preheat the oven to moderate 350ºF/180ºC/gas mark 4 again.
2. Cook the cassoulet for an hour.
3. Break the crust (I USED PANKO BREAD CRUMBS) on the top with the spoon and add 1/4 cup/60 ml of the reserved cooking liquid. (Don't get fancy. Just pile, dab, stack and pile. It doesn't have to be pretty.)
4. Reduce the heat to very slow 250ºF/130ºC/gas mark ½ and continue cooking another 15 minutes, or until screamingly hot through and through. Then serve.


Friday, January 7, 2011
LECHE FLAN (KULINARYA THEME FOR JANUARY 2011)
Hiatus is over!! I'm back and promise to be active w/ my cooking group again!Kulinarya's theme for this month is..What Filipino dish (savoury or sweet) would you like to have on your birthday? . Good call, Maribel, Tress and Jen.
Well, i probably will be a record holder for submitting/blogging way too early! Call it a coincidence, i just made one of my favorite dessert which is also a staple dessert for a birthday celebration. I don't see any reason why i can't submit my theme early right? =;). Sooo...i will not have to worry should i become busy when deadline comes.
Actually, i can easily pick Pancit since that's our family tradition, for longevity. But I've had at least 3 blogs on pancit. My favorite is Pancit Bam-I .
I've not posted my leche flan recipe here so what a timing=;). I use this recipe for my Flan Cake/Custard Cake as well.
FLAN : WITH OR WITH OUT RAISINS
1 can condensed milk (14 oz)
1 can evaporated milk (12 oz)
1 T vanilla extract
8 large egg yolks (save the egg whites for other recipes, you can freeze them) or
10 medium egg yolks
CARAMEL SYRUP:
1 cup sugar
3/4 cup water
1 T corn syrup
1. In a pot, mix the sugar, corn syrup & water. Bring to a boil for a few minutes until the sugar caramelize or when the syrup starts to change into amber color.
2. Pour the caramelized sugar into an aluminum mold (llanera) or ramekins. Spread the caramel on the bottom of the molds then add raisins if you want to.
3. Mix well the evaporated milk, condensed milk, egg yolks and vanilla by hand or blender. ( i prefer by hand)
4. Gently pour the mixture on top of the caramel on the molds. Fill the mold to about 1 to 1 1/4 inch thick.
5. Cover molds individually with aluminum foil.
6. Steam for about 20 minutes OR bake for about 45 minutes, place the mold on a larger baking pan half filled with very hot water. Pre-heat oven to about 370 degrees before baking.
7. Let cool then refrigerate.
8. Unmold by runnning a thin knife around the edges of the mold to loosen the Leche Flan. Place a platter on top of the mold and quickly turn upside down.


Actually, i can easily pick Pancit since that's our family tradition, for longevity. But I've had at least 3 blogs on pancit. My favorite is Pancit Bam-I .
FLAN : WITH OR WITH OUT RAISINS
1 can condensed milk (14 oz)
1 can evaporated milk (12 oz)
1 T vanilla extract
8 large egg yolks (save the egg whites for other recipes, you can freeze them) or
10 medium egg yolks
CARAMEL SYRUP:
1 cup sugar
3/4 cup water
1 T corn syrup
1. In a pot, mix the sugar, corn syrup & water. Bring to a boil for a few minutes until the sugar caramelize or when the syrup starts to change into amber color.
2. Pour the caramelized sugar into an aluminum mold (llanera) or ramekins. Spread the caramel on the bottom of the molds then add raisins if you want to.
3. Mix well the evaporated milk, condensed milk, egg yolks and vanilla by hand or blender. ( i prefer by hand)
4. Gently pour the mixture on top of the caramel on the molds. Fill the mold to about 1 to 1 1/4 inch thick.
5. Cover molds individually with aluminum foil.
6. Steam for about 20 minutes OR bake for about 45 minutes, place the mold on a larger baking pan half filled with very hot water. Pre-heat oven to about 370 degrees before baking.
7. Let cool then refrigerate.
8. Unmold by runnning a thin knife around the edges of the mold to loosen the Leche Flan. Place a platter on top of the mold and quickly turn upside down.


Subscribe to:
Posts (Atom)