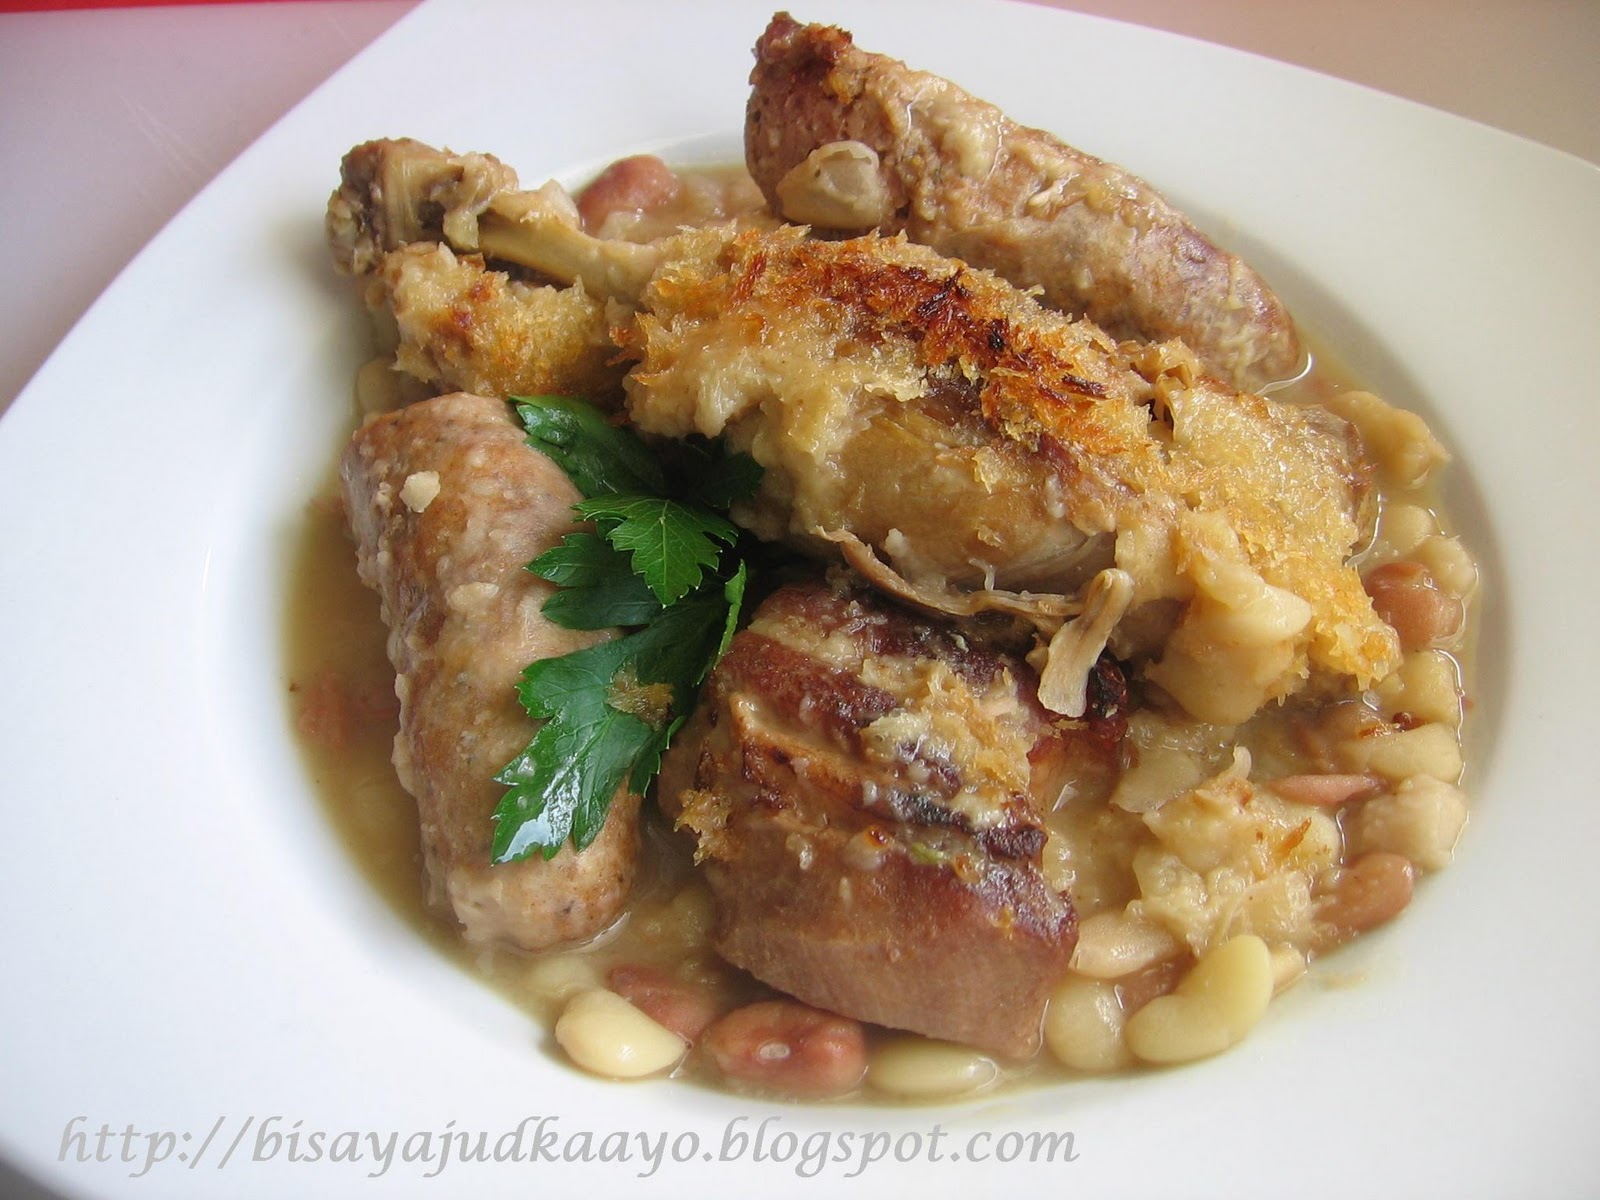
Hello! Hello! Remember me? I'm back after a long hiatus! What a wonderful challenge for me to start anew.
Knowing that the posting date is near, I thought i'd be able to join next month since i checked on the challenge two days ago . I guess i got lucky? i have all the ingredients ready for this challenge.
My daughter made 8 pcs. of duck confit a couple of months ago. I have all the proteins needed, pork belly and some Polish and spicy Italian sausages. For my beans, i had cranberry beans and baby lima beans in my pantry which i had to use inorder for me to be able to start right away.
Wow, the recipe was way too much for me and my husband. I have to divide the ingredients and i'm planning on making another batch but this time w/ tomatoes.
The verdict? yum!!! We love it! who wouldn't..Meat Galore!! What a perfect meal for a cold winter night! Thanks Lisa and Jenni!
This months challenge were hosted by Jenni of The Gingered Whisk and Lisa from Parsley, Sage, Desserts and Line Drives and the challenge is Cassoulet.
Cassoulet is a rich, slow cooked stew or casserole that originated in the south of France during the 14th century. It traditionally contains pork, sausages, and white beans as well as a duck or goose confit and then topped with fried bread crumbs or cracklings. The dish is named after its traditional cooking vessel, the cassole, which is a deep, round earthenware pot with slanted sides. This is a dish that traditionally takes about three days to prepare, but is oh so worth all the effort!! A confit, in case you don’t know, is one of the oldest ways to preserve food. It is essentially any kind of food that has been immersed in any kind of fat for both flavor and preservation. When stored in a cool place, confit can last for several months! Typically meats (most often waterfowl) are preserved in fats, while fruits are preserved in sugar.
Ingredients for Cassoulet
5 cups/1200 ml/1100 g/39 oz dried Tarbais beans or white beans such as Great Northern or Cannelini (if you use canned beans be aware that you will need double this amount!) (I USED CRANBERRY BEANS AND BABY LIMA BEANS)
2 pounds/900 gm fresh pork belly
1 onion, cut into 4 pieces
1 pound/450 gm pork rind (OMITTED)
1 bouquet garni (tie together two sprigs parsley, 2 sprigs thyme and one bay leaf)
salt and pepper
1/4 cup/60 ml/55 gm duck fat
6 pork sausages (I USED POLISH AND SPICY ITALIAN SAUSAGES)
3 onions, thinly sliced
1 garlic clove, thinly sliced
4 confit duck legs (USED ONLY 2)
( THIS RECIPE IS WAY TOO MUCH SO CUT THEM IN HALF)
Day One
1.Place the beans in the large bowl and cover with cold water so that there are at least 2 or 3 inches (50mm or 75mm) of water above the top of the beans. Soak overnight. That was hard, right? (Beans will double in size upon soaking, so use a big bowl!)
Day Two
1. Drain and rinse the beans and place in the large pot.
2. Add the pork belly, the quartered onion, and the bouquet garni.
3. Cover with water, and bring to a boil. Reduce to a simmer and cook for about 30 minutes. Season with salt and pepper to taste and continue to simmer until the beans are tender, about 30 minutes more.
4. Let cool for 20 minutes, then discard the onion and the bouquet garni.
5. Remove the pork belly, cut it into 2-inch/5-cm squares, and set aside. (If you plan to wait another day before finishing the dish, wait to cut the pork belly until then.)
6. Strain the beans and the rind and set aside, reserving the cooking liquid separately.
7. In the sauté pan, heat all but 1 tablespoon/15 ml/15 gm of the duck fat over medium-high heat until it shimmers and becomes transparent.
8. Carefully add the sausages and brown on all sides
9. Remove sausages and set aside, draining on paper towels.
10. In the same pan, over medium-high heat, brown the sliced onions, the garlic and the reserved squares of pork rind from the beans (not the unused pork rind; you'll need that later).
11. Once browned, remove from the heat and transfer to the blender. Add 1 tablespoon//15 ml/15 gm of the remaining duck fat and purée until smooth. Set aside.
12. Preheat the oven to moderate 350ºF/180ºC/gas mark 4.
13. Arrange all your ingredients in alternating layers, beginning with a layer of beans, then sausages, then more beans, then pork belly, beans, duck confit and finally more beans, adding a dab of the onion and pork rind purée between each layer.
14. Add enough of the bean cooking liquid to just cover the beans, reserving 1 cup/240 ml in the refrigerator for later use.
15. Cook the cassoulet in the oven for 1 hour, then reduce the heat to very slow 250ºF/130ºC/gas mark ½ and cook for another hour.
16. Remove from the oven and allow to cool. Refrigerate overnight. (SKIP THIS AND CONTINUE THE 3RD DAY PROCESS.)
Day Three (I DIDN'T WAIT FOR THE 3RD DAY)
1. Preheat the oven to moderate 350ºF/180ºC/gas mark 4 again.
2. Cook the cassoulet for an hour.
3. Break the crust (I USED PANKO BREAD CRUMBS) on the top with the spoon and add 1/4 cup/60 ml of the reserved cooking liquid. (Don't get fancy. Just pile, dab, stack and pile. It doesn't have to be pretty.)
4. Reduce the heat to very slow 250ºF/130ºC/gas mark ½ and continue cooking another 15 minutes, or until screamingly hot through and through. Then serve.
Majority of my recipes are Asian Cuisines, Filipino to be specific. Please inform me should you want to use my pictures. Check out some of my photos at TAGA_LUTO
Friday, January 14, 2011
Friday, January 7, 2011
LECHE FLAN (KULINARYA THEME FOR JANUARY 2011)
Hiatus is over!! I'm back and promise to be active w/ my cooking group again!Kulinarya's theme for this month is..What Filipino dish (savoury or sweet) would you like to have on your birthday? . Good call, Maribel, Tress and Jen.
Well, i probably will be a record holder for submitting/blogging way too early! Call it a coincidence, i just made one of my favorite dessert which is also a staple dessert for a birthday celebration. I don't see any reason why i can't submit my theme early right? =;). Sooo...i will not have to worry should i become busy when deadline comes.
Actually, i can easily pick Pancit since that's our family tradition, for longevity. But I've had at least 3 blogs on pancit. My favorite is Pancit Bam-I .
I've not posted my leche flan recipe here so what a timing=;). I use this recipe for my Flan Cake/Custard Cake as well.
FLAN : WITH OR WITH OUT RAISINS
1 can condensed milk (14 oz)
1 can evaporated milk (12 oz)
1 T vanilla extract
8 large egg yolks (save the egg whites for other recipes, you can freeze them) or
10 medium egg yolks
CARAMEL SYRUP:
1 cup sugar
3/4 cup water
1 T corn syrup
1. In a pot, mix the sugar, corn syrup & water. Bring to a boil for a few minutes until the sugar caramelize or when the syrup starts to change into amber color.
2. Pour the caramelized sugar into an aluminum mold (llanera) or ramekins. Spread the caramel on the bottom of the molds then add raisins if you want to.
3. Mix well the evaporated milk, condensed milk, egg yolks and vanilla by hand or blender. ( i prefer by hand)
4. Gently pour the mixture on top of the caramel on the molds. Fill the mold to about 1 to 1 1/4 inch thick.
5. Cover molds individually with aluminum foil.
6. Steam for about 20 minutes OR bake for about 45 minutes, place the mold on a larger baking pan half filled with very hot water. Pre-heat oven to about 370 degrees before baking.
7. Let cool then refrigerate.
8. Unmold by runnning a thin knife around the edges of the mold to loosen the Leche Flan. Place a platter on top of the mold and quickly turn upside down.
Actually, i can easily pick Pancit since that's our family tradition, for longevity. But I've had at least 3 blogs on pancit. My favorite is Pancit Bam-I .
FLAN : WITH OR WITH OUT RAISINS
1 can condensed milk (14 oz)
1 can evaporated milk (12 oz)
1 T vanilla extract
8 large egg yolks (save the egg whites for other recipes, you can freeze them) or
10 medium egg yolks
CARAMEL SYRUP:
1 cup sugar
3/4 cup water
1 T corn syrup
1. In a pot, mix the sugar, corn syrup & water. Bring to a boil for a few minutes until the sugar caramelize or when the syrup starts to change into amber color.
2. Pour the caramelized sugar into an aluminum mold (llanera) or ramekins. Spread the caramel on the bottom of the molds then add raisins if you want to.
3. Mix well the evaporated milk, condensed milk, egg yolks and vanilla by hand or blender. ( i prefer by hand)
4. Gently pour the mixture on top of the caramel on the molds. Fill the mold to about 1 to 1 1/4 inch thick.
5. Cover molds individually with aluminum foil.
6. Steam for about 20 minutes OR bake for about 45 minutes, place the mold on a larger baking pan half filled with very hot water. Pre-heat oven to about 370 degrees before baking.
7. Let cool then refrigerate.
8. Unmold by runnning a thin knife around the edges of the mold to loosen the Leche Flan. Place a platter on top of the mold and quickly turn upside down.
Thursday, January 6, 2011
VANILLA BEAN MACARONS WITH GANACHE FILLING
Now that i got the hang of it, yes, i'm talking about French macarons, the flavors are endless. I'm not intimidated to make these macarons anymore!!. Ofcourse, mine aren't perfect, but practice, practice...i'll eventually make the most beautiful macarons i'd ever make! lol!
I made vanilla bean macarons this time. I guess i spoke to soon coz the batter for this macaron was a bit thick but inspite of that they still came out good. The shape is not that perfect but i like it!!!! annnddd it still got their feet! ha!ha!ha! isn't that what matters most?
I used the madagascar vanilla bean pods. They are expensive but reallyyyy worth it. After i take out the vanilla beans "seeds" i save the pods and put them in my jar of sugar. Those pods will impart vanilla smell and taste to your sugar.
For more macaron flavors, "secrets on how to make successful macarons" and the recipe for both the macaron shell and the ganache filling...pls check my other blogs...MY FRENCH MACARONS GOT FEET and MACARONS .
I made vanilla bean macarons this time. I guess i spoke to soon coz the batter for this macaron was a bit thick but inspite of that they still came out good. The shape is not that perfect but i like it!!!! annnddd it still got their feet! ha!ha!ha! isn't that what matters most?
I used the madagascar vanilla bean pods. They are expensive but reallyyyy worth it. After i take out the vanilla beans "seeds" i save the pods and put them in my jar of sugar. Those pods will impart vanilla smell and taste to your sugar.
For more macaron flavors, "secrets on how to make successful macarons" and the recipe for both the macaron shell and the ganache filling...pls check my other blogs...MY FRENCH MACARONS GOT FEET and MACARONS .
Labels:
Baking Challenge,
Chocolate,
COOKIES,
desserts,
French Fare,
Fusion Dishes,
Sweet treats
MY FRENCH MACARONS GOT FEET!!!
Well, well, it's been a long time since i last made macarons. As i mentioned in my other macaron blog MACARONS these little jewels are an obsession of mine. I am proud to say that my macarons has improved immensely. I can tell you that I'm comfortable making them this time. Rate of success? hhhmmm about 85% ..yes, I'm so proud to say that. They all had feet and yes, there were cracked shells but not much...can i hear a woot! woot! sshhh!!! i did a happy dance. I'm entitled to my opinion right?
Thanks to my friend Tina and macaron bloggers, i took notes which i call "secrets" to make a perfect macaron. See, when i made them the first time, the cookbook i read and macaron blogs just straight up shared the recipe but never mentioned about the extra steps you have to do in order for you to make a beautiful macaron. Which leads to frustration and disappointment because you believe you followed the recipe word for word, step by step but your end product is no way similar or the same as theirs.
So, I'm sharing the notes that i have learned. This is to save you from the frustration and disappointments.
1. It is imperative to use a scale. That's my opinion.
2. Age your egg whites. Use a day old egg whites.
3. Some say sift your dry products..i didn't it still came out good.
4. Use a template for a uniform size. (I must admit, i need more practice on this step)
5. Use parchment paper or silpat pls.
6. Don't over mix your batter. It should be runny but not to runny=;)
7. Preheat your oven to 400 degrees then lower to 300 degrees few minutes before you put them in.
8. They say bake one sheet pan at a time w/c i did but didn't even think about the reason for it. But Tina thought that it does make sense especially for small oven, to avoid over crowding.
There has been an influx of macaron recipes but i'm sticking to my original recipe with slight adjustments based on the notes i have made.
I MADE MATCHA MACARONS. I ADDED A TSP OF MATCHA (JAPANESE GREEN TEA) POWDER TO THE DRY INGREDIENTS. A TSP. OF THE MATCHA WOULD SUFFICE OTHERWISE THE TASTE OF THE GREEN TEA WILL BE OVERPOWERING.
3 egg whites (about 90 gr)
30 gr granulated sugar
200 gr powdered sugar
110 gr almond flour or finely ground almonds
pinch of salt
Preparation:
1- Preheat the oven to 320 f. (SEE MY NOTES REGARDING THE TEMPERATURE) Line 2 baking sheets with parchment paper and set aside.
2- In a food processor, combine the ground almonds, powdered sugar. Mix until you get a thin powder. (ADD THE MATCHA) Remove from the bowl, Sift the mixture. Set aside.
3- Beat the egg whites with a pinch of salt until soft peak. Gradually, add the granulated sugar and continue to beat until the mixture becomes shiny. At this point, you add the desired food coloring (if using).
4- Sift the dry ingredients over the egg whites in 3 steps. fold the mixture until shiny. Do not over mix.
5- Fill a pastry bag fitted with a round 1/2 inch tip with the batter and pipe evenly the cookies leaving 2 inches between them. Let the cookies rest for about 20 minutes.
6- Cook the macarons for 12 to 15 minutes. Let them cool before filling.
Ganache filling:
1 pint heavy cream
8 oz semi- sweet or bittersweet chocolate chips
1. In a heavy saucepan, boil heavy cream. Turn off the heat. Add chocolate chips and let it rest until melted. Use a rubber spatula to stir the mixture until all the pieces are melted.
2. Pour it into a room-temperature bowl and cover with plastic wrap.
Thanks to my friend Tina and macaron bloggers, i took notes which i call "secrets" to make a perfect macaron. See, when i made them the first time, the cookbook i read and macaron blogs just straight up shared the recipe but never mentioned about the extra steps you have to do in order for you to make a beautiful macaron. Which leads to frustration and disappointment because you believe you followed the recipe word for word, step by step but your end product is no way similar or the same as theirs.
So, I'm sharing the notes that i have learned. This is to save you from the frustration and disappointments.
1. It is imperative to use a scale. That's my opinion.
2. Age your egg whites. Use a day old egg whites.
3. Some say sift your dry products..i didn't it still came out good.
4. Use a template for a uniform size. (I must admit, i need more practice on this step)
5. Use parchment paper or silpat pls.
6. Don't over mix your batter. It should be runny but not to runny=;)
7. Preheat your oven to 400 degrees then lower to 300 degrees few minutes before you put them in.
8. They say bake one sheet pan at a time w/c i did but didn't even think about the reason for it. But Tina thought that it does make sense especially for small oven, to avoid over crowding.
There has been an influx of macaron recipes but i'm sticking to my original recipe with slight adjustments based on the notes i have made.
I MADE MATCHA MACARONS. I ADDED A TSP OF MATCHA (JAPANESE GREEN TEA) POWDER TO THE DRY INGREDIENTS. A TSP. OF THE MATCHA WOULD SUFFICE OTHERWISE THE TASTE OF THE GREEN TEA WILL BE OVERPOWERING.
3 egg whites (about 90 gr)
30 gr granulated sugar
200 gr powdered sugar
110 gr almond flour or finely ground almonds
pinch of salt
Preparation:
1- Preheat the oven to 320 f. (SEE MY NOTES REGARDING THE TEMPERATURE) Line 2 baking sheets with parchment paper and set aside.
2- In a food processor, combine the ground almonds, powdered sugar. Mix until you get a thin powder. (ADD THE MATCHA) Remove from the bowl, Sift the mixture. Set aside.
3- Beat the egg whites with a pinch of salt until soft peak. Gradually, add the granulated sugar and continue to beat until the mixture becomes shiny. At this point, you add the desired food coloring (if using).
4- Sift the dry ingredients over the egg whites in 3 steps. fold the mixture until shiny. Do not over mix.
5- Fill a pastry bag fitted with a round 1/2 inch tip with the batter and pipe evenly the cookies leaving 2 inches between them. Let the cookies rest for about 20 minutes.
6- Cook the macarons for 12 to 15 minutes. Let them cool before filling.
Ganache filling:
1 pint heavy cream
8 oz semi- sweet or bittersweet chocolate chips
1. In a heavy saucepan, boil heavy cream. Turn off the heat. Add chocolate chips and let it rest until melted. Use a rubber spatula to stir the mixture until all the pieces are melted.
2. Pour it into a room-temperature bowl and cover with plastic wrap.
Labels:
Chocolate,
COOKIES,
desserts,
French Fare,
Fusion Dishes,
Sweet treats
Friday, December 31, 2010
SNICKERDOODLE CUPCAKES
HAPPY NEW YEAR!!! FROM THE BOTTOM OF MY HEART, I THANK YOU, ALL MY FOLLOWERS AND READERS, YOU ARE MY INSPIRATION!
Yes, i'm ending the year 2010 with a cupcake blog! As for my new year's "promise"...i will learn more cupcake recipes and hone my cupcake decorating=;)!
And ofcourse share more Filipino dishes. I know i've been slacking w/ The Daring Kitchen and Kulinarya Cooking Club..i will be back and be active again!!!
Enough said now on to my last blog for 2010. Snickerdoodle Cupcakes, yup it does taste like the snickerdoodle cookies, even better if i may say so!!
Got the recipe from DUNCAN HINES
Ingredients
1 package Duncan Hines white cake mix
1 cup whole milk
1 stick of butter, melted
3 large eggs
1 teaspoon vanilla extract
2 teaspoons ground cinnamon
Frosting:
1 stick butter
3 3/4 cup confectioners sugar
3-4 Tablespoons milk
1 teaspoon vanilla extract
1 Tablespoon ground cinnamon
Baking Instructions
1. Preheat oven to 350 degrees and line your cupcake tin. Place cake mix, milk, melted butter, eggs, vanilla, and cinnamon in a large mixing bowl. Blend for three minutes (stop to scrape once). Pour into pans and bake for 22-25 minutes Allow the cakes to cool completely.
Frosting:
2. Beat butter until fluffy for frosting. Add all other ingredients.
Yes, i'm ending the year 2010 with a cupcake blog! As for my new year's "promise"...i will learn more cupcake recipes and hone my cupcake decorating=;)!
And ofcourse share more Filipino dishes. I know i've been slacking w/ The Daring Kitchen and Kulinarya Cooking Club..i will be back and be active again!!!
Enough said now on to my last blog for 2010. Snickerdoodle Cupcakes, yup it does taste like the snickerdoodle cookies, even better if i may say so!!
Got the recipe from DUNCAN HINES
Ingredients
1 package Duncan Hines white cake mix
1 cup whole milk
1 stick of butter, melted
3 large eggs
1 teaspoon vanilla extract
2 teaspoons ground cinnamon
Frosting:
1 stick butter
3 3/4 cup confectioners sugar
3-4 Tablespoons milk
1 teaspoon vanilla extract
1 Tablespoon ground cinnamon
Baking Instructions
1. Preheat oven to 350 degrees and line your cupcake tin. Place cake mix, milk, melted butter, eggs, vanilla, and cinnamon in a large mixing bowl. Blend for three minutes (stop to scrape once). Pour into pans and bake for 22-25 minutes Allow the cakes to cool completely.
Frosting:
2. Beat butter until fluffy for frosting. Add all other ingredients.
Wednesday, December 1, 2010
SPAGHETTI ALLA CARBONARA AND NUTELLA ICE CREAM GOODNESS
***FYI: THE FOLLOWING BLOGS ARE MY BLOGS FROM MYSPACE...I AM MOVING MY MS BLOGS HERE BEFORE I WILL TOTALLY LOSE THEM. YUP, MYSPACE HAS CHANGED, THEY ARE MORE ON THE ENTERTAINMENT NOW. SO DON'T BE ALARMED THAT THE RECIPES ARE "OFF SEASON" DISHES.
BLOGGED DATE: SEPT. 1, 2008
This dish is my go to meal, a quick, easy and yet elegant dish. Ofcourse it's always delish...it's bacooonnnnn and panceetttaaa!!!! what could go wrong?
For the dessert this brought the patience and impatience in me. I scooped the ice cream and placed on a tray w/c should stay in the freezer for few minutes but i opted not to. I spread a generous amount of nutella on two lady fingers. Made an ice cream sandwich sort of, then put some mint leaves in between. By the time i got done w/ the lady finger and nutella spreading..the ice cream started to melt oh boy!!! well, you'll see what i mean... but over all it was a messy goodness, coz i love nutella and ice cream. Got this dessert recipe from Giada de Laurentiis.
SPAGHETTI ALLA CARBONARA
2 T olive oil
1 T butter
1 Cup smoked bacon, sliced into thin sliced (I added pancetta to mine)
3 eggs, lightly beaten
¼ Cup freshly grated Parmesan cheese
¼ Cup freshly grated Romano cheese
1 T chopped fresh flat leaf parsley
4 T light cream
Pepper
1 lb/450 g spaghetti noodles
****Recipe didn't call for garlic but i had some garlic on the side while rendering the bacon and pancetta just to get some garlic undertone.Take out the garlic when it starts to brown, use the browned garlic for other dish.
****Pancetta is not in the recipe either but i like it w/ my carbonara, but bacon will suffice, ofcourse.
1. Heat the oil and butter in a skillet over a medium high heat.
2. Add the bacon and cook for 4-5 minutes, until browned and crispy.
3. Remove from the heat.
4. Combine the eggs, cheeses, parsley, and cream in a bowl, mixing well. Season with pepper.
5. Cook the pasta in plenty of boiling salted water until al dente. Drain and return to the skillet.
6. Quickly add the egg mixture to the pasta, tossing rapidly so that the egg cooks in the heat.
7. Transfer to a warm serving dish.
8. Briefly reheat the bacon over a high heat. Add to the pasta, toss again and serve at once.
Source: Essentials Pasta Sauces
DESSERT INGREDIENTS: NUTELLA, LADY FINGERS, ICE CREAM, MINT LEAVES.
BLOGGED DATE: SEPT. 1, 2008
This dish is my go to meal, a quick, easy and yet elegant dish. Ofcourse it's always delish...it's bacooonnnnn and panceetttaaa!!!! what could go wrong?
For the dessert this brought the patience and impatience in me. I scooped the ice cream and placed on a tray w/c should stay in the freezer for few minutes but i opted not to. I spread a generous amount of nutella on two lady fingers. Made an ice cream sandwich sort of, then put some mint leaves in between. By the time i got done w/ the lady finger and nutella spreading..the ice cream started to melt oh boy!!! well, you'll see what i mean... but over all it was a messy goodness, coz i love nutella and ice cream. Got this dessert recipe from Giada de Laurentiis.
SPAGHETTI ALLA CARBONARA
2 T olive oil
1 T butter
1 Cup smoked bacon, sliced into thin sliced (I added pancetta to mine)
3 eggs, lightly beaten
¼ Cup freshly grated Parmesan cheese
¼ Cup freshly grated Romano cheese
1 T chopped fresh flat leaf parsley
4 T light cream
Pepper
1 lb/450 g spaghetti noodles
****Recipe didn't call for garlic but i had some garlic on the side while rendering the bacon and pancetta just to get some garlic undertone.Take out the garlic when it starts to brown, use the browned garlic for other dish.
****Pancetta is not in the recipe either but i like it w/ my carbonara, but bacon will suffice, ofcourse.
1. Heat the oil and butter in a skillet over a medium high heat.
2. Add the bacon and cook for 4-5 minutes, until browned and crispy.
3. Remove from the heat.
4. Combine the eggs, cheeses, parsley, and cream in a bowl, mixing well. Season with pepper.
5. Cook the pasta in plenty of boiling salted water until al dente. Drain and return to the skillet.
6. Quickly add the egg mixture to the pasta, tossing rapidly so that the egg cooks in the heat.
7. Transfer to a warm serving dish.
8. Briefly reheat the bacon over a high heat. Add to the pasta, toss again and serve at once.
Source: Essentials Pasta Sauces
PANCETTA AND BACON RENDERING AWAY!!!
SPAGHETTI ALLA CARBONARA/ PASTA CARBONARA
I served parmesan crisp on the side. Put a teaspoon of shredded parmesan cheese on a silpat or parchment paper. Bake at 350 degrees for few minutes or until the cheese starts to bubble and get a bit brown.
Excuse my silpat, it has been used and abused. I love my silpats
PARMESAN CRISPS
DESSERT INGREDIENTS: NUTELLA, LADY FINGERS, ICE CREAM, MINT LEAVES.
NUTELLA, LADY FINGER ICE CREAM SANDWICH!!!!
ASIAN BURGER SLIDERS
***FYI: THE FOLLOWING BLOGS ARE MY BLOGS FROM MYSPACE...I AM MOVING MY MS BLOGS HERE BEFORE I WILL TOTALLY LOSE THEM. YUP, MYSPACE HAS CHANGED, THEY ARE MORE ON THE ENTERTAINMENT NOW. SO DON'T BE ALARMED THAT THE RECIPES ARE "OFF SEASON" DISHES.
BLOGGED DATE: AUG.12,2009
This recipe is my interpretation of Wolfgang Puck's ASIAN BURGER. I have a fascination w/ slider burgers so i made my patties small enough for Hawaiian bread mini rolls. I made spicy mayo and tomato, cukes and mango salad on the side.
***Warning*** THESE SLIDERS ARE MESSY BUT GOOD!
Serves: 4
Ingredients:
2 lbs. ground beef
2 t curry powder
1 t sugar
2 1/2 T chopped cilantro
4 t scallions, chopped
1 C chopped garlic
2 Thai bird chilies, minced (substitute it w/ jalapeno)
1 1/2 t cumin powder
S&P
8 shitake mushrooms chopped
1/4 C teriyaki sauce
8 Hawaiian mini rolls.
Lettuce
Sliced small sweet or vidalla onions sliced into rings.
1. Mix all ingredients except for lettuce, sliced onion rings and the bread.
2. Take a teaspoon of the mix and fry to check if burger mixture needs more seasoning.
3. Form patties enough to fit in the mini rolls.
4. Cook patties in a hot pan until cooked through or about 5 minutes each side.
Assembly time:
1. Slather some spicy mayo mix on each side of the bread.
2. Arrange onions, tomatoes and lettuce and the burger.
Serve w/ Tomato, Cukes and Mango Salad.
Miracle whip or mayo + Korean red pepper paste = Spicy Mayo
TIP: Don't throw the heels of your sliced bread. I use them to absorb excess oil of the food i'm frying. Just like this burger patty. I like this better than using paper towels.
I used the brown tomato, it tasted just like a regular roma tomato.
We all liked this burger but I can probably add more curry powder and cumin next time.
BLOGGED DATE: AUG.12,2009
This recipe is my interpretation of Wolfgang Puck's ASIAN BURGER. I have a fascination w/ slider burgers so i made my patties small enough for Hawaiian bread mini rolls. I made spicy mayo and tomato, cukes and mango salad on the side.
***Warning*** THESE SLIDERS ARE MESSY BUT GOOD!
Serves: 4
Ingredients:
2 lbs. ground beef
2 t curry powder
1 t sugar
2 1/2 T chopped cilantro
4 t scallions, chopped
1 C chopped garlic
2 Thai bird chilies, minced (substitute it w/ jalapeno)
1 1/2 t cumin powder
S&P
8 shitake mushrooms chopped
1/4 C teriyaki sauce
8 Hawaiian mini rolls.
Lettuce
Sliced small sweet or vidalla onions sliced into rings.
1. Mix all ingredients except for lettuce, sliced onion rings and the bread.
2. Take a teaspoon of the mix and fry to check if burger mixture needs more seasoning.
3. Form patties enough to fit in the mini rolls.
4. Cook patties in a hot pan until cooked through or about 5 minutes each side.
Assembly time:
1. Slather some spicy mayo mix on each side of the bread.
2. Arrange onions, tomatoes and lettuce and the burger.
Serve w/ Tomato, Cukes and Mango Salad.
Miracle whip or mayo + Korean red pepper paste = Spicy Mayo
TIP: Don't throw the heels of your sliced bread. I use them to absorb excess oil of the food i'm frying. Just like this burger patty. I like this better than using paper towels.
I used the brown tomato, it tasted just like a regular roma tomato.
We all liked this burger but I can probably add more curry powder and cumin next time.
Wednesday, November 24, 2010
Patotoes Au Grutin Muffin Style
I can't take the credit for this, it was my daughter's idea. These are old photos, we actually had this for our last year's Christmas dinner. I totally forgot to blog it, but better late than never right?.
I love this idea, another way to prepare your potatoes other than the same old same old mash potato, i do love MP but if i could zhuzz (is this how you spell it?=;) or "umph" my potatoes the better for me. A neat and beautiful way to present your au gratin. It is definitely a good conversation piece to your party.
Another way to prepare your potatoes check my hasselback potato .
Now for the au gratin recipe, if you have a favorite recipe, by all means make your own, and put them in the muffin cups instead of a caserole dish container.
Here's the recipe for this au gratin:
Quantity would depend on the size of your muffins.Ingredients
• 1 ½ pounds Idaho potatoes, peeled and diced
• ¼ cup diced sweet onions
• ½ cup grated Gruyere or cheddar cheese (i used both)
• ½ cup freshly grated Parmesan
• 1 cup heavy cream
• 1 teaspoon salt
• ½ teaspoon ground black pepper
• 1/8 teaspoon paprika
• 1/3 cup unsalted butter, softened
Directions
Preheat the oven to 375 degrees F.
Butter muffin pans with softened butter.
Mix heavy cream, diced potatoes, onions, gruyere or cheddar, parmesan, paprika, salt and pepper.
Arrange potato mixture into each muffin cup.
Add more heavy cream if needed.
Cover with foil and bake for 35 to 45 minutes. Or until potatoes are tender and top turns golden brown.
Remove foil halfway through the cooking time.
Carefully remove the gratins and serve.
Subscribe to:
Posts (Atom)