Thursday, November 11, 2010

APPLE CUSTARD TEA CAKES

Apples, apples, apples!!!! I've made Apple Chips and Apple Almond Salad , Apple Crumb Muffins and Apple Butter . They were all delicious if i may say so!

This time i made cupcakes which i think look interesting and beautiful. Got the recipe from Cupcake cookbook by Pamela Clark.  I like a lot of her recipes so expect for more cupcakes soon=;)

I made a slight adjustment w/ the milk. I find the batter a bit thick so i added  2 more tablespoons of milk. Other than that..the cupcakes were a success!

APPLE CUSTARD TEA CAKES
Recipe from Cupcakes by Pamela Clark

Ingredients:
Cake batter:6 T butter - i used unsalted
1/2 t vanilla extract
1/2 C sugar
2 eggs
3/4 C self-rising flour
1/4 C instant vanilla pudding mix
3 T milk - i added 2 tablespoon
1 large unpeeled apple, cored, sliced finely- i used mandoline to have a uniform slice
2 T butter, extra melted
1 1/2 T sugar, extra
1/2 t ground cinnamon

Custard:
1 1/2 T instant vanilla pudding mix
1 1/2 T sugar
1/2 C milk
1/4 t vanilla extract

1. Make custard. Recipe below.
2. Preheat oven to 350 degrees F. Line 6 hole oversize (Texas) or 12 hole standard muffin pan with paper baking cups.
3. Beat butter, vanilla, sugar, eggs flour, pudding mix and milk in small bowl with electric mixer on low speed until ingredients are just combined. Increase speed to medium, beat until mixture is changed to a paler color.
4. Divide half the mixture among baking cups. Top with custard, then remaining cake mixture; spread mixture to cover custard. Top with apple slices, pressing slightly into cake.
5. Bake large cakes about 40 minutes, small cakes about 30 minutes.
6. Brush hot cakes with extra butter, then sprinkle with combined extra sugar and cinnamon. Turn cakes onto wire rack. Serve warm or cold.

CUSTARD:
Blend pudding mix and sugar with milk and vanilla in small pot; stir over medium heat until mixture boils and thickens. Remove from heat, cover surface with plastic wrap, cool.


Thursday, November 4, 2010

CHOCOLATE DULCE DE LECHE CUPCAKES

My oh my...me and my cupcakes! lol! Okay this time i used chocolate cake mix. This is the season to take advantage with cake mix, they are on sale.

What you will need:

1 can dulce de leche

1 box chocolate cake mix - For the ingredients and how to make the cupcake batter, follow the box instructions.

Buttercream Frosting
Ingredients

3 cups confectioners' sugar
1 cup butter
1 teaspoon vanilla extract
1 to 2 tablespoons whipping cream
2 t dulce de leche

Directions

In a standing mixer fitted with a whisk, mix together sugar and butter. Mix on low speed until well blended and then increase speed to medium and beat for another 3 minutes.

Add vanilla and cream and continue to beat on medium speed for 1 minute more, adding more cream if needed for spreading consistency.

Fold in 2 T of dulce de leche into the frosting.


Bake the chocolate cupcake according to cake mix instructions.


Using a melon baller, scoop out a little portion  in the middle of the cupcake. Save the small piece.


A can of Dulce de Leche


Put a teaspoon or less depending on how much dulce de leche you like on the scooped out portion.


Place back the small piece of the cake to cover .


With the buttercream frosting cover and decorate your cupcakes.


Wednesday, November 3, 2010

TIRAMISU CUPCAKES

I love cupcakes! This is another favorite of mine. It's easy, so good and kid friendly...yup!! no alcohol on this recipe!. I've tried baking both from scratch and the scratch the box=;). Obviously making your cake from scratch is better but when you are in a hurry "scratch the cake mix box" is also good. Seriously, i like them both.


I will post both, now you decide which one you'd like to make first. Again i like both the cake mix box and making your own cake.


TIRAMISU CUPCAKES FROM SCRATCH


Makes 24 cupcakes

• 1 1/4 cups all purpose flour

• 1 1/4 teaspoon baking powder

• 1/8 teaspoon salt

• 3/4 cup milk

• 11/2 tsp vanilla extract

• 6 tablespoons unsalted butter, room temperature, cut into pieces

• 1 large egg

• 1 cup sugar

• Unsweetened cocoa powder, for dusting

• Espresso or coffee syrup (recipe to follow)

• Mascarpone Frosting (recipe to follow)

Directions

1. Preheat oven to 325 degrees. Line standard muffin tins with cupcake liners.

2. Sift together the flour, baking powder, and salt. Set aside.

3. With an electric mixer on medium speed, cream butter and sugar until light and fluffy .

4. Add the egg and vanilla, mix until combined into the batter.

5. Finally, alternately add the dry ingredients and milk.

6. Divide batter evenly among lined cups, filling each three-quarter full.

7. Bake, rotating tins halfway through, until centers are completely set and edges are light golden brown, about 20 minutes.

8. Transfer tins to wire racks to cool completely before removing cupcakes.

9. To finish, brush tops of cupcakes evenly with coffee syrup; repeat until all syrup has been used.

10. Allow cupcakes to absorb liquid 30 minutes. Dollop frosting onto cupcakes; refrigerate up to overnight in airtight containers. Dust generously with cocoa powder just before serving.

Espresso/Coffee Syrup

1 C freshly brewed espresso or concentrated coffee

11/2 T sugar
Stir until sugar has dissolved.


*****Mascarpone Frosting:

Makes about 2 cups

• 1 cup heavy cream

• 8 ounces mascarpone cheese, room temperature

• 1/2 cup confectioners' sugar, sifted

Directions

1. With an electric mixer on medium speed, whisk heavy cream until stiff peaks form (be careful not to overbeat, or cream will be grainy). In another bowl, whisk together mascarpone and confectioners' sugar until smooth. Gently fold whipped cream into mascarpone mixture until completely incorporated. Use immediately.

****If you can't find mascarpone you can use cream cheese as the substitute

****The chocolate chips are optional. You can garnish them w/ chocolate shavings if you want.


TIRAMISU CUPCAKES USING A YELLOW CAKE MIX.

Check the cake mix box for ingredients and instructions to make the cupcakes.
I used the same recipe for both the Espresso Syrup and the Mascarpone Frosting.


Friday, October 8, 2010

SWEET AND SOUR PORK

There are a slew of sweet and sour recipes, some are what i call "fusion" otherwise coined as "Americanized Version" or not so authentic anymore which i don't mind.

Every asian country has their own version, my recipe is my take on this dish, lets say my Filipino version. But there is one common procedure or method that Asians do the same in making this dish, pour the sauce right before or few minutes before serving.

I'm not a food court hater but i find their sweet and sour dish disgusting! The battered chicken/pork are soaked in the sauce w/c defeats the purpose of frying them. The battered fried meat turns mushy and gooey, not appetizing at all!

Anyways, give this method a try and you'll see the big difference. Also, i went fancy schmancy w/ my vegetables, you really don't have to! I used some cutters to make it look pretty. This is how my mother prepared her sweet and sour  may it be pork, chicken, seafoods or fish escabeche, green onion florets, butterfly or flower shaped carrots, sweet onions and peppers.

PORK AND VEGETABLE INGREDIENTS:

2 lbs.  pork loin or porkbelly sans the skin ( a little of fat marbling is best for this dish)
1/2 C soy sauce
2 medium carrots
2 sweet bell peppers ( i recommend different colors)
3 stalks of green onions or leeks
2 cloves garlic minced
3 stalks of celery
1 big sweet onions
1 cup pineapple tidbits (optional)

Cut your washed pork loin into cubes (bite size), then marinate w/ soy sauce. Set it aside.

Cut your vegetables into thin slices and use a decorative cutter. There is actually no specific cut to the vegetables, be creative or julienne them.


BATTER INGREDIENTS:

1/2  C cornstarch
1/2 C flour
1 C water (add more if needed)
Pinch of salt and pepper
Canola oil for frying

Mix all ingredients, go easy w/ water then add more if necessary. Batter should have a pancake consistency. I want them crispy that's why i don't put eggs on my batter.
Place the marinated pork pieces into the batter and mix, making sure all pork are well coated. In a deep skillet, add in the cooking oil enough for deep-frying. Once the oil is hot, deep fry the pork pieces in batches until they turn golden brown and cooked.

Drain to eliminate grease and set aside.

SWEET AND SOUR SAUCE INGREDIENTS:

1 Bottle Jufran ketchup (This is a Filipino catsup but you can use regular ketchup)
4 c H20
1 1/2 c sugar
1/4 c soy sauce
1/2 c vinegar
1/2 c chili sauce
1/2 c cornstarch
1/4 c water to be mixed with the cornstarch to make a slurry.

Mix the first 6 ingredients in a pot, then bring it to a boil , add cornstarch slurry slowly to thicken. Refrigerate left over sauce, it has a long shelf life.  You can use it again or  as egg roll sauce.

ASSEMBLY TIME:

Arrange your cooked crispy pork on a plate. Mix veggies and some of the sauce, then pour on top of the pork. Add sauce if you want. Best served w/ steamed white rice.


Friday, October 1, 2010

GIRL AND THE GOAT - CHICAGO FOODVENTURE

I highly recommend when you are in Chicago, Girl and The Goat - Executive Chef, Stephanie Izard "Top Chef" season 4 winner.

It’s ABC – Amazing, Bold and Complex!!! That’s how I would describe Girl and the Goat. It was well worth it.

We had an early reservation but arrived 30 minutes early just to peruse the restaurant. I already liked the restaurant from the façade, the open kitchen and the lengthy bar and the warm welcome we received from the staff. Oh and we enjoyed reading the “goat messages” on the back of the staff’s uniform. Patrick our wait staff was friendly and very knowledgeable about the menu. The menu were divided into three sections, vegetables, fish and meat. We decided to order one from each section. One from each would suffice since each serving is meant to be shared.


We started with bread fresh from the oven. Nutty Apple Smack, it was crusty on the outside and moist in the inside, w/ apple butter sauce and lemon mayo cream. It was delicious!!!


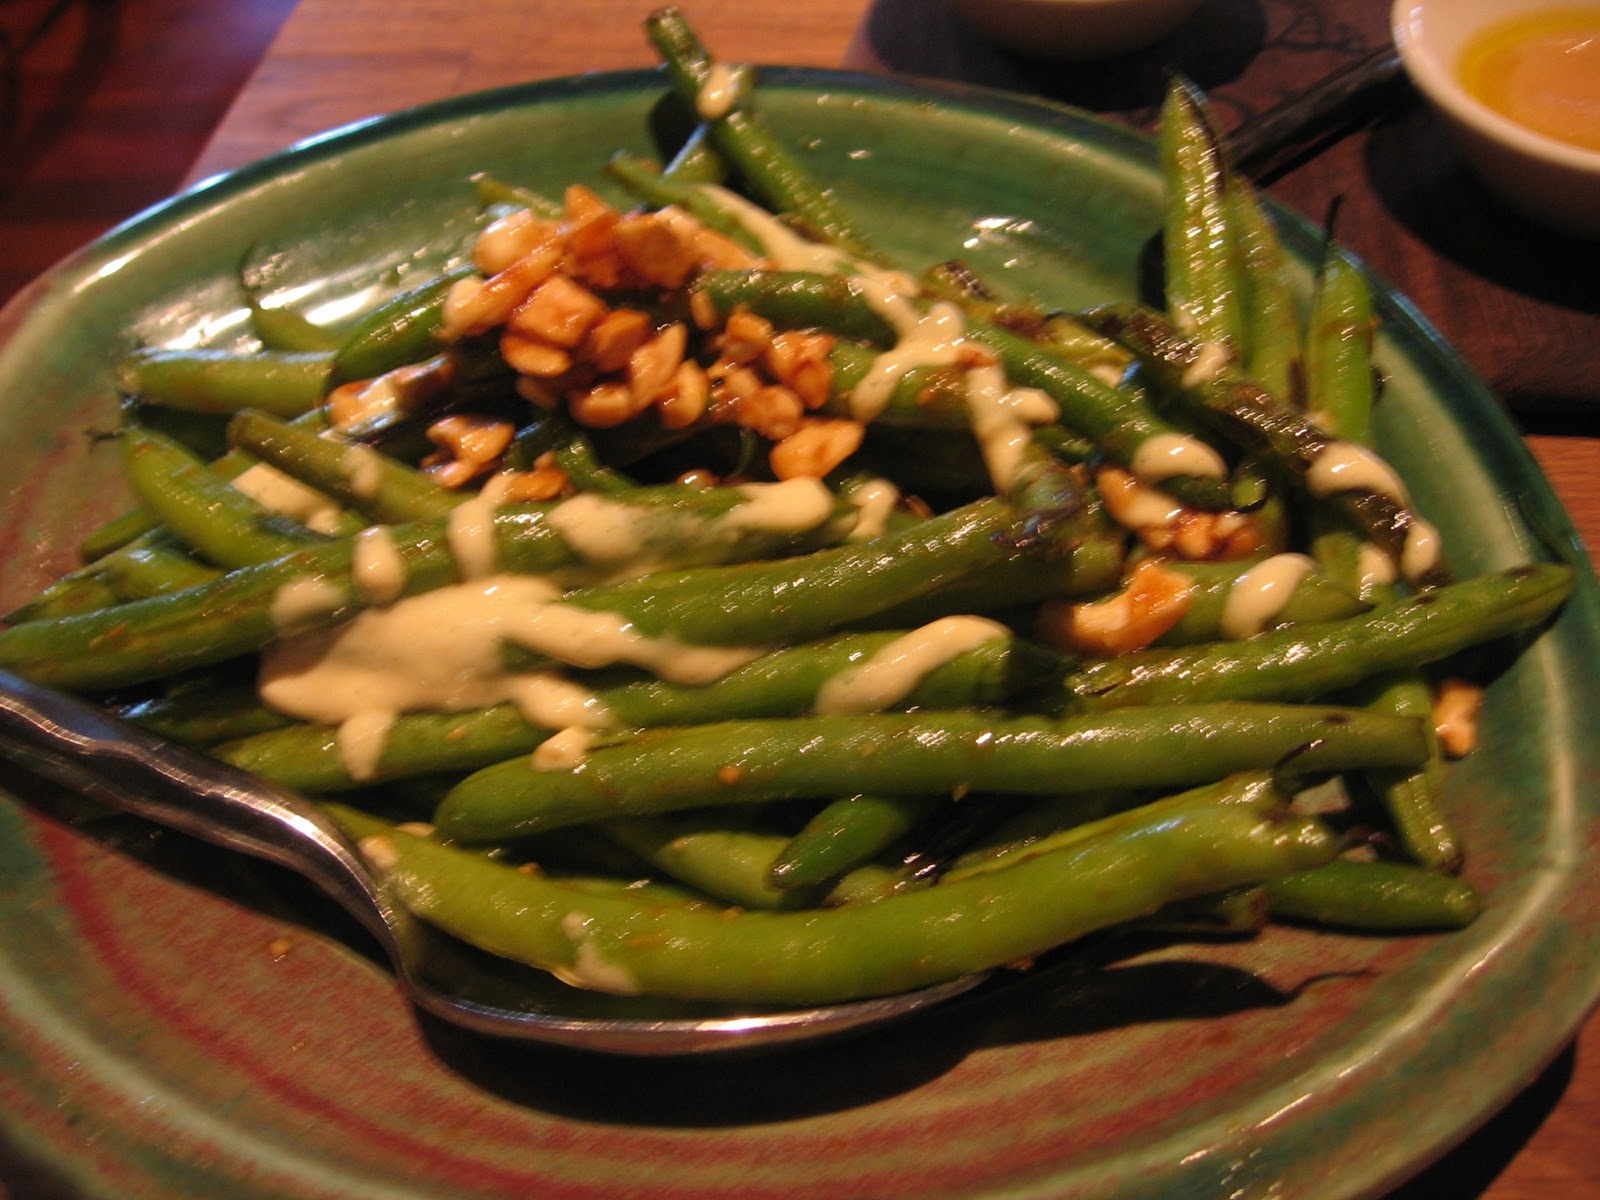
Our first course, Patrick’s recommendation, the sautéed green beans with fish sauce vinaigrette and cashews. I’m not a fan of green beans but this was amazing. The green beans and the vinaigrette were a perfect combination. Thank you Patrick…we enjoyed this dish.


Next course was my daughter’s choice, grilled baby octopus with guanciale, lemon-pistachio vinaigrette cooked with fava beans and colored waxed beans. This was another winner!!


And the piece de resistance……. Wood oven roasted pig face! (WARNING: NOT FOR THE FAINT OF HEART). This was served roulade /disc style with cilantro tamarind sauce, potato sticks and topped with a sunny side up egg. I love this dish, it reminds me of a Filipino dish- sisig. Although, I would like to have some pickled vegetables on the side to balance the texture and rich flavor of the pig and the egg.


By this time you would think we were already stuffed, wrong, we made sure we still had room for the whimsical desserts! My daughter and I ordered two kinds of dessert. First, the corn nougat served on a mason jar. It was fun digging through the jar trying to decipher what was in it. The corn nougat had layers of sweet corn ice cream, apricot plum jam and sprinkled with bacon goodness.


The second dessert, we had the goat cheese bavaroise, served in a crock. The amalgamation of the blueberries, the cake and the brown sugar were ridiculously delicious.


Now that’s a dessert!!!


Now it was time for the bill, not bad, it was reasonable considering how many items we had ordered. Price ranged from $6 to $18.


Kudos to Chef Stephanie, her kitchen staff and the wait staff. It was worth the hype. We will definitely be back and hopefully will get to meet Chef Stephanie next time.

So, now you know why it’s ABC. The food were amazing, they were bold and complex which we loved.

Wednesday, August 11, 2010

PORTOKALOPITA ( GREEK ORANGE PIE)

First tried this pie at work. My supervisor brought the pie, she told us to try her portokalopita and we all said porto!!! what??? the word just rolled off  her tongue of course because she's Greek, easy for her to say=;). Don't you dare ask me to pronounce this pie in Greek, because it'll sound different ha!ha!ha! all i can say is de-lish, that i can say with ease!

It sounds good to me and it sure tasted good! I thought it will entail a lot of ingredients and complicated steps but much to my surprise it's a straight forward recipe.  A very forgiving recipe, there is no way you'll mess this up!

The other reason why i like this pie? it calls for a dried up phyllo dough which means i can now save and put those extra phyllo dough to use! I usually throw away dried, excess phyllo dough because i thought they can't be used. This recipe will not require you to handle those phyllo dough with "TLC" just like you would in baklava.

Plus you can make your fresh orange juice to go with this dessert, you will have to read and check the recipe so you will know what i mean.


Okay, i can't resist! I have to make it complicated but this step is optional. Not only will this candied orange zest make your pie more appetizing, it'll add another layer of texture and flavor to the pie.


In a pot, combine 1/2 C of water, 1/2 of sugar and zest of 3 or 4 oranges (depending on the size) then bring to a simmer. Cook until the zest becomes translucent and tender.


INGREDIENTS: ( i tweaked the recipe, my additions/adjustments will be in red)
SYRUP:
(This is too much, i didn't use the entire syrup, i don't want to make my pie too soggy, so i suggest to pour half of the syrup first and then you decide whether you want to add more or not.)

2 C sugar

3 C water

1 T honey

Zest of 1 orange, stripped

1. In a saucepan over medium-high heat combine the water, sugar, honey and orange zest.

2. Bring to a boil and cook for about 10 - 15 minutes. Set aside and let it cool.


Meanwhile, preheat the oven to 375 degrees. Lightly grease a baking dish. Unroll the phyllo dough, cut or tear into pieces and leave it uncovered to dry.


FILLING:


10 sheets phyllo

1/3 C sugar

2 T baking powder (1 1/2 T baking powder)

1/3 C olive oil (Canola Oil)

1 t vanilla extract

2 t orange blossom water
1 1/4 C Greek yogurt

4 eggs

Zest of 1 orange, finely grated (i used a zester)

1. In a large bowl whisk the eggs.

2. Add the oil, orange blossom water, sugar, vanilla, orange zest, yogurt and baking powder and whisk well.

3. Pour the mixture into the baking dish then toss in the torn pieces of phyllo pushing some pieces down to coat.

4. Bake the pie until set and golden on top, about 30 minutes.

5. Remove from oven, poke holes around and pour half of  the cooled syrup (add more if needed).

6. Set the portokalopita aside and let cool before serving.


So, now you know why you can fix yourself a freshly squeezed orange juice? I actually call this a frugal dessert as well.  You get to use left over phyllo dough and you only use the zest of the oranges hence the fresh squeezed orange juice.

Saturday, August 7, 2010

NIRA ITAME (STIR FRY CHIVES)

Nira or Chinese Chives could be purchased at most Asian produce markets. Stronger in flavor than regular chives, Nira is available in four major varieties: dark green (known as Green Nira or Garlic Chives), pale yellow (known as Yellow Nira, Yellow Chive or Chive Shoot), a round-stemmed chive topped by a pointed flower bud (known as gau choy fa) and a distinctly flavored chive with a similar appearance (known as gau choy sum.) Popular for use in soups, stir fry and salads, Nira Grass can be used like an onion. The slender shoots can be snipped and added to sandwiches and spreads or used as a garnish on vegetables.


Ingredients:

1 lb shrimp (cleaned and deveined)

2 tablespoons oil

2 cloves garlic- minced

2 pieces green onions minced

1 tablespoon soy sauce (kikkoman)

1/8 teaspoon white pepper

1 tablespoon rice wine

1 bunch of Nira cut 1 to 2 inches

1 dash sesame oil for garnish


Heat a wok and saute 1 tablespoon of the oil, the garlic.
Add the onions, soy sauce, pepper, rice wine and the nira.

Stir until nira turns dark green and tender.

Stir in the shrimps and cook until shrimp turns pink.

Taste and adjust the seasonings if needed.

Garnish with a dash of sesame seeds

Serve with steamed rice.