Saturday, August 15, 2009

GRILLED PIZZA

I'm loving the weather, yay i have the reason to grill again. This time we had grilled pizza. I made Enrichin's (Lenny) here
pizza dough from his cook book "Enrichin' Your Kitchen"..:Chapter "Traditional Family Specialties"

Basic Pizza Dough

INGREDIENTS :
3 -3 ½ cups flour
1 pkg. Dry Active Yeast
1 cup lukewarm water
1 pinch of sugar
1 tsp salt

DIRECTIONS:
1.Warm a medium mixing bowl by swirling hot water in it. Drain.

2.Place yeast in the bowl, pour on warm water.

3.Stir in sugar, mix with fork and allow to stand 5 to 10 minutes until the yeast has dissolved and starts to form.

4.Use a wooden spoon to mix the salt and 1/3 the flour, stirring with the spoon until the dough forms a mass and begins to pull away from the sides of the bowl.

5.Sprinkle some of the flour onto a smooth work surface. I usually use a wooden board.

6.Remove dough from bowl and begin to knead it working in the remaining flour a little at a time. Knead for about 10 minutes. By the end the dough should be elastic and smooth. Form into a ball. Lightly oil a mixing bowl and place dough in the bowl.

7.Cover with a moisten clean dish towel, set it in a warm place until the dough doubles in size.

8.This take about 45 minutes to an hour. To test if the dough is ready poke two fingers into the dough.

9.If indentions remain, the dough is ready. You will need to work the dough one more time. Knead for 1 to 2 minutes to release the air.

****If a pizza dough is not available, you can substitute it w/ tortilla , lavash, flatbread or pita bread. These are the crust i used before. I suggest a thin crust would be best for grilling, it's quick and crispy.

1. Brush one side with olive oil and grill that side for few minutes.


2. Assemble your toppings on the grilled side. So the uncooked one will be on the bottom when you place the crust back to the grill. I used Italian hot sausage. Remove the casings, and cook the sausage first before the assembly. I used mozarella and provolone for the cheese. Close the grill and cook for about 10 minutes or until the cheese melts.


Until the gas ran out so i had to finish the last pizza in the oven but overall the pizza was good!!!.


This was the pizza that had to be cooked in the oven.


GIVE THIS A TRY, AND TELL ME W/C WOULD YOU PREFER, GRILLED PIZZA OR THE BAKED PIZZA.

ENJOY!!!!

SOUTHERN BUTTERMILK FRIED CHICKEN AND CORN WAFFLES


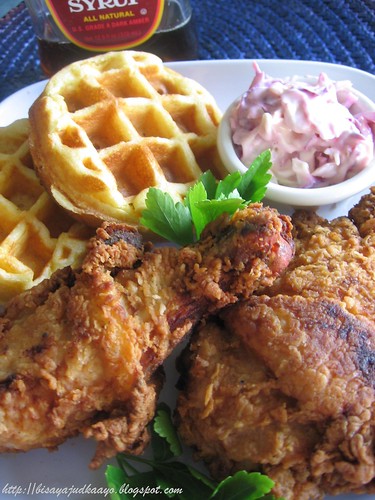
Southern Fried Chicken with Waffles

I love crispy fried chicken especially when the chicken pieces are marinated with buttermilk for hours. It stays moist and flavorful. For my marinade, i mix buttermilk (enough to cover the chicken pieces) Lawry's seasoned salt, freshly ground pepper and powdered garlic. Marinate in the ref for at least 3 hours.

On a ziploc bag, put enough flour, salt and pepper to coat the marinated chicken pieces. Shake and make sure all chicken pieces are well coated w/ flour mixture.

Fry in batches until crispy. Set aside.

As for my coleslaw, shred red and green cabbage, mayonnaise, lemon juice, salt and pepper to taste, sugar and Ceasars Salad dressing if available.

And obviously the CornWaffle i made it from scratch=:) , i scratched open a box of Jiffy Corn Muffin Mix (ha!ha!) and used the recipe provided.

Sunday, August 9, 2009

CRISPY MUSHROOMS AND JALAPENOS

Easy Peasy Appetizer II

Ingredients:
Button mushrooms
Jalapeno (top part of the stuffed jalapeno)
Panko bread crumbs
Italian breadcrumbs (seasoned)
Ranch dressing
eggs
flour

1. Prepare the breading station.
1st bowl- flour seasoned w/ S&P
2nd bowl - 2 eggs beaten w/ little milk or water
3rd bowl - combination of panko and Italian breadcrumbs

2. Deep mushrooms and jalapeno into the breading station from 1st to 3rd bowl.

3. Deep fry. Drain oil.

4. Serve w/ ranch or any other dipping/dressing sauce you want.


ENJOY!!!!

STUFFED JALAPENOS

Easy Peasy appetizer!

Ingredients:
Jalapenos
bacon
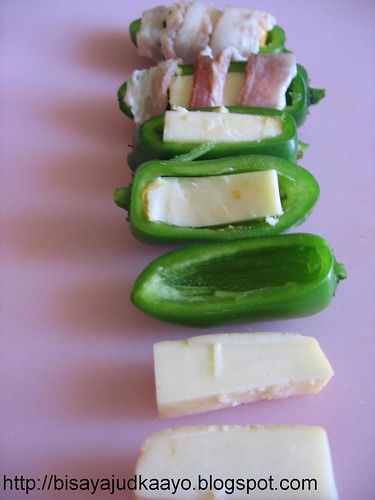
cheese ( i used muenster cheese)

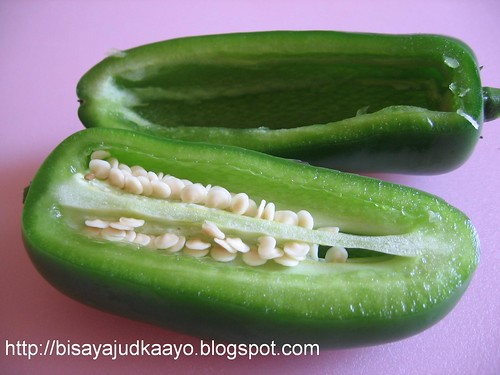
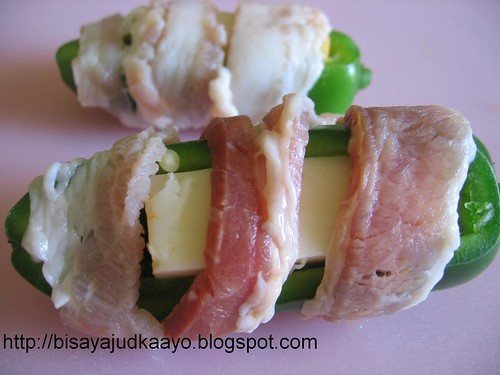
Cut the top part of the jalapeno (save them for another appetizer) then take out seeds.


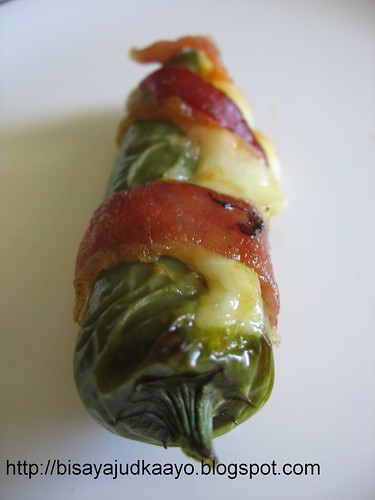
Cut cheese enough to fit inside the peppers. Cut bacon lenghtwise then wrap the stuffed jalapeno securing both ends of bacon w/ toothpick to prevent shrinkage.


Bake at 375 degrees F for 35-40 minutes or until bacon is cooked.


ENJOY!!!!

Wednesday, August 5, 2009

Rice with mushrooms, seafood and artichokes (1st DC Challenge)

The count down is over, i can finally blog my first Daring Cooks Challenge. Thank you very much Robert . . An Alaskan Cook's Exploration of Food and Technique for inviting me to join this wonderful group. It's been few weeks since i joined The Daring Kitchen and I'm loving it already. I can't wait for next months challenge!

This month's (August) host is Olga Olga's Recipes . Olga chose a Spanish recipe by José Andrés, Jose Made In Spain "Rice with mushrooms, cuttlefish and artichokes". Thanks for the recipe, this is a delicious dish, definitely a keeper.

I love the sofrito and intend to use them w/ other recipes, i'm thinking using them w/ pasta and seafoods..will see. As for the allioli, i opted for the traditional recipe and it came out really good. The Allioli really complimented the dish but must be used sparingly, learned it after putting a lot on my first serving.


Some of the ingredients
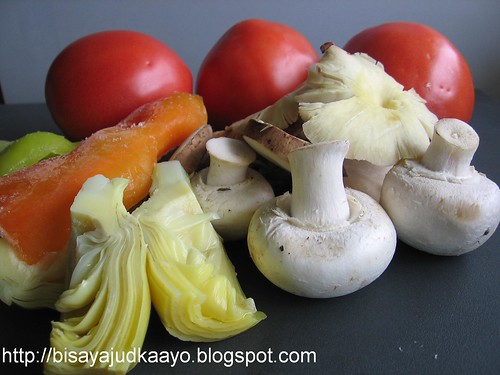


I did some substitutions on my version of the dish.
1. I used mixed seafoods.
2. I used shrimp stock.
3. I added colored bell peppers.
4. I used mixed mushrooms.
5. For the sofrito, i sauteed my garlic and onions first then pureed them, i'll specify the changes in red.

Cooking time: 45 minutes
Ingredients (serves 4):

•4 Artichokes (you can use jarred or freezed if fresh are not available) Used the brined artichokes and added more veggies- tricolored bell peppers.
•12 Mushrooms (button or Portobello) I used mixed mushrooms.
•1 or 2 Bay leaves (optional but highly recommended)
•1 glass of white wine Used St. Julian White Wine-Michigan Wine

•2 Cuttlefish (you can use freezed cuttlefish or squid if you don’t find it fresh) I used mixed seafoods coz i had them in the freezer.
•“Sofregit” (see recipe below)
•300 gr (2 cups) Short grain rice (Spanish types Calasparra or Montsant are preferred, but you can choose any other short grain. This kind of rice absorbs flavor very well) – about 75 gr per person ( ½ cup per person) Please read this for more info on suitable rices. I used Nishiki (Sushi Rice)
•Water or Fish Stock (use 1 ½ cup of liquid per ½ cup of rice) I have lots of shrimp stock
•Saffron threads (if you can’t find it or afford to buy it, you can substitute it for turmeric or yellow coloring powder) Used Saffron
•Allioli (olive oil and garlic sauce, similar to mayonnaise sauce) - optional It's a must in my opinion.

I SKIPPED SOME OF THE STEPS SINCE I USED SEAFOOD MIX IN LIEU OF CUTTLEFISH AND BRINED ARTICHOKES.

Directions:
1.Cut the cuttlefish in little strips.
2.Add 1 or 2 tablespoon of olive oil in a frying pan and put the cuttlefish in the pan.
3.Cut artichokes in eights.
4.Clean the mushrooms and cut them in fourths.
5.Add a bay leaf to the cuttlefish and add also the artichokes and the mushrooms.
6.Sauté until we get a golden color in the artichokes.
7.Put a touch of white wine so all the solids in the bottom of the get mixed, getting a more flavorful dish.
8.Add a couple or three tablespoons of sofregit and mix to make sure everything gets impregnated with the sofregit.
9.Add all the liquid and bring it to boil.
10.Add all the rice. Let boil for about 5 minutes in heavy heat. FOR THIS STEP IT'LL DEPEND ON WHAT KIND OF RICE YOU ARE USING.
11.Add some saffron thread to enrich the dish with its flavor and color. Stir a little bit so the rice and the other ingredients get the entire flavor. If you’re using turmeric or yellow coloring, use only 1/4 teaspoon.
12.Turn to low heat and boil for another 8 minutes (or until rice is a little softer than “al dente”)
13.Put the pan away from heat and let the rice stand a couple of minutes.


The Dish in the making
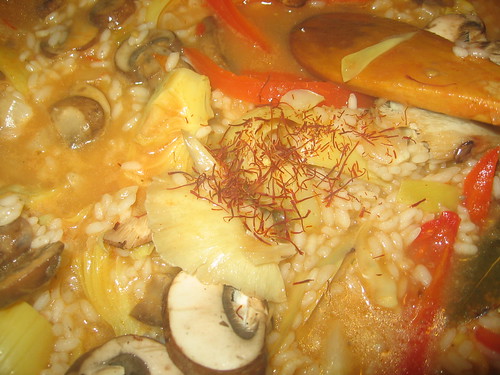


Sofrito (pureed)
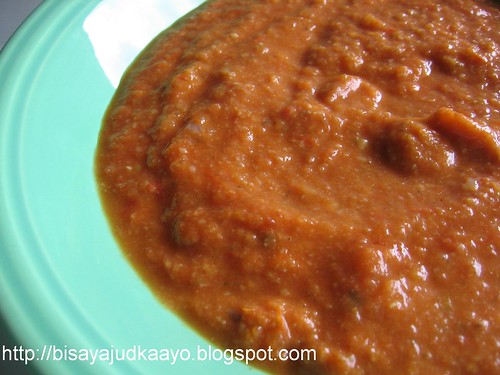


Sofregit (a well cooked and fragrant sauce made of olive oil, tomatoes, garlic and onions, and may at times
different vegetables such as peppers or mushrooms)-

Cooking time: aprox. 1 hour
Ingredients:

•2 tablespoons of olive oil
•5 big red ripe tomatoes, chopped
•2 small onions, chopped
•1 green pepper, chopped (optional)
•4 or 5 garlic cloves, chopped
•1 cup of button or Portobello mushrooms, chopped (optional)
•1 Bay leaf
•Salt
•Touch of ground cumin
•Touch of dried oregano
Directions:

1.Put all the ingredients together in a frying pan and sauté slowly until all vegetables are soft. I SAUTEED THE GARLIC AND ONIONS FIRST THEN ADDED THE REST OF THE VEGGIES
2.Taste and salt if necessary (maybe it’s not!)

3. PUREED THE SOFRITO, I PREFER MINE SAUCY


Allioli


Allioli is the optional part of the recipe. AS I MENTIONED EARLIER, IT'S A MUST. You must choose one of the two recipes given, even though I highly recommend you to try traditional one. Allioli is served together with the rice and it gives a very nice taste

Allioli (Traditional recipe) I MADE THIS
Cooking time: 20 min aprox.
Ingredients:

•4 garlic cloves, peeled USED MORE
•Pinch of salt
•Fresh lemon juice (some drops)
•Extra-virgin olive oil (Spanish preferred but not essential)
Directions:

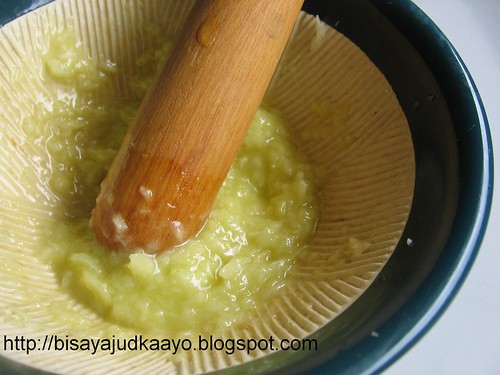
1.Place the garlic in a mortar along with the salt.
2.Using a pestle, smash the garlic cloves to a smooth paste. (The salt stops the garlic from slipping at the bottom of the mortar as you pound it down.)
3.Add the lemon juice to the garlic.
4.Drop by drop; pour the olive oil into the mortar slowly as you continue to crush the paste with your pestle.
5.Keep turning your pestle in a slow, continuous circular motion in the mortar. The drip needs to be slow and steady. Make sure the paste soaks up the olive oil as you go.
6.Keep adding the oil, drop by drop, until you have the consistency of a very thick mayonnaise. If your allioli gets too dense, add water to thin it out. This takes time—around 20 minutes of slow motion around the mortar—to create a dense, rich sauce.
José's tips for traditional recipe: It's hard to think that, when you start crushing the garlic, it will ever turn into something as dense and smooth as allioli. But don't give up. It's worth the extra time and effort to see the oil and garlic come together before your eyes. Just make sure you're adding the olive oil slowly, drop by drop. Keep moving the pestle around the mortar in a circular motion and keep dreaming of the thick, creamy sauce at the end of it all.

Allioli a la moderna (Modern recipe)
Cooking time: 3-4 minutes
Ingredients:

•1 small egg
•1 cup extra-virgin olive oil (as above, Spanish oil is highly recommended)
•1 garlic clove, peeled
•1 Tbs. Spanish Sherry vinegar or lemon juice (if Sherry vinegar is not available, use can use cider or white vinegar)
•Salt to taste
Directions:

1.Break the egg into a mixing bowl.
2.Add 2 tablespoons of the olive oil and the garlic cloves, along with the vinegar or lemon juice.
3.Using a hand blender, start mixing at high speed until the garlic is fully pureed into a loose paste.
4.Little by little, add what's left of the olive oil as you continue blending.
5.If the mixture appears too thick as you begin pouring the oil, add 1 teaspoon of water to loosen the sauce.
6.Continue adding the oil and blending until you have a rich, creamy allioli.
7.The sauce will be a lovely yellow color.
8.Add salt to taste.
José's tips for modern recipe:
(1) If you do not have access to a hand blender, you can use a hand mixer (the kind with the two beaters) or a food processor. If you use a food processor, you must double the recipe or the amount will be too little for the blades to catch and emulsify.
(2) What happens if the oil and egg separate? Don't throw it out. You can do two things. One is to whisk it and use it as a side sauce for a fish or vegetable. But if you want to rescue the allioli, take 1 tablespoon of lukewarm water in another beaker and start adding to the mix little by little. Blend it again until you create the creamy sauce you wanted.

Olga’s Tips:
1) When cooking the alternative style you can change the cuttlefish or squid for diced potato.

2) If you can’t find cuttlefish or squid, or you’re not able to eat them because of allergies, you can try to substitute them for chicken or vegetables at your choice.
3) Sofregit can be done in advance. You can keep it in the fridge or even freeze it.

4) To tone down the taste when you do it by hand in a mortar, then add an egg yolk. If you want to tone it down in the alternative way use milk or soy milk. Anyway, the best alternative way is the original oil and garlic alone.

5) Allioli must be consumed during the preparation day and preserved in the fridge before using it.

FINAL DISH..IT'S A MUST TRY!


ENJOY!!! AND SEE YOU NEXT MONTH!

NY STRIP STEAK W/ COFFEE RUB AND HASSELBACK POTATO

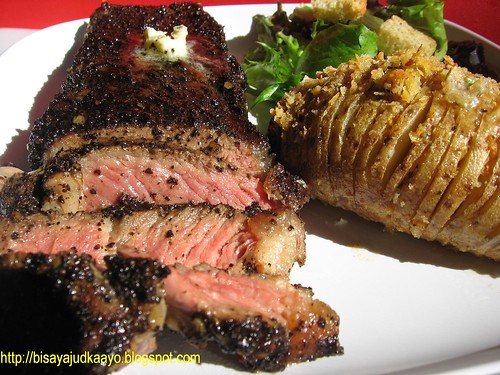
I have been intrigued w/ coffee rub for the longest time but didn't have the chance to make them until now. Since this was new to us, we might or might not like it..i tried it w/ one steak, and the rest of the steak i made them my usual way w/ S&P, little garlic and onion powder. I am not a fan of masking/ putting too much to your steak. I love to savor the real steak flavor. For the sidedish, i made hasselback potato and served some mesclun salad.

The steak w/ coffee rub got mixed review, 2 to 1. My daughter said it was okay but she'd rather have her coffee as a beverage and an ingredient to a dessert. As for me, i like the combination of the coffee and the pepper, surprisingly delish and i'd like to try this w/ chicken or pork.


So, for those who have tried making this what did you think? and for those who haven't...give this a try. Like i said i like it.


COFFEE RUB: GROUND COFFEE BEANS (I USED FRENCH ROAST), KOSHER SALT, FRESH GROUND BLACK PEPPER, BROWN SUGAR.

BRING YOUR STEAK TO ROOM TEMPERATURE BEFORE YOU COOK THEM. PAT DRY THE STEAK AND COAT ALL SIDES W/ THE DRY RUB.


PAN SEAR THE MEAT TO FORM A GOOD CRUST ABOUT 2-3 MINUTES ON EACH SIDE. TRANSFER TO THE OVEN (375 DEGREES F) AND CONTINUE COOKING FOR ANOTHER 5 MINUTES OR DEPENDING ON YOUR DESIRED DONENESS. LET THE MEAT REST FOR 5 MORE MINUTES BEFORE SLICING OR DEVOURING. I TOPPED THE STEAK W/ A SLICE OF COMPOUND BUTTER (CHIVES AND PARSLEY)


HASSELBACK POTATO

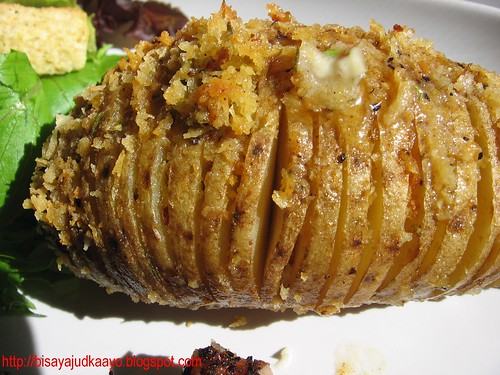
CUT ONE SIDE OF THE POTATO TO MAKE IT STAND. PLACE 2 CHOPSTICKS ON EACH SIDE OF THE POTATO. THINLY SLICE POTATO CROSSWISE. THE CHOPSTICKS WILL PREVENT THE KNIFE TO CUT THROUGH THE POTATO.


THERE ARE A LOT OF VARIATIONS ON WHAT TO COAT THE POTATOES. MY VERSION IS A COMBINATION/MIXTURE OF FLOUR, PANKO BREADCRUMBS (MY FAVORITE), PAPRIKA, SALT AND PEPPER, GARLIC AND ONION POWDER.

COAT THE POTATO W/ OLIVE OIL, THEN THE DRY MIXTURE. GINGERLY PUT SOME OF THE MIXTURE IN BETWEEN THE SLICES.

ARRANGE POTATOES IN A BAKING DISH; COVER W/ FOIL AND BAKE FOR 30 MINUTES. REMOVE THE FOIL AND BAKE FOR ANOTHER 15 MINUTES TO MAKE IT CRISPY.

I TOPPED THE POTATO W/ COMPOUND BUTTER (CHIVES, PARSLEY). THIS WAS CRISPY AND MOIST IN THE INSIDE! YUMMY! AND NICE PRESENTATION OFCOURSE.


THE ENTIRE MEAL!!!!

COFFEE RUBBED NY STRIP STEAK WITH HASSELBACK POTATO AND MESCLUN SALAD
IT WAS SURPRISINGLY DELICIOUS!!
ENJOY!!!!

Saturday, August 1, 2009

TRES LECHES CUPCAKE

So, i guess there was a time that i really tried to bake...another cake that i've blogged March 18,2008 at my myspace blog.

Again this is semi-homemade.

1. Follow instructions from the White Cake Mix box. But in lieu of the water i used evaporated milk.

2. Mixed 1/2 cup of each condensed milk and regular milk. Set it aside.

3. Cool the cupcakes and poke the cakes. I used icepick. Then pour the mixed milk into the poked cupcakes.

4. The toppings is a store bought Vanilla Frostings. i just added little milk to soften it and to make it easy to pour on top of each cup cake.

Wow! I thought tres leches was complicated to make. It was easy and delish. Well, at least my version.

Photobucket

VERY BERRY SWIRL CAKE

My friends knows that i'm bake challenged but i've been trying my very best to overcome them. This is another proof that i've been tryin' this is another cake that i need to make again.

Blogged at myspace March 18, 2008

STRAWBERRY SWIRL CAKE (The Original Recipe)

From: Kraft Family and Food Magazine

Prep: 35 min.
Total 1 hr. 35 min. (include. Cooling)

1 pkg. white cake mix

1 pkg. Strawberry flavor Gelatin

2/3 cup Sour Cream

2/3 cup powdered sugar

1 tub Whipped topping thawed

1 ½ cups sliced strawberries


1.Preheat oven to 350 degrees F. Grease 2 (8 or 9 inch) round cake pans; set aside. Prepare cake batter as directed on package. Pour half of the batter into medium bowl. Add dry gelatin mix; stir until well blended.

2.Spoon half of the white batter and half of the pink batter, side by side, into each prepared pan.

3.Swirl batters together lightly, using a teaspoon. Bake 30 min. Cool 30 min, in pans. Remove to wire racks.

4.Mix sour cream and powdered sugar in a medium bowl until well blended. Gently stir in whipped topping.

5.Place one of the cake layers on serving plate; spread to with 1 cup of the whipped topping mixture. Top with 1 cup of the strawberries.

6.Top with remaining cake layer. Spread top and side of cake with remaining whipped topping mixture. Top with remaining ½ cup strawberries just before serving.


(My version) VERY BERRY SWIRL CAKE

Instead of strawberry flavor gelatin, I used frozen raspberry, black and blue berries. Cooked them w/ sugar, added some water and let it simmer until they thickened. Strained it to get a smooth sauce.

For the whipped toppings i used Cool whipped vanilla toppings. Instead of spreading the whipped toppings in the middle with fresh strawberries, I used strawberry jams.

So I had enough of the whipped toppings to cover the entire cake. Did some piping’s to cover the imperfections.


Photobucket


Photobucket

DEATH BY CHOCOLATE

I've blogged this at my myspace blog, thought i'd blog and share this recipe here in my blogspot. Also, i think it's about time for me to do this cake again!

Blogged April 12, 2008

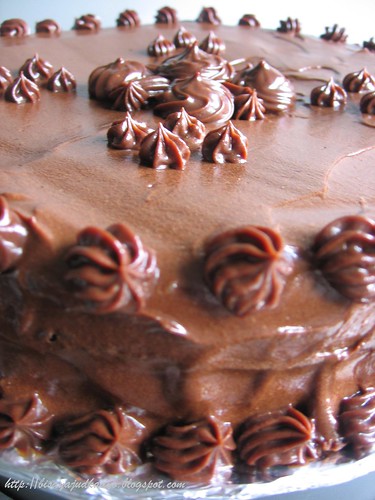
As i mentioned before i bake my cakes from scratch, " I scratch and open a box of cake mix". But this time, i did it really from scratch, no cake mix box. I have had the craving for this and now it's fixed. If you like chocolate, i suggest you make this. The recipe is perfect, the only thing that i'd adjust the next time i'll make this, is to make more frostings and be generous w/ the frosting in the middle part. This cake is to die for (no pun intented). It's even better the next day, but i microwaved mine for few seconds just because i want my chocolate cake a bit warm and served it w/ strawberry ice cream on the side......yummmmy. And i'm not a cake decorator, so i did the best i could to cover the imperfectons.
I got the original recipe from CacaoWeb Chocolate and Cocao. But did some adjustments. The original called for 50 minutes to bake but i know every oven has different temp and i know in my oven it'll only need 30 to 35 min. to bake.

Y: 12 servings


Ingredients:


8 oz dark semi sweet chocolate

2/3 cup unsalted butter

1 cup sugar

4 large eggs

4 tablespoons all purpose flour

4 tablespoons unsweetened cocoa powder

1 ½ teaspoon baking powder

1 teaspoon vanilla extract

4 tablespoons sour cream


Ingredients for frosting:


2/3 cup heavy whipping cream

9 oz semisweet dark chocolate


Method:

1.Preheat oven to 350 degrees F.
2.Melt chocolate with butter over a Bain Marie (hot water bath). Set aside.
3.Beat the eggs with sugar, mix with flour, cocoa powder, baking powder and vanilla extract.
4.Slowly fold in the chocolate mixture and the sour cream.
5.Divide into two greased round cake pan.
6.Bake until springy and toothpick inserted in the center comes out clean, approximately 30 minutes.
7.Allow the cake to cool, then remove from the pan.


Frosting/Ganache:

1.Heat 2/3 cup of heavy whipping cream in a sauce pan.
2.Remove from heat, add 9 oz of the dark semi sweet chocolate (finely chopped if not using morsels), stir until the chocolate is completely melted and smooth. Let it cool until firm.
3.Use 1/3 of the frosting between the two layers and the remaining on top and around the cake.
4.Refrigerate briefly to set the frosting before serving.

death by chocolate

Did my best to cover up the mess

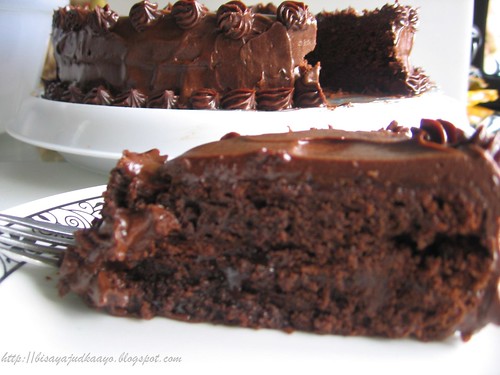
Want a slice of the cake???? then bake this to have your slice
A slice of death by chocolate

ENJOY!!!!!!!!

Tuesday, July 28, 2009

STUFFED PATTYPAN aka FLYING SAUCER SQUASH

A year ago, i found this cute "alien" looking vegetable at the farmers market it's commonly known as pattypan squash. Last week at the farmers market i saw abundance of these veggie and this time they are bigger. I bought enough for 2 kinds of recipe. I'll be making stir fry and the the stuffed pattypan, thanks to Red it was easy to pull out the blog i made for Stuffed PattyPan Squash. STUFFED PATTYPAN aka FLYING SAUCER SQUASH

I made the recipe with some tweaking (improvements). The recipe/dish is already delish but i added some ingredients to kick it up another notch.

Ingedients:
Pattypan Squash (bought 3 different colors)
Hot Italian Sausage
Pancetta
Hot Sopressata
garlic (chopped)
onions (chopped)
parsley (chopped)
Muenster cheese (shredded)
Italian Tomato sauce (sauce made by my boss=;))

Procedure:
1. Wash and core the squash (set them aside).

2. Cook pancetta and sopressata w/ little oil until crispy. Set aside. Crumble or chop the cooled pancetta and sopressata.

3. Remove sausage from the casing. Using the same pan, saute garlic and onions then stir in the crumbled italian sausage, stir until cooked.

4. Season w/ S&P. Set aside and let cool. Add chopped parsley when it's cool. These will be the filling.

5. In the meantime cook the Italian Tomato sauce
a. Saute garlic, onion and add S&P, some dried rosemary, dried oregano and dried parsley, then add a can of tomato sauce. Bring to a boil.
b. Add a little of tomato juice to make the sauce a bit sweet. If you don't have tomato juice just add sugar and make sure to taste the sauce then make necessary adjustments.

6. From here, it'll be assembly time.

7. Spread some sauce on the bottom of the casserole dish.

8. Arrange the cored pattypan squash in the casserole dish. Stuff each squash w/ cheese then the filling and a little of the sauce. Repeat process to all the cored squash.

9. Cover the casserole w/ foil and bake in a preheated oven at 375 degrees F for about 30- 35 minutes or until squash is tender. Poke w/ a paring knife to check doneness.

10. Add the crispy pancetta and sopressata on top of the stuffed pattypan then sprinkle w/ little shredded cheese.

11. Bake again uncovered for few more minutes or just enough to brown the cheese.

12. Serve hot w/ the Italian Tomato Sauce.

Once again...it was so delish. The addition of the Italian Tomato Sauce made this dish really really delicious. You've got to try this dish. You don't have to use Pattypan squash for this, yellow or green squash or zucchini will be perfect as well!


ENJOY!!! !

Sunday, July 19, 2009

SALMON BOZUSHI

This is it, our final Japanese dish showcasing shiso leaves. Again, Debbie, Domo Arigato for the inspiration. Obviously sashimi grade salmon was used for this dish.
Just for a brief fyi: http://www.thenibble.com/REVIEWS/MAIN/fish/seafood/sushi-glossary.asp#b

BOZUSHI ("STICK"/ROD SUSHI)
Bosushi is pressed into a long, candy bar-type shape and then cut up into bite-size pieces.

SUSHI means
Su: Rice vinegar. Part of the derivation of the word, sushi. Rice is shi in Japanese.

W/c means sushi doesn't necessarily mean raw fish on rice. You can be as creative as you want. You can make vegan sushi as well.


This is my sushi recipe. There are a lot of variations/versions of sushi rice so make what ever you think will best suit you.

Ingredients
4 cups sushi rice (I use Nishiki brand)
1 cup rice wine vinegar
1/4 cup mirin


Directions
1. Wash rice at least 2 times or until water is clear. Every rice calls for different rice and water ratio so follow the measurements/ instructions of the brand of rice you bought.

2. Cook rice in rice cooker. I highly recommend a rice cooker. If you don't have a rice cooker, cook rice in a pot.

3. Fold in vinegar and mirin with the hot rice, add enough so that the rice has a tart/sweet taste. Rice should be shiny, not mushy. Carefully clean inside rim of bowl with damp cloth, cover and let rest for 30 minutes.

At this stage you'll be making a salmon bozushi:

Note: I spread a little of Japanese spicy mayo. (Store bought) before adding the shiso leaves.

4. Slice the salmon thin, lengthwise.

5. Put a 1/2 cup of rice at the center of a large piece of clear wrap then start spreading and pressing the rice until it forms into a stick/rod and firm enough to keep its shape. Optional: spread spicy mayo.


5. Spread your shiso leaves across the top of your shaped sushi. I used at least 3 shiso leaves here. It'll depend on the size of your leaves.

6. Over the shiso leaves, arrange the salmon, overlapping each slices slightly, just so no rice will be exposed.

7.Then wrap the stick/rod firmly in the clear wrap.

8. Cut in bite sizes and serve w/ soy sauce and wasabi.


Sashimi Grade Salmon

Shiso Leaf


Bozushi in the wrapped stage


Cut Bozushi into bite sizes and top w/ fish roe (optional)


Kanpai!


Really, really delicious!