Saturday, August 1, 2009

TRES LECHES CUPCAKE

So, i guess there was a time that i really tried to bake...another cake that i've blogged March 18,2008 at my myspace blog.

Again this is semi-homemade.

1. Follow instructions from the White Cake Mix box. But in lieu of the water i used evaporated milk.

2. Mixed 1/2 cup of each condensed milk and regular milk. Set it aside.

3. Cool the cupcakes and poke the cakes. I used icepick. Then pour the mixed milk into the poked cupcakes.

4. The toppings is a store bought Vanilla Frostings. i just added little milk to soften it and to make it easy to pour on top of each cup cake.

Wow! I thought tres leches was complicated to make. It was easy and delish. Well, at least my version.

Photobucket

VERY BERRY SWIRL CAKE

My friends knows that i'm bake challenged but i've been trying my very best to overcome them. This is another proof that i've been tryin' this is another cake that i need to make again.

Blogged at myspace March 18, 2008

STRAWBERRY SWIRL CAKE (The Original Recipe)

From: Kraft Family and Food Magazine

Prep: 35 min.
Total 1 hr. 35 min. (include. Cooling)

1 pkg. white cake mix

1 pkg. Strawberry flavor Gelatin

2/3 cup Sour Cream

2/3 cup powdered sugar

1 tub Whipped topping thawed

1 ½ cups sliced strawberries


1.Preheat oven to 350 degrees F. Grease 2 (8 or 9 inch) round cake pans; set aside. Prepare cake batter as directed on package. Pour half of the batter into medium bowl. Add dry gelatin mix; stir until well blended.

2.Spoon half of the white batter and half of the pink batter, side by side, into each prepared pan.

3.Swirl batters together lightly, using a teaspoon. Bake 30 min. Cool 30 min, in pans. Remove to wire racks.

4.Mix sour cream and powdered sugar in a medium bowl until well blended. Gently stir in whipped topping.

5.Place one of the cake layers on serving plate; spread to with 1 cup of the whipped topping mixture. Top with 1 cup of the strawberries.

6.Top with remaining cake layer. Spread top and side of cake with remaining whipped topping mixture. Top with remaining ½ cup strawberries just before serving.


(My version) VERY BERRY SWIRL CAKE

Instead of strawberry flavor gelatin, I used frozen raspberry, black and blue berries. Cooked them w/ sugar, added some water and let it simmer until they thickened. Strained it to get a smooth sauce.

For the whipped toppings i used Cool whipped vanilla toppings. Instead of spreading the whipped toppings in the middle with fresh strawberries, I used strawberry jams.

So I had enough of the whipped toppings to cover the entire cake. Did some piping’s to cover the imperfections.


Photobucket


Photobucket

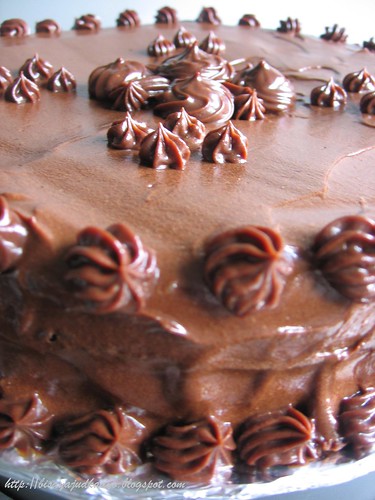
DEATH BY CHOCOLATE

I've blogged this at my myspace blog, thought i'd blog and share this recipe here in my blogspot. Also, i think it's about time for me to do this cake again!

Blogged April 12, 2008

As i mentioned before i bake my cakes from scratch, " I scratch and open a box of cake mix". But this time, i did it really from scratch, no cake mix box. I have had the craving for this and now it's fixed. If you like chocolate, i suggest you make this. The recipe is perfect, the only thing that i'd adjust the next time i'll make this, is to make more frostings and be generous w/ the frosting in the middle part. This cake is to die for (no pun intented). It's even better the next day, but i microwaved mine for few seconds just because i want my chocolate cake a bit warm and served it w/ strawberry ice cream on the side......yummmmy. And i'm not a cake decorator, so i did the best i could to cover the imperfectons.
I got the original recipe from CacaoWeb Chocolate and Cocao. But did some adjustments. The original called for 50 minutes to bake but i know every oven has different temp and i know in my oven it'll only need 30 to 35 min. to bake.

Y: 12 servings


Ingredients:


8 oz dark semi sweet chocolate

2/3 cup unsalted butter

1 cup sugar

4 large eggs

4 tablespoons all purpose flour

4 tablespoons unsweetened cocoa powder

1 ½ teaspoon baking powder

1 teaspoon vanilla extract

4 tablespoons sour cream


Ingredients for frosting:


2/3 cup heavy whipping cream

9 oz semisweet dark chocolate


Method:

1.Preheat oven to 350 degrees F.
2.Melt chocolate with butter over a Bain Marie (hot water bath). Set aside.
3.Beat the eggs with sugar, mix with flour, cocoa powder, baking powder and vanilla extract.
4.Slowly fold in the chocolate mixture and the sour cream.
5.Divide into two greased round cake pan.
6.Bake until springy and toothpick inserted in the center comes out clean, approximately 30 minutes.
7.Allow the cake to cool, then remove from the pan.


Frosting/Ganache:

1.Heat 2/3 cup of heavy whipping cream in a sauce pan.
2.Remove from heat, add 9 oz of the dark semi sweet chocolate (finely chopped if not using morsels), stir until the chocolate is completely melted and smooth. Let it cool until firm.
3.Use 1/3 of the frosting between the two layers and the remaining on top and around the cake.
4.Refrigerate briefly to set the frosting before serving.

death by chocolate

Did my best to cover up the mess

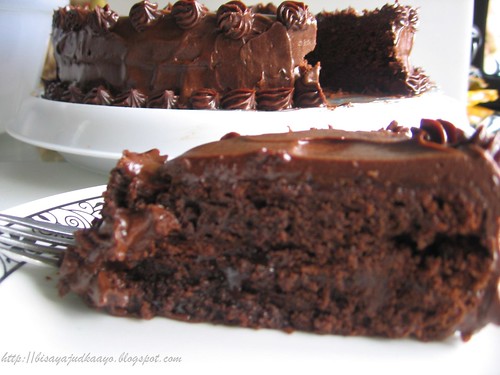
Want a slice of the cake???? then bake this to have your slice
A slice of death by chocolate

ENJOY!!!!!!!!

Tuesday, July 28, 2009

STUFFED PATTYPAN aka FLYING SAUCER SQUASH

A year ago, i found this cute "alien" looking vegetable at the farmers market it's commonly known as pattypan squash. Last week at the farmers market i saw abundance of these veggie and this time they are bigger. I bought enough for 2 kinds of recipe. I'll be making stir fry and the the stuffed pattypan, thanks to Red it was easy to pull out the blog i made for Stuffed PattyPan Squash. STUFFED PATTYPAN aka FLYING SAUCER SQUASH

I made the recipe with some tweaking (improvements). The recipe/dish is already delish but i added some ingredients to kick it up another notch.

Ingedients:
Pattypan Squash (bought 3 different colors)
Hot Italian Sausage
Pancetta
Hot Sopressata
garlic (chopped)
onions (chopped)
parsley (chopped)
Muenster cheese (shredded)
Italian Tomato sauce (sauce made by my boss=;))

Procedure:
1. Wash and core the squash (set them aside).

2. Cook pancetta and sopressata w/ little oil until crispy. Set aside. Crumble or chop the cooled pancetta and sopressata.

3. Remove sausage from the casing. Using the same pan, saute garlic and onions then stir in the crumbled italian sausage, stir until cooked.

4. Season w/ S&P. Set aside and let cool. Add chopped parsley when it's cool. These will be the filling.

5. In the meantime cook the Italian Tomato sauce
a. Saute garlic, onion and add S&P, some dried rosemary, dried oregano and dried parsley, then add a can of tomato sauce. Bring to a boil.
b. Add a little of tomato juice to make the sauce a bit sweet. If you don't have tomato juice just add sugar and make sure to taste the sauce then make necessary adjustments.

6. From here, it'll be assembly time.

7. Spread some sauce on the bottom of the casserole dish.

8. Arrange the cored pattypan squash in the casserole dish. Stuff each squash w/ cheese then the filling and a little of the sauce. Repeat process to all the cored squash.

9. Cover the casserole w/ foil and bake in a preheated oven at 375 degrees F for about 30- 35 minutes or until squash is tender. Poke w/ a paring knife to check doneness.

10. Add the crispy pancetta and sopressata on top of the stuffed pattypan then sprinkle w/ little shredded cheese.

11. Bake again uncovered for few more minutes or just enough to brown the cheese.

12. Serve hot w/ the Italian Tomato Sauce.

Once again...it was so delish. The addition of the Italian Tomato Sauce made this dish really really delicious. You've got to try this dish. You don't have to use Pattypan squash for this, yellow or green squash or zucchini will be perfect as well!


ENJOY!!! !

Sunday, July 19, 2009

SALMON BOZUSHI

This is it, our final Japanese dish showcasing shiso leaves. Again, Debbie, Domo Arigato for the inspiration. Obviously sashimi grade salmon was used for this dish.
Just for a brief fyi: http://www.thenibble.com/REVIEWS/MAIN/fish/seafood/sushi-glossary.asp#b

BOZUSHI ("STICK"/ROD SUSHI)
Bosushi is pressed into a long, candy bar-type shape and then cut up into bite-size pieces.

SUSHI means
Su: Rice vinegar. Part of the derivation of the word, sushi. Rice is shi in Japanese.

W/c means sushi doesn't necessarily mean raw fish on rice. You can be as creative as you want. You can make vegan sushi as well.


This is my sushi recipe. There are a lot of variations/versions of sushi rice so make what ever you think will best suit you.

Ingredients
4 cups sushi rice (I use Nishiki brand)
1 cup rice wine vinegar
1/4 cup mirin


Directions
1. Wash rice at least 2 times or until water is clear. Every rice calls for different rice and water ratio so follow the measurements/ instructions of the brand of rice you bought.

2. Cook rice in rice cooker. I highly recommend a rice cooker. If you don't have a rice cooker, cook rice in a pot.

3. Fold in vinegar and mirin with the hot rice, add enough so that the rice has a tart/sweet taste. Rice should be shiny, not mushy. Carefully clean inside rim of bowl with damp cloth, cover and let rest for 30 minutes.

At this stage you'll be making a salmon bozushi:

Note: I spread a little of Japanese spicy mayo. (Store bought) before adding the shiso leaves.

4. Slice the salmon thin, lengthwise.

5. Put a 1/2 cup of rice at the center of a large piece of clear wrap then start spreading and pressing the rice until it forms into a stick/rod and firm enough to keep its shape. Optional: spread spicy mayo.


5. Spread your shiso leaves across the top of your shaped sushi. I used at least 3 shiso leaves here. It'll depend on the size of your leaves.

6. Over the shiso leaves, arrange the salmon, overlapping each slices slightly, just so no rice will be exposed.

7.Then wrap the stick/rod firmly in the clear wrap.

8. Cut in bite sizes and serve w/ soy sauce and wasabi.


Sashimi Grade Salmon

Shiso Leaf


Bozushi in the wrapped stage


Cut Bozushi into bite sizes and top w/ fish roe (optional)


Kanpai!


Really, really delicious!

Friday, July 17, 2009

SALMON KELP ROLL

Another recipe from "Nobu Now" cookbook. Yes, it's another roll! check Here for the explaination if you don't already know why i've been making Japanese fares and why. This was one of our Sunday menu.

SALMON KELP ROLL
Recipe from Nobu Now Cookbook P. 36

Serves :2
½ sheet Shiroita Konbu kelp ( 5x8 inch) *
2 ounces boneless skinless salmon fillet
2 large shiso leaves
1 garlic clove, cut into 6 thin slices
1 stick yamagobo root, rolled and cut into slices about ½ inch thick.
½ ounce scallions chopped
daikon for garnish *2 T ponzu
1 head of an edible flower *

AMA-ZU (SWEET VINEGAR)
2 T rice vinegar
6 T granulated sugar
2 ½ t sea salt
PONZU
4 T soy sauce
8 T rice vinegar
2 T lemon juice
¾ inch square piece of konbu

1. Make the ama-zu by putting all the ingredients in a pan and warming through gently until the sugar dissolves. *
2. Prepare the kelp: heat the ama-zu in a pan until it is just about to boil (it should not reach boiling point), then add the kelp. Simmer gently for 1 minute, remove the pan from the heat and leave it to cool at room temperature. *3. Peel off the skin of the salmon and cut the flesh into 6 thin slices about 1/8 inch thick.

4. Drain the kelp well and spread it out on a sheet of plastic wrap.* Place 4 salmon slices side by side and then the other slices across them side by side.

5. Over the salmon slices, arrange the 2 large shiso leaves, the slices of garlic, yamagobo and scallions. Roll up the kelp tightly into a cylinder.

6. Cut the roll across into 6 pieces and arrange them on a serving dish with daikon garnish in the middle. Pour some ponzu around the pieces and place the flower on the daikon.

Ponzu sauce – are available at Japanese/Asian markets.

yamagobo root - pickled burdock

Shiroita Kelp is the ingredient i had to substitute. Noble Fish didn't have this kind of kelp so i opted to buy Soy Wrap w/c to me is the closest to the kelp and i get to try something new as well.

***I skipped some steps since i didn't have the kelp.


This is like a very thin crepe. It comes w/ 5 different flavors.

Sashimi/Sushi Grade fish should be used for this particular dish.
Salmon


Shiso Leaves


Yamagobo (Picled Burdock)


Place salmon slices side by side. Over the salmon slices, arrange 2 shiso leaves, slices of garlic, yamagobo and scallions (i used chives). Roll up tightly into a cylinder.


Cut into pieces and arrange them on serving dish w/ some garnish. Daikon should have been a garnish for this but forgot to buy one so i garnished it w/ my cherry tomato. Pour some ponzu.


It was okay but will not be doing this again. I didn't like the pickled burdock (yamagobo). But the soy wrap, i will definitely be using them again great alternative for nori wrap. (Wink, Wink to Tina)


Thursday, July 16, 2009

PAM'S SUSHI AND "SPIDER" TEMPURA

This is a continuation to the previous blog SHRIMP ROLL (SHRIMP OR PRAWN, SHITAKE MUSHROOMS, SHISO LEAVES
Part II of the Saturday dinner

These "Spider" Tempura was an after thought side dish. If you know me, you'll be surprised if i told you that i threw away the shrimp heads and shells. Nope, i made shrimp stock out of the shrimp shells including the heads. But this time i made some tempura using the heads aka "Spider" coz that's what they call it. Well, i'm sure you guys know why, i just don't want to elaborate and explain further!
I make my own batter, it's a combination of flour and cornstarch, water and S&P. I mixed them until i achieve a pancake consistency. Deep the shrimp heads into the batter then deep fry.

Pam made her special sushi. She made 2 kinds, one vegetarian and one w/ egg omelet

INGREDIENTS:
Nishiki rice
Mirin
Rice Wine Vinegar
Soy Sauce (Kikkoman)


Wasabe
Cucumber (julienne)
Carrots (julienne)
Avocado (julienne)
Japanese Spicy Mayo
Fish Roe (optional)
Egg Omelet
Nori (Seaweeds)

Pam's Sushi with eggs


Pam's version of California Roll sans the crab


It was a wonderful meal!!!


Wednesday, July 15, 2009

SHRIMP ROLL (SHRIMP OR PRAWN, SHITAKE MUSHROOMS, SHISO LEAVES)

I bought a new cookbook "Nobu Now" as a birthday gift to myself. As I peruse through the recipes, I see some familiar ingredients while some; I haven’t the slightest clue what those ingredients are. Some I’ve seen and heard but never ventured on using them nor tasted them.

Call it coincidence, Debbie, posted a blog on shiso leaves Cold-Smoked Herring Bouzushi (rod sushi)
and remembered Nobu had shiso on at least 6 of his recipes. I’ve seen shiso leaf graced my plate at fancy shmancy Japanese restaurant but thought it was just a garnish so I set it aside. Ever since Debbie posted her blog w/ shiso and Nobu had these in his recipes, I decided to give shiso a try.
I listed all the Japanese ingredients that I need for the recipes I planned on making and went to Noble Fish, a Japanese mini grocery store near my place. I got almost all the ingredients except for two. They didn’t have the Shiroita Kelp for the Salmon Kelp roll. I saw this colorful soy wrap and decided to use it instead of the kelp and pate’ brisque obviously I can’t buy them there but me being me I thought of experimenting, and used rice paper w/c I have in my pantry. I know, I know…I should have used egg roll wrapper or phyllo dough to substitute the pate’ brisque but hey, like I said I wanted to experiment and see if I could fry those rice papers.

Menu for that weekend were Shrimp Roll and Pam’s sushi for Saturday. Salmon Kelp Roll and a Debbie inspired shiso wrapped sushi for Sunday. Over all it was a success except for a few ingredients that I will not use on my next try.


I will be blogging all recipes separately so comeback and read all my new Japanese dishes. Okay?


Recipe from Nobu Now Cookbook p.57
Serves: 1
1 tiger prawn or large size shrimp
½ shitake mushroom
1 large shiso leaf
1 endive (chicory) leaf
1/ sheet pate brique or egg roll
a little yuzu kosho
2 T Maui Onion salsa
1 t caviar or fish roe (i used red onions)
cilantro


MAUI ONION SALSA

1 3/4 ounces finally chopped Maui Onion (i used red onions)
1 3/4 ounces finely chopped tomato
3 T Ponzu
1 t orange juice (i added the zest)
1/2 t hot chili sauce
Mix all the ingredients together.

1. Remove the shell, head and tail of the shrimp. Cut into the back of the shrimp with a knife, devein and slice through the meat lengthwise.

2. Cut the mushroom into ¼ inch slices. Cut the shiso leaf in half and the endive leaf into four.
3. Place on the sheet of pate brique the halved shrimp pieces, alternating the heads and tails. Put the shitake pieces on top and sprinkle w/ the yuzu ppper. Spread the halved shiso leaves over them and fold each side of the pastry over the filling, then roll up away from you.

4. Heat the oil for deep frying to a temperature of 355 degrees F. Deep fry the roll until golden brown. Drain.

5. Spoon the onion salsa into a cocktail glass and place in it the endive leaf and then fried roll. Top with the caviar or fish roe and cilantro.

Nobu’s note:
Eat the first bite of the roll with the caviar/roe and then the second bite onwards with the salsa.

Shiso Leaf – There are both red and green shiso leaves. The red ones (akaijiso) are mainly used to color umeboshi and other pickles. The green leaves (aojiso) have many uses as a herb, tempura and garnish. Although it is called perilla or beefsteak plant in English, shiso is actually a member of the mint family. Shiso buds are also used as a condiment, garnish and, when very young, for tempura.

PONZU- a citrus and soy sauce dip

Yuzu Kosho – Available from Japanese markets, this commercial seasoning comprises green chili, yuzu rind and salt.

Yuzu – Japanese citron- is zestier than lemons and not as sweet. Yuzu also has a very potent fragrance. It is used for both its acidic juice and its aromatic rind. Yuzu juice is now available from Asian supermarkets.


Ponzu

Yuzo Kosho - green chili, Yuzu rind and salt.
Yuzu - Japanese Citron is zestier than lemons and not as sweet.


Shiso leaves. I'm glad i could buy this at the Japanese store nearby. Something new that we like.


Shiso leaves - They are both red and green. The green (aojiso) have many uses as a herb, tempura and garnish. Is also called perilla or beefsteak plant in English. Shiso is actually a member of the mint family. Shiso buds are also used as a condiment, garnish and when very young, for tempura.


Assemble shrimp in the middle lower part of the sheet. Arrange shiso leaves, mushrooms on top of the shrimps then spread a little of the yuzo kosho. Then fold and roll.


Folding and rolling is so simple.


Shrimp and Shitake Mushroom Rolls in a row


A knock off plating from Nobu Now. Original plating had caviar instead of fish roe.


Shrimp roll w/ Onion Salsa, Shitake Mushrooms, Fish Roe and Endives. The combination of all the ingredients were perfect.
We love, love these rolls but will not use the rice paper again for frying. It's crispy when you serve them right away but became soggy after few minutes. I would suggest to use thin egg roll wrapper or phyllo dough if you can't find pate' brisque.


Will definitely make this again! Yum!


Wednesday, July 8, 2009

FRIED PORKBELLY (PRITONG LIEMPO)

This is a continuation to the previous blog i posted (Fish and Shrimp Sinigang). Fried porkbelly was the side dish for the sinigang so i figured, i should blog the porkbelly too!

As i mentioned my sister from TN gave me a year supply of the porkbelly =;). They buy their pork meat at an abattoir near their cabin. I should blog that site as well, i'm sure all my foodie friends will be jealous ha!

This dish again is so Filipino, but this time not from the Visayas (Cebu) region. I have blogged the Cebuano style before check them at my archives under Filipino dishes or Pork..(Pritong Liempo- Cebuano Style) .http://bisayajudkaayo.blogspot.com/2008/12/pritong-liempo-adobo-cebuano-style.html

This time this is more of the Luzon(Laguna) region style of cooking.

So simple measurements aren't necessary. All you need aside from the porkbelly are the following:
Flour or combination of cornstarch and flour
water
S&P
Oil for frying


PorkBelly sliced thin. You can either cook them as is or cut them 1" size.

Season the pork belly w/ S&P. Set them aside
Make your batter. You can definitely make your own batter by adding your choice of herbs or spices.
Fry them.

Fried Porkbelly cooked in strips. Served w/ soy sauce and vinegar dip


Fried Porkbelly cut in 1" size


OH SO CRISPY AND DELICIOUS!!!!!